Why Gluten-Free Chickpea Bread Deserves a Place in Your Kitchen
Finding a good gluten-free bread can feel like a never-ending search. Many store-bought loaves are dry, crumbly, and expensive, and many homemade gluten-free recipes require a long list of specialty flours, starches, and binders. This gluten-free chickpea bread takes a very different approach. It uses just one main flour, chickpea flour, along with a handful of simple ingredients you probably already have in your kitchen.
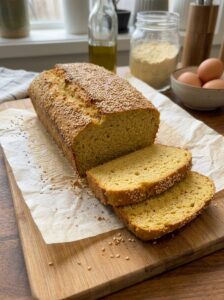
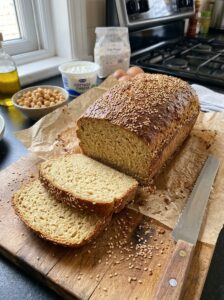
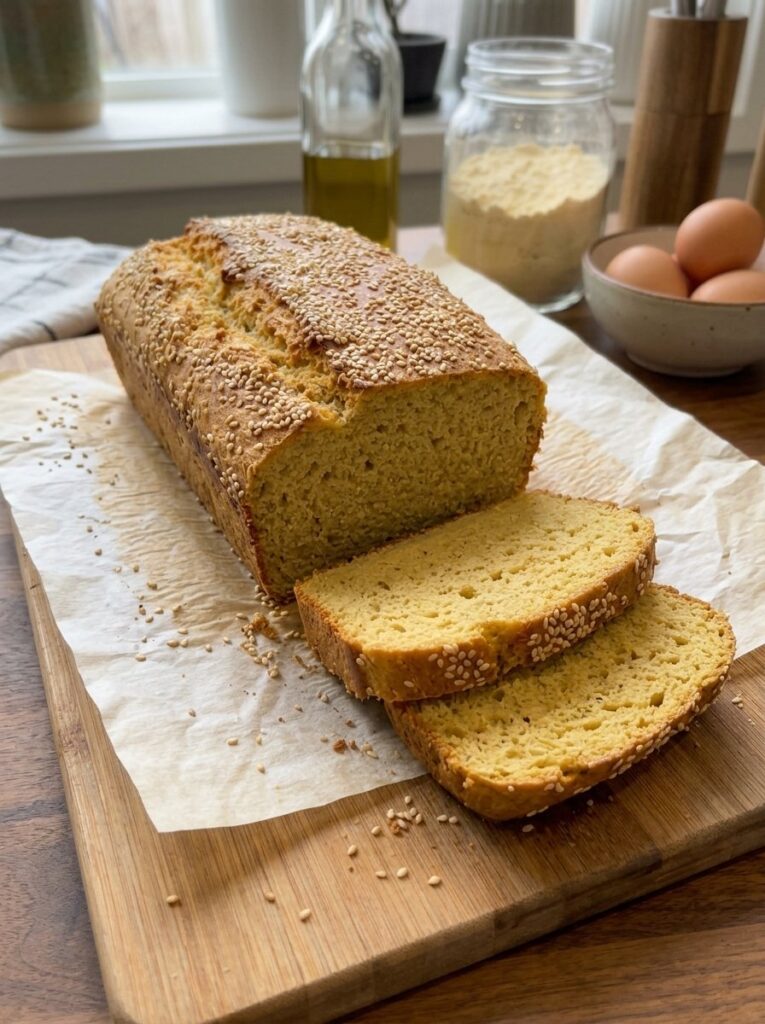
The result is a soft, hearty loaf with a golden crust and a tender, moist crumb. It is mildly savory, slightly nutty, and satisfying in a way that many gluten-free breads are not. It comes together in a single bowl, needs no yeast, no kneading, and no rising time, and bakes in about 40 to 45 minutes.
This bread is a great option for people who avoid gluten, anyone looking to add more plant-based protein and fiber to their diet, and home cooks who want an uncomplicated recipe that works. Because the ingredient list is short, it is also budget friendly and easy to repeat whenever you need a fresh loaf.
In this guide you will find the full recipe, a breakdown of why each ingredient matters, step-by-step instructions with practical tips, flavor variations, serving ideas, storage and freezing advice, and answers to the most common questions about making chickpea flour bread at home.
What Is Chickpea Flour Bread?
Chickpea flour bread is a quick bread made with flour ground from dried chickpeas. Chickpea flour, also known as gram flour, garbanzo bean flour, or besan, is a staple in many cuisines around the world. It is naturally gluten-free, rich in protein and fiber, and has a mild, earthy, nutty flavor.
Because chickpea flour contains no gluten, it does not form the stretchy network that gives wheat bread its chew. Instead, eggs provide structure, baking powder provides lift, and the flour itself creates a soft, dense, slightly custardy crumb. The result is more like a moist, hearty quick bread than a fluffy sandwich loaf, and it is delicious, especially when toasted.
Here is what makes this loaf special:
- Naturally gluten-free. The base ingredient is chickpea flour, with no wheat, barley, or rye in the recipe.
- High in protein and fiber. Chickpea flour and eggs both contribute protein, and chickpeas are a good source of fiber.
- No yeast. Baking powder and apple cider vinegar work together to lift the loaf, so there is no proofing or rising time.
- One-bowl simplicity. You whisk the wet ingredients, stir in the dry ones, and pour the batter into a pan.
- Simple pantry ingredients. There are no specialty gums, starches, or hard-to-find flours.
- Versatile. It works for sandwiches, breakfast toast, snacks, and as a side with soups and salads.
Ingredients for Gluten-Free Chickpea Bread
- 2 cups (240 g) chickpea flour
- 2 eggs
- 1 cup (240 ml) water
- 1/4 cup (60 ml) olive oil
- 2 teaspoons baking powder
- 1 tablespoon apple cider vinegar
- 1/2 teaspoon salt
- 1/2 teaspoon garlic powder (optional)
- 1 tablespoon sesame seeds (optional)
A Closer Look at the Ingredients
Chickpea flour. This is the star of the recipe. Look for finely ground chickpea flour, which is often found in the baking aisle, the natural foods section, or international grocery stores, where it may be labeled besan or gram flour. Measure it carefully. The best method is to weigh it on a kitchen scale, which is why the recipe includes 240 grams. If you measure by cups, spoon the flour lightly into the measuring cup and level it off rather than scooping directly from the bag, which can pack in too much flour and make the loaf dense.
Eggs. Because there is no gluten, eggs are essential for binding and structure. They also add richness, help the loaf set as it bakes, and contribute to the golden color of the crust.
Water. Water hydrates the chickpea flour and creates the batter. Chickpea flour absorbs a good amount of liquid, so the ratio of one cup of water to two cups of flour is important for a moist, tender crumb.
Olive oil. A quarter cup of olive oil adds moisture, softness, and a savory richness that helps balance the earthy flavor of the chickpea flour. It also keeps the bread from drying out. Use a mild, good-tasting olive oil, since you will notice its flavor.
Baking powder. This is the primary leavening agent. Check that your baking powder is fresh. If it is old, your loaf may bake up flat and dense. If you need the bread to be strictly gluten-free, check the label on your baking powder, since some brands may contain additives or be processed in facilities that handle gluten.
Apple cider vinegar. The acid in the vinegar reacts with the baking powder to give the batter extra lift, and it also helps soften the natural beany flavor of the chickpea flour. You will not taste the vinegar in the finished loaf.
Salt. Salt is essential for flavor. Chickpea flour can taste flat and slightly bitter without enough salt, so do not skip it.
Garlic powder (optional). A little garlic powder adds savory warmth that makes the bread especially good for sandwiches and toast with savory toppings.
Sesame seeds (optional). Sprinkled on top, sesame seeds toast in the oven and add a nutty flavor and a pleasing crunch.
Equipment You Will Need
- A standard loaf pan
- Parchment paper
- A large mixing bowl
- A whisk and a spatula
- Measuring cups and spoons, or a kitchen scale
- A wire cooling rack
Parchment paper is highly recommended for this bread. Gluten-free loaves can stick to the pan, and lining it makes it easy to lift the finished loaf out without breaking it.
How to Make Gluten-Free Chickpea Bread
Step 1: Preheat the Oven and Prepare the Pan
Preheat your oven to 375 degrees Fahrenheit (190 degrees Celsius). Line a loaf pan with parchment paper, leaving a little extra paper hanging over the long sides so you can lift the loaf out after baking.
Step 2: Whisk the Wet Ingredients
In a large bowl, whisk together the eggs, water, olive oil, and apple cider vinegar. Whisk until the mixture is well combined and slightly frothy. The eggs should be fully broken up, with no visible streaks of yolk or white.
Step 3: Add the Dry Ingredients
Add the chickpea flour, baking powder, salt, and garlic powder, if using, to the wet mixture. Chickpea flour tends to form lumps, so break up any clumps with your whisk or a fork before mixing, or sift the flour first for an extra smooth batter.
Step 4: Mix and Rest the Batter
Mix until you have a smooth, thick batter with no dry pockets of flour. The batter should be thick but pourable, similar to a thick pancake batter or a loose cake batter. Let the batter rest for 5 minutes. This rest allows the chickpea flour to fully absorb the liquid, which improves texture and helps reduce any raw, beany taste.
Step 5: Fill the Pan
Pour the batter into the prepared loaf pan and smooth the top with a spatula. Tap the pan gently on the counter to release any large air bubbles. Sprinkle sesame seeds evenly over the top, if using.
Step 6: Bake
Bake for 40 to 45 minutes, or until the center is fully cooked and a toothpick inserted into the middle comes out clean. The top should be golden brown and firm to the touch. Because chickpea flour bread can seem done on the outside before the center is fully set, check the middle carefully. If the top is browning too quickly, tent the loaf loosely with foil for the last part of baking.
Step 7: Cool Completely
Let the bread cool completely before removing it from the pan and slicing. This step matters. Chickpea flour bread continues to set as it cools, and cutting into it while warm can make the center seem gummy or cause the slices to crumble. Lift the loaf out using the parchment, place it on a wire rack, and wait until it reaches room temperature. Then slice and enjoy.
Tips for the Best Chickpea Flour Bread
- Weigh your flour if you can. A kitchen scale gives the most consistent results.
- Let the batter rest. The five-minute rest improves texture and softens the raw chickpea flavor.
- Use fresh baking powder. It is the main source of lift, so it must be active.
- Break up lumps. A smooth batter bakes into a more even, tender loaf.
- Do not skip the salt or vinegar. Both help balance the flavor of the chickpea flour.
- Make sure the center is fully baked. Test with a toothpick, and bake a few extra minutes if needed.
- Cool completely before slicing. Patience gives you clean slices and a better texture.
- Toast your slices. Toasting adds crispness and brings out a nuttier, more bread-like flavor.
- Use a serrated knife. A gentle sawing motion keeps slices neat and intact.
Flavor Variations and Add-Ins
The basic recipe is savory and mild, which makes it a great base for creative twists.
Herb loaf. Stir in a tablespoon or two of chopped fresh herbs such as rosemary, thyme, parsley, or chives.
Cheesy chickpea bread. Fold in a quarter cup of shredded cheddar, parmesan, or mozzarella for extra savory flavor.
Seeded bread. Add sunflower seeds, pumpkin seeds, flaxseeds, or poppy seeds to the batter and sprinkle more on top.
Spicy version. Add a pinch of red pepper flakes, smoked paprika, or finely chopped jalapeno.
Everything seasoning. Replace the sesame seeds with everything bagel seasoning for a crunchy, savory top.
Sun-dried tomato and basil. Fold in chopped sun-dried tomatoes and dried basil for an Italian-inspired loaf.
Onion and garlic. Add a little onion powder along with the garlic powder for a more deeply savory flavor.
Cumin and turmeric. Stir in half a teaspoon each of cumin and turmeric for a warm, golden loaf that nods to the traditional uses of chickpea flour.
Olive and rosemary. Add chopped olives and fresh rosemary for a Mediterranean-style bread.
How to Serve Gluten-Free Chickpea Bread
This loaf is flexible enough to serve at any meal.
Toast for breakfast. Toast a slice and top it with avocado, cream cheese, hummus, or a fried egg. Add sliced tomatoes, cucumbers, or fresh herbs for a bright, filling start to the day.
Sandwiches. The sturdy crumb holds up well to fillings. Try it with turkey and greens, chicken salad, roasted vegetables, or tuna salad.
Soup and stew companion. Serve warm slices alongside tomato soup, lentil soup, vegetable soup, or chili for dipping.
Open-faced toasts. Top slices with smashed avocado, ricotta and honey, smoked salmon, roasted peppers, or sliced radishes.
Savory snack. Toast a thin slice and top it with hummus, olives, and a drizzle of olive oil.
Brunch boards. Add slices to a brunch spread with eggs, fruit, cheese, and spreads.
Croutons. Cube the bread, toss with olive oil and seasonings, and toast in the oven until crisp for gluten-free croutons.
Breadcrumbs. Dry out a few slices, then pulse them in a food processor for homemade gluten-free breadcrumbs.
Storage and Freezing
Because this loaf is moist and made with eggs, store it carefully.
- Cool completely first. Storing warm bread causes condensation and makes the loaf soggy.
- Refrigerate. Wrap the cooled loaf tightly, or place slices in an airtight container, and keep it in the refrigerator. For best quality, plan to eat it within about four days.
- Freeze for longer storage. Slice the cooled loaf, separate the slices with parchment paper, and freeze them in a freezer-safe bag or container. Frozen slices keep well for a couple of months.
- Reheat. Toast slices straight from the refrigerator or freezer for the best texture. You can also warm them briefly in a 350 degrees Fahrenheit oven or in a skillet.
- Discard if spoiled. If you see mold, notice an off smell, or the bread develops a slimy texture, throw it away.
These storage times are general guidelines for homemade bread made with eggs. When in doubt, follow safe food handling practices.
Frequently Asked Questions
Is this bread really gluten-free?
The ingredients themselves are naturally gluten-free. Chickpea flour contains no gluten. However, if you have celiac disease or a serious gluten sensitivity, check the labels on your chickpea flour, baking powder, and any add-ins, and look for products labeled gluten-free. Some flours can be cross-contaminated during processing.
Does the bread taste like chickpeas?
It has a mild, earthy, nutty flavor. Resting the batter, adding the vinegar, and using enough salt all help reduce any strong beany taste. Toasting the slices brings out a more savory, bread-like flavor. Garlic powder, herbs, and seeds make it taste even better.
What is the texture like?
The loaf is soft, moist, and slightly dense, with a tender crumb and a golden crust. It is more like a hearty quick bread than a light, airy sandwich bread. It slices well once completely cooled and is excellent toasted.
Can I use besan or gram flour?
Yes. Besan and gram flour are both names for chickpea flour. Gram flour is sometimes made from roasted or different varieties of chickpeas, so flavor can vary slightly. Choose a finely ground version for the smoothest texture.
Can I make this bread without eggs?
Eggs are important for structure in this recipe, so removing them will change the result significantly. If you want to experiment with an egg-free version, you would need a suitable binder, and the loaf may come out denser or more fragile.
Can I use a different vinegar or lemon juice?
Yes. White vinegar or lemon juice can replace the apple cider vinegar in the same amount. The acid works with the baking powder to give lift and soften the chickpea flavor.
Why is my bread gummy in the middle?
Gumminess usually means the loaf was underbaked or sliced while still warm. Make sure a toothpick comes out clean from the center, and let the bread cool completely before cutting. If the top browns too quickly, tent the loaf with foil and keep baking.
Why did my bread turn out dense?
Dense bread can be caused by too much flour, old baking powder, or an overly thick batter. Weigh the flour if possible, use fresh baking powder, and make sure the batter is thick but pourable.
Why does my bread taste bitter or too beany?
Chickpea flour can taste raw or bitter if the batter is not rested or the loaf is underbaked. Let the batter rest for five minutes, add the salt and vinegar as written, and make sure the bread is fully cooked. Some brands of chickpea flour are milder than others, so you may want to try a different brand.
Can I use water alternatives like milk?
Yes. Milk or an unsweetened plant-based milk can replace the water for a slightly richer, softer loaf. Use the same amount.
Can I make this bread dairy-free?
The recipe as written contains no dairy. It uses olive oil and water rather than butter or milk, so it is naturally dairy-free as long as you do not add cheese or dairy-based toppings.
Can I double the recipe?
Yes. Double all the ingredients and use two loaf pans, or a larger pan, and check for doneness with a toothpick. Baking time may increase for a larger loaf.
Can I make muffins or rolls instead?
Yes. Spoon the batter into a lined muffin tin and bake for a shorter time, checking at about 20 to 25 minutes. Muffins are convenient for grab-and-go snacks and lunches.
Can I make this bread sweet?
You can make a lightly sweet version by omitting the garlic powder and adding a little honey or maple syrup, cinnamon, and vanilla. Keep the amounts modest so the batter does not become too wet.
Why Make Your Own Gluten-Free Bread?
Store-bought gluten-free bread is convenient, but baking your own offers real advantages.
- Better freshness and flavor. A freshly baked loaf tastes far better than packaged bread that has been sitting on a shelf.
- Fewer ingredients. You know exactly what is in your bread, with no long list of additives.
- Cost savings. Gluten-free breads can be expensive. This recipe uses affordable pantry ingredients.
- High in protein. Chickpea flour and eggs add more protein than many gluten-free loaves based on starches.
- Easy and fast. There is no yeast, no rising, and no kneading.
- Customizable. You can add herbs, seeds, cheese, or spices to match your taste.
Nutrition Notes
Chickpea flour is a good source of plant-based protein and dietary fiber, and it also provides minerals such as iron and magnesium. Eggs add protein and other nutrients, and olive oil contributes healthy fats. Exact nutrition values will depend on the brands you use and how thickly you slice the loaf. If you have any dietary restrictions, allergies, or health conditions, read ingredient labels carefully and consult a qualified professional when needed.
Final Thoughts: Simple, Hearty, and Naturally Gluten-Free
Gluten-free chickpea bread proves that great homemade bread does not need to be complicated. With a single main flour, a few pantry staples, and one mixing bowl, you can bake a soft, golden loaf that is hearty, protein-rich, and full of flavor.
Make it for breakfast toast, pack it into sandwiches, serve it with soup, or slice and freeze it for busy days. Let the batter rest, bake until the center is fully set, and let the loaf cool completely for the best texture. Then toast a slice, add your favorite toppings, and enjoy.
Whether you are living gluten-free, exploring plant-based protein, or simply looking for an easy no-yeast bread recipe, this chickpea flour loaf is a wonderful place to start. Give it a try, make it your own, and share it with someone who loves simple, wholesome homemade food.
Print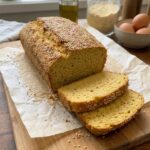
Gluten-Free Chickpea Bread: An Easy, Naturally Gluten-Free Loaf Made with Chickpea Flour
Description
Soft, hearty, and naturally gluten-free! This homemade chickpea bread is packed with flavor and made with simple pantry ingredients. Perfect for sandwiches, breakfast toast, or a healthy snack!
Ingredients
- 2 cups (240 g) chickpea flour
- 2 eggs
- 1 cup (240 ml) water
- 1/4 cup (60 ml) olive oil
- 2 teaspoons baking powder
- 1 tablespoon apple cider vinegar
- 1/2 teaspoon salt
- 1/2 teaspoon garlic powder (optional)
- 1 tablespoon sesame seeds (optional)
Instructions
- Preheat your oven to 375°F (190°C). Line a loaf pan with parchment paper.
- In a large bowl, whisk together the eggs, water, olive oil, and apple cider vinegar.
- Add the chickpea flour, baking powder, salt, and garlic powder.
- Mix until you have a smooth, thick batter. Let it rest for 5 minutes.
- Pour the batter into the prepared loaf pan and sprinkle sesame seeds on top.
- Bake for 40–45 minutes, or until the center is fully cooked and a toothpick comes out clean.
- Let the bread cool completely before removing it from the pan and slicing.