Why You Should Bake Your Own Sandwich Bread
There is something deeply satisfying about slicing into a loaf of bread you made yourself. The crust is golden, the crumb is soft and springy, and the whole kitchen smells warm and comforting. Better still, homemade sandwich bread is much simpler than most people expect. This recipe uses just five everyday ingredients: flour, warm milk, active dry yeast, sugar, and salt. There are no dough conditioners, no preservatives, and no complicated techniques.
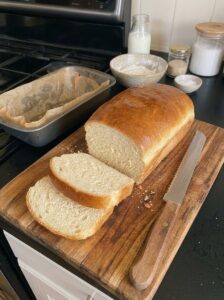
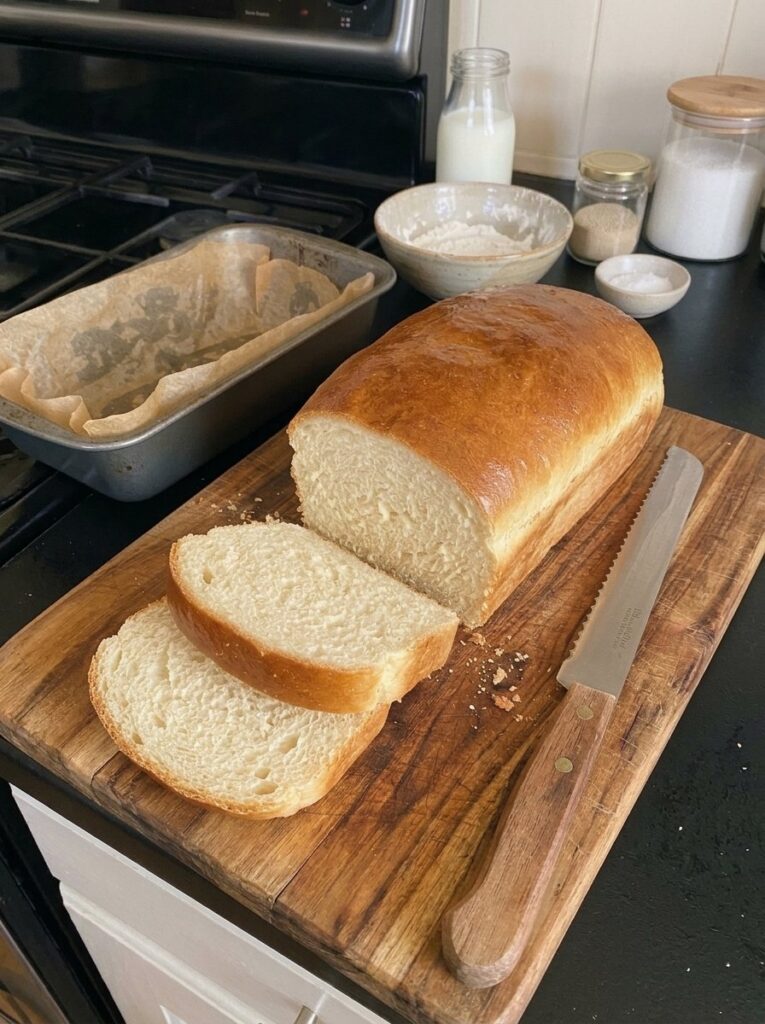
The result is a soft, fluffy loaf with a tender crumb and a lightly golden crust, perfect for sandwiches, toast, French toast, grilled cheese, and simple breakfasts with butter and jam. Because it is made with milk, the bread has a rich flavor and a pillowy texture that stays soft for days. And because you make it yourself, you control what goes in it.
Whether you are a complete beginner who has never touched yeast or a seasoned baker looking for a reliable everyday loaf, this recipe is a great one to keep in your rotation. In this guide you will find the full ingredient list, an explanation of what each ingredient does, detailed step-by-step instructions, tips for the softest possible crumb, troubleshooting help, flavor variations, serving ideas, storage and freezing advice, and answers to the most common bread-baking questions.
What Makes This Sandwich Bread Special?
This loaf is built on simplicity and reliability. Here is why it works so well:
- Only five ingredients. Flour, milk, yeast, sugar, and salt are all you need.
- Soft and fluffy texture. Milk and a small amount of sugar create a tender, slightly sweet crumb that is ideal for sandwiches.
- Beginner friendly. The method is straightforward, with clear visual cues to tell you when each step is done.
- Versatile. It works for sandwiches, toast, croutons, breadcrumbs, bread pudding, and more.
- Budget friendly. A homemade loaf costs far less than a good bakery loaf.
- Fresh flavor. Nothing beats the taste and aroma of bread baked in your own oven.
Ingredients for 5-Ingredient Soft Homemade Sandwich Bread
- 3 cups (375 g) all-purpose flour or bread flour
- 1 cup (240 ml) warm milk
- 2 1/4 teaspoons (7 g) active dry yeast
- 2 tablespoons (25 g) sugar
- 1 teaspoon (6 g) salt
You will also want a little oil, butter, or nonstick spray to grease the bowl and the loaf pan.
What Each Ingredient Does
Flour. Flour provides the structure of the bread. When flour is mixed with liquid and kneaded, the proteins form gluten, which traps the gas produced by the yeast and allows the dough to rise. All-purpose flour gives a soft, tender loaf, while bread flour has a higher protein content and produces a slightly chewier, taller loaf. Either one works well here. For the most accurate results, weigh your flour. If you measure by cups, spoon the flour into the measuring cup and level it off instead of scooping directly from the bag, which can pack in too much flour and make the loaf dry and dense.
Warm milk. Milk adds richness, flavor, and softness. The fat and proteins in milk help create a tender crumb and a golden crust. The milk needs to be warm, not hot, so that it wakes up the yeast without harming it. A good target is lukewarm, about 105 to 110 degrees Fahrenheit (40 to 43 degrees Celsius). It should feel comfortably warm to the touch, like a baby bottle. If the milk is too hot, it can kill the yeast, and the bread will not rise.
Active dry yeast. Yeast is the living ingredient that makes bread rise. It feeds on sugar and produces carbon dioxide, which creates air pockets in the dough. Active dry yeast needs to be activated in warm liquid with a little sugar until it becomes foamy. Check the expiration date on your yeast, and store opened yeast in the refrigerator or freezer to keep it fresh.
Sugar. Sugar gives the yeast something to eat, adds a slight sweetness, and helps the crust brown beautifully. Two tablespoons is just enough to boost flavor and softness without making the bread taste like dessert.
Salt. Salt controls the yeast, strengthens the gluten structure, and brings out the flavor of the bread. Without it, the loaf would taste flat and may rise too quickly and unevenly.
Equipment You Will Need
- A large mixing bowl
- A wooden spoon or dough scraper, or a stand mixer with a dough hook if you prefer
- A 9 by 5-inch loaf pan
- A clean kitchen towel or plastic wrap for covering the dough
- A wire cooling rack
- Measuring cups and spoons, or a kitchen scale
- An instant-read thermometer (optional but helpful)
A 9 by 5-inch loaf pan is the traditional size for sandwich bread and gives you a classic loaf shape with even slices.
How to Make 5-Ingredient Soft Homemade Sandwich Bread
Step 1: Activate the Yeast
In a large bowl, combine the warm milk, sugar, and yeast. Stir gently and let the mixture sit for 5 to 10 minutes, until it becomes foamy and bubbly on the surface. This is how you know your yeast is alive and active. If nothing happens after 10 minutes, the yeast may be old or the milk may have been too hot or too cold. In that case, start again with fresh yeast and milk at the right temperature.
Step 2: Mix the Dough
Add the flour and salt to the yeast mixture. Stir with a wooden spoon until a shaggy dough forms and there are no dry patches of flour left. The dough will look rough and sticky at this stage, and that is normal.
Step 3: Knead the Dough
Turn the dough out onto a lightly floured surface and knead for 8 to 10 minutes, until it becomes smooth and elastic. To knead by hand, push the dough away from you with the heel of your hand, fold it back over itself, give it a quarter turn, and repeat. If you are using a stand mixer, knead on low to medium speed with the dough hook for about 6 to 8 minutes.
The dough is ready when it feels smooth, springs back slightly when poked, and is soft but not overly sticky. If it sticks to your hands badly, add a teaspoon of flour at a time, but avoid adding too much, since extra flour can make the bread dry. You can also test the dough using the windowpane test: stretch a small piece gently between your fingers. If it stretches thin enough to become translucent without tearing, the gluten is well developed.
Step 4: First Rise
Place the dough in a lightly greased bowl and turn it once so the top is coated. Cover the bowl with a kitchen towel or plastic wrap and let the dough rise in a warm spot for 1 to 1 1/2 hours, or until it has doubled in size. A good place to rise dough is inside a turned-off oven with the light on, or on a counter away from drafts. Rising time depends on the temperature of your kitchen. In a cool room it may take longer, and in a warm room it may be faster, so judge by the size of the dough rather than the clock.
Step 5: Shape the Loaf
Gently punch down the dough to release the large air bubbles. Turn it out onto a lightly floured surface and press it into a rectangle about 9 inches wide. Roll the dough up tightly from the short end, like a jelly roll, pinching the seam closed as you go. Tuck the ends under slightly. A tight roll helps the loaf rise evenly and gives you a nice, uniform slice.
Step 6: Place in the Pan
Place the shaped dough seam-side down in a greased 9 by 5-inch loaf pan. Press it gently so it fills the pan evenly.
Step 7: Second Rise
Cover the pan loosely and let the dough rise again for 30 to 45 minutes, until it rises just above the rim of the pan. Do not let it rise too far above the pan, since over-proofed dough can collapse in the oven. You can press a finger lightly into the side of the dough. If the indentation slowly springs back, the loaf is ready to bake.
Step 8: Bake
While the loaf is rising, preheat your oven to 350 degrees Fahrenheit (175 degrees Celsius). Bake the bread for 30 to 35 minutes, until it is golden brown and cooked through. The top should be evenly golden, and the loaf should sound hollow when tapped on the bottom. If you use an instant-read thermometer, the internal temperature should be around 190 degrees Fahrenheit (88 degrees Celsius). If the top browns too quickly, tent the loaf loosely with foil for the remaining baking time.
Step 9: Cool Completely
Remove the bread from the pan right away and place it on a wire rack. Let it cool completely before slicing. This step is hard to wait for, but it matters. Bread continues to cook and set as it cools, and slicing into it while it is hot can make the crumb seem gummy and compressed. For a softer crust, brush the top of the warm loaf lightly with melted butter and cover it with a clean towel while it cools.
Tips for the Softest, Fluffiest Sandwich Bread
- Use the right milk temperature. Warm, not hot, is the key. Too hot kills the yeast, while too cold slows it down.
- Do not add too much flour. A slightly tacky dough produces a softer loaf than a stiff, dry one.
- Knead thoroughly. Good gluten development leads to a taller, fluffier loaf.
- Let the dough double. Rely on size and appearance, not just the timer.
- Shape tightly. A snug roll gives the loaf structure and prevents large holes.
- Do not over-proof the second rise. The dough should come just above the pan, not far over it.
- Check doneness with a thermometer. An internal temperature of about 190 degrees Fahrenheit means the bread is done.
- Brush with butter. Brushing the hot loaf with butter creates a tender, glossy crust.
- Cool completely before slicing. Patience gives you clean slices and a better texture.
- Use a serrated bread knife. A gentle sawing motion preserves the soft crumb.
Troubleshooting Common Bread Problems
My dough did not rise. The yeast may be expired, the milk may have been too hot or too cold, or the room may be too cool. Check the yeast date, use a thermometer for the milk, and move the dough to a warmer spot. Give it extra time before giving up.
My bread is dense and heavy. Common causes include too much flour, under-kneading, or not letting the dough rise enough. Weigh your flour, knead until the dough is smooth and elastic, and let it fully double during the first rise.
My loaf collapsed or has a sunken top. The dough was likely over-proofed. Watch the second rise closely and bake as soon as the dough crests just above the pan.
The crust is too hard. The loaf may have baked too long or at too high a temperature. Brush the crust with melted butter after baking and cover it with a towel while cooling to soften it.
The inside is gummy. The bread may be underbaked, or it was sliced too soon. Check the internal temperature and let it cool fully before cutting.
There are large holes in the crumb. The dough was likely not shaped tightly or was not degassed enough. Press out the air bubbles and roll the loaf tightly.
The bread tastes yeasty or bland. Make sure you measured the salt correctly and gave the dough enough time to rise. A slow, steady rise develops better flavor than a rushed one.
Flavor Variations
Once you master the basic loaf, it is easy to customize.
Honey wheat bread. Replace half of the flour with whole wheat flour and swap the sugar for honey for a slightly nuttier, heartier loaf. You may need a splash more milk, since whole wheat flour absorbs more liquid.
Buttery soft bread. Knead in a tablespoon or two of softened butter after the dough comes together for an even richer, softer crumb.
Herb and garlic bread. Add dried herbs such as rosemary, oregano, or Italian seasoning, plus a little garlic powder, to the dough.
Cheese bread. Knead in shredded cheddar or parmesan for a savory loaf that is great with soup.
Cinnamon swirl bread. After rolling out the dough, sprinkle with cinnamon and sugar before rolling it into a loaf.
Seeded bread. Sprinkle sesame, poppy, or sunflower seeds on top before baking, or knead some into the dough.
Dinner rolls. Divide the dough into 12 equal pieces, shape into balls, and bake in a greased pan for about 20 to 25 minutes, until golden.
How to Use Your Homemade Sandwich Bread
This loaf is truly an all-purpose bread. Here are some of the best ways to enjoy it.
Classic sandwiches. Turkey and cheese, egg salad, chicken salad, BLTs, and peanut butter and jelly all taste better on fresh homemade bread.
Toast. Toast a slice and top it with butter and jam, avocado, eggs, or cream cheese and sliced fruit.
Grilled cheese. The soft crumb and golden crust make a perfect grilled cheese sandwich.
French toast. Slightly stale slices soak up custard beautifully and cook into rich, golden French toast.
Bread pudding. Cube leftover bread and bake it in a sweet custard for a comforting dessert.
Croutons. Cube the bread, toss with olive oil and seasonings, and bake until crisp.
Breadcrumbs. Dry out the bread, then pulse it in a food processor for homemade breadcrumbs.
Dipping bread. Serve warm slices alongside soups, stews, and salads.
Storage and Freezing
Homemade bread has no preservatives, so it is best stored with care.
- Room temperature. Once completely cooled, store the loaf in a bread bag, airtight container, or wrapped tightly in plastic or foil. It will stay soft for about 3 to 4 days.
- Avoid the refrigerator. Refrigeration tends to dry out bread and make it stale faster. Use it only in very hot, humid weather when mold is a concern.
- Freezing. Slice the cooled loaf, separate the slices with parchment paper if you like, and freeze them in a freezer-safe bag. Frozen bread keeps well for up to about three months.
- Thawing and reheating. Toast slices straight from the freezer, or thaw them at room temperature. A whole frozen loaf can be warmed in a 300 degrees Fahrenheit oven for 10 to 15 minutes.
- Discard if spoiled. If you see mold or notice an off smell, throw the bread away.
These times are general guidelines. Humidity and kitchen temperature can affect how long bread stays fresh.
Frequently Asked Questions
Can I use instant yeast instead of active dry yeast?
Yes. Instant yeast can be used in the same amount. You can mix it directly with the flour rather than activating it in milk first, though activating it as the recipe describes works too and lets you confirm the yeast is alive.
Can I use water instead of milk?
Yes, but the bread will have a slightly chewier crumb and a less rich flavor. Milk gives a softer, more tender result. You can also use plant-based milk, although the texture and browning may differ.
Can I use bread flour instead of all-purpose flour?
Yes. Bread flour has more protein, which gives a taller, chewier loaf. You may need slightly more liquid, so add a little extra milk if the dough feels stiff.
Can I knead the dough in a stand mixer?
Yes. Use the dough hook and knead on low to medium speed for about 6 to 8 minutes, until the dough is smooth and elastic and pulls away from the sides of the bowl.
Can I make this bread without kneading?
Kneading develops the gluten that gives the bread its structure. Without it, the loaf will be denser and less uniform. If you want a no-knead method, a different recipe with a longer, wetter fermentation is a better choice.
How do I know if my dough has risen enough?
The dough should have roughly doubled in size and look puffy. When you gently press a floured finger into it, the indentation should fill back slowly.
Why did my dough take so long to rise?
Cool kitchens, old yeast, or milk that was too cold can all slow the rise. Move the dough to a warmer spot and give it more time. A longer rise is not a problem as long as the dough does not over-proof.
Can I let the dough rise in the refrigerator?
Yes. A slow, cold rise overnight can develop more flavor. Cover the dough tightly, refrigerate, then let it come to room temperature and finish rising before shaping and baking.
Why is my bread dry?
Too much flour, overbaking, or slicing before cooling can contribute to dryness. Weigh the flour, check the internal temperature, and store the bread properly.
How can I make the crust softer?
Brush the top with melted butter right after baking and cover the loaf with a clean towel as it cools.
Can I double the recipe?
Yes. Double all the ingredients and make two loaves, or divide the dough for one loaf and a batch of rolls. Knead each batch fully and follow the same rise times, adjusting for your kitchen.
Can I add sweeteners or make it sweeter?
You can increase the sugar slightly, or replace it with honey, for a slightly sweeter loaf. Keep the changes small so the yeast and dough behave as expected.
Can I make this recipe vegan or dairy-free?
You can replace the milk with a plant-based milk. The recipe will still work, though the texture and flavor may differ slightly from the version made with dairy milk.
Why Homemade Bread Is Worth the Effort
Store-bought bread is convenient, but homemade bread offers rewards that are hard to match.
- Better flavor and aroma. Fresh bread tastes better than anything that has been sitting on a shelf.
- Simple ingredients. You know exactly what is in your loaf, with no unfamiliar additives.
- Customizable. You can change the flour, add herbs, seeds, or cheese, and shape the dough however you like.
- Cost effective. A loaf made from pantry staples costs far less than a good bakery loaf.
- A relaxing, rewarding process. Kneading and baking can be a calming, satisfying activity, and the results are delicious.
- Great for sharing. A fresh loaf makes a warm, thoughtful gift for friends, neighbors, and family.
Nutrition Notes
Homemade sandwich bread provides carbohydrates for energy, along with some protein from the flour and milk. The exact nutrition depends on the type of flour and milk you use and the thickness of your slices. If you want more fiber, try replacing part of the flour with whole wheat flour. If you have allergies or dietary restrictions, read ingredient labels carefully and adjust accordingly.
Final Thoughts: A Simple Loaf You Will Bake Again and Again
This 5-ingredient soft homemade sandwich bread proves that great bread does not require a long ingredient list or professional training. With flour, warm milk, yeast, sugar, and salt, you can bake a soft, fluffy, golden loaf that is perfect for everything from morning toast to lunchtime sandwiches.
Start with fresh yeast and warm, not hot, milk. Knead until the dough is smooth and elastic, let it rise until doubled, shape it tightly, and bake until golden. Then let it cool completely before slicing, and enjoy the reward of a truly homemade loaf.
Once you see how easy it is, you may never want to go back to store-bought bread. Give this recipe a try, make it your own, and share a slice with someone who loves the smell of fresh bread as much as you do.
Print
5-Ingredient Soft Homemade Sandwich Bread: An Easy, Fluffy Loaf for Toast and Sandwiches
Description
Soft, fluffy, and deliciously fresh! This easy homemade sandwich bread requires just 5 simple ingredients and makes the perfect loaf for toast, sandwiches, and breakfast. Once you try homemade bread, you’ll love having it in your kitchen!
Ingredients
- 3 cups (375g) all-purpose flour or bread flour
- 1 cup (240ml) warm milk
- 2¼ tsp (7g) active dry yeast
- 2 tbsp (25g) sugar
- 1 tsp (6g) salt
Instructions
- In a large bowl, combine the warm milk, sugar, and yeast. Let sit for 5–10 minutes until foamy.
- Add the flour and salt. Mix until a dough forms.
- Knead for 8–10 minutes until the dough becomes smooth and elastic.
- Place the dough in a lightly greased bowl, cover, and let rise for 1–1½ hours, or until doubled in size.
- Gently punch down the dough and shape it into a loaf.
- Place it in a greased 9 × 5-inch loaf pan.
- Cover and let rise again for 30–45 minutes, until the dough rises just above the pan.
- Bake at 350°F (175°C) for 30–35 minutes, until golden brown and cooked through.
- Remove from the pan and let cool completely on a wire rack before slicing.