Why Make Homemade Peanut Butter Banana Dog Cookies?
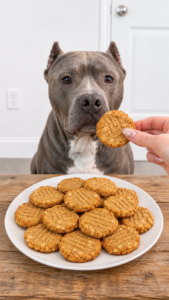
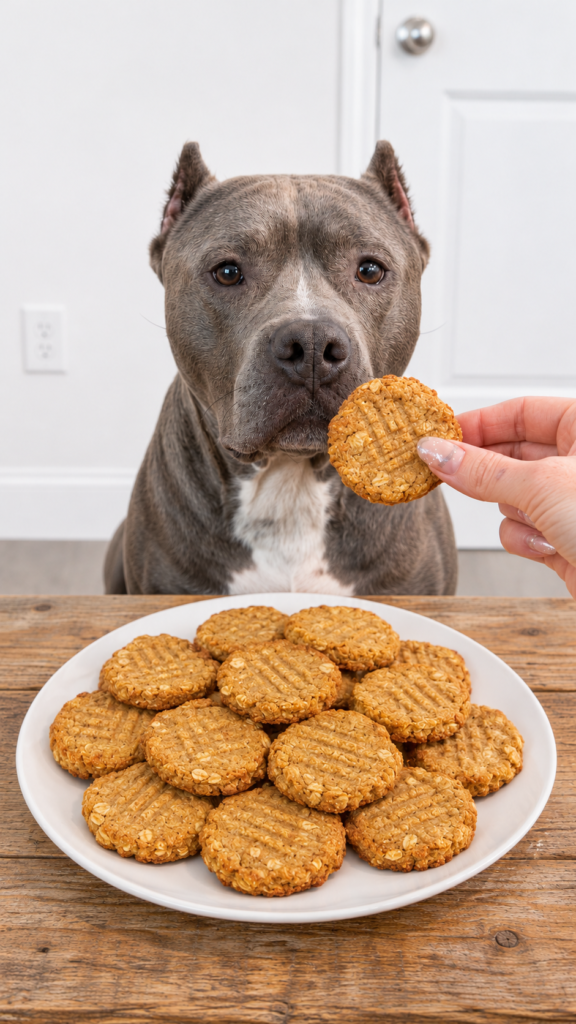
Every dog owner knows that look: the tilted head, the wagging tail, the eyes fixed on your hand as you reach for the treat jar. Treats are a big part of how we train, reward, and bond with our dogs, which makes it worth knowing exactly what goes into them. These peanut butter banana crunch cookies for dogs are made with a short list of simple, recognizable ingredients: ripe banana, natural peanut butter, an egg, oat flour, and rolled oats. There are no mystery additives, no artificial colors, and no long chemical names.
The cookies bake up golden, firm, and satisfyingly crunchy. The ripe banana adds natural sweetness, the peanut butter provides the irresistible flavor most dogs adore, the egg binds everything together and adds protein, and the oats bring fiber and a hearty texture. A bone-shaped cookie cutter makes them look as good as they taste, and they are perfect as training rewards, afternoon snacks, or a special homemade surprise.
The recipe is also easy. You mash, mix, roll, cut, and bake. There is no special equipment, no complicated technique, and no ingredients you cannot find in a regular grocery store. If you can make cookies, you can make these.
In this guide you will find the full recipe, an explanation of what each ingredient does, step-by-step directions, important dog safety notes, tips for the crunchiest biscuits, variations, serving guidance, storage and freezing advice, and answers to frequently asked questions.
What Makes These Dog Cookies Special?
Here is why this recipe is worth making:
- Only six ingredients. Banana, peanut butter, egg, oat flour, rolled oats, and a little water if needed.
- Naturally sweet. Ripe banana provides sweetness without any added sugar.
- Crunchy texture. A second rest in the cooling oven dries the biscuits out for a satisfying crunch that dogs love and that helps the cookies keep.
- Simple, recognizable ingredients. You know exactly what your dog is eating.
- Easy to customize. You can make small training bites or larger biscuits just by changing the cutter size.
- Budget friendly. A batch costs far less than most specialty store-bought treats.
Ingredients for Peanut Butter Banana Crunch Cookies for Dogs
- 1 ripe banana, mashed
- 1/2 cup natural peanut butter (xylitol-free)
- 1 large egg
- 1 1/2 cups oat flour
- 1/2 cup rolled oats
- 1 to 2 tablespoons water, if needed
A Closer Look at the Ingredients
Ripe banana. A banana with plenty of brown spots is ideal because it is soft, easy to mash, and naturally sweet. Mash it until completely smooth so it blends evenly into the dough. Bananas are a safe, popular treat ingredient for most dogs, but remember that they contain natural sugar, so they are best used in moderation.
Natural peanut butter (xylitol-free). This is the most important ingredient to check. Xylitol, an artificial sweetener found in some peanut butters and many other foods, is toxic to dogs and can cause a dangerous drop in blood sugar and liver damage. Always read the ingredient label carefully before using any peanut butter, and choose a brand that contains only peanuts, or peanuts and a little salt. Avoid peanut butters with added sugar, sweeteners, or other flavorings. Unsalted peanut butter is an even better choice when available.
Egg. The egg binds the dough, adds protein, and helps the cookies hold their shape. Because the cookies are fully baked, the egg is cooked through.
Oat flour. Oat flour is a gentle, wholesome base that is often used in dog treats. It is simple to make at home by blending plain rolled oats in a blender or food processor until they form a fine powder. Make sure the oats or oat flour are plain, with no added sugar, flavorings, or sweeteners. If your dog has specific dietary needs or sensitivities, check with your veterinarian.
Rolled oats. Rolled oats add fiber, a rustic texture, and extra crunch. Use plain, old-fashioned rolled oats rather than flavored instant oatmeal packets, which often contain sugar and flavorings.
Water. A little water helps bring the dough together if it is too dry. Add it one tablespoon at a time, since the moisture level depends on how ripe your banana is and how thick your peanut butter is.
Important Dog Safety Notes
Before you start baking, keep these safety points in mind.
- Never use peanut butter containing xylitol. Always check the label. Xylitol may also appear as birch sugar in some ingredient lists.
- Avoid chocolate. Chocolate is toxic to dogs, so do not add chocolate chips or cocoa to this recipe.
- Avoid added sugar. Dogs do not need sugar in their treats, and the banana already provides plenty of natural sweetness.
- Serve in moderation. Treats should be an occasional extra, not a replacement for a complete and balanced dog food. A commonly cited guideline is that treats should make up no more than about 10 percent of a dog’s daily calories.
- Break biscuits into suitable portions. Cut or break the cookies into sizes that suit your dog, especially for small breeds. Supervise your dog while they eat crunchy biscuits.
- Watch for allergies and sensitivities. If your dog has allergies, a sensitive stomach, or a medical condition such as diabetes or pancreatitis, check with your veterinarian before offering new treats. Peanuts, eggs, wheat-free grains, and bananas can all be problematic for individual dogs.
- Introduce new treats slowly. Offer a small piece first and watch for any signs of digestive upset or an allergic reaction.
- Keep treats separate from human snacks. These cookies are made for dogs and are not formulated or seasoned for people.
This article is for general information and is not a substitute for veterinary advice. Your veterinarian knows your dog best.
Equipment You Will Need
- A large mixing bowl
- A fork or potato masher
- A rolling pin
- A bone-shaped cookie cutter, or any small cutter
- A baking sheet
- Parchment paper
- A wire cooling rack
- A blender or food processor (if making your own oat flour)
How to Make Peanut Butter Banana Crunch Cookies for Dogs
Step 1: Preheat the Oven
Preheat your oven to 325 degrees Fahrenheit (165 degrees Celsius). A lower oven temperature helps the cookies dry out and become crunchy without burning.
Step 2: Mash the Banana
In a large mixing bowl, mash the ripe banana until it is completely smooth. Use a fork or potato masher and take your time, since any lumps will show up in the finished dough.
Step 3: Add the Peanut Butter and Egg
Add the peanut butter and egg to the mashed banana, then mix until the mixture is creamy and well combined. If your peanut butter is very thick, warm it for a few seconds first to make it easier to blend.
Step 4: Add the Oat Flour and Oats
Gradually add the oat flour and rolled oats, stirring as you go. Mixing gradually helps prevent dry pockets of flour and makes it easier to judge how much moisture the dough needs.
Step 5: Form the Dough
Mix until a firm dough forms. The dough should hold together when pressed and should not be sticky. If it feels too dry or crumbly, add a little water, one tablespoon at a time, until the dough comes together. If it is too sticky, add a little more oat flour.
Step 6: Roll Out the Dough
Roll out the dough on a lightly floured surface to about one quarter inch thickness. Dust the rolling pin with a little oat flour if the dough sticks. Thinner cookies become crunchier and bake more evenly, while thicker ones stay softer in the center.
Step 7: Cut Out the Biscuits
Use a bone-shaped cookie cutter to cut out the biscuits. Re-roll the scraps and cut again until all the dough is used. For small dogs or training treats, use a small cutter or cut the dough into small squares.
Step 8: Arrange on the Baking Sheet
Arrange the cookies on a parchment-lined baking sheet. They do not spread much, so they can be placed fairly close together, but leave a little room between each one for even baking.
Step 9: Bake
Bake for 25 to 30 minutes, until the cookies are lightly golden and firm. Larger or thicker cookies may need a few extra minutes, while small ones may bake faster, so check them near the end of the baking time.
Step 10: Dry in the Oven for Extra Crunch
Turn off the oven and leave the cookies inside for another 15 to 20 minutes. This gentle drying step removes extra moisture and gives the biscuits their extra crunchy texture.
Step 11: Cool Completely
Remove the cookies from the oven and allow them to cool completely before serving. They continue to firm up as they cool. Never serve warm biscuits to your dog, and do not store them until they are fully cool.
Tips for the Crunchiest Dog Biscuits
- Roll the dough evenly. Even thickness means even baking.
- Do not skip the oven drying step. It is what makes the biscuits crunchy.
- Use thinner cookies for more crunch. A quarter inch is a good thickness for crisp biscuits.
- Check for firmness. The cookies should feel firm and hold their shape, not soft or bendy.
- Cool them completely. Trapped warmth creates condensation and softens the cookies.
- Make a smaller cutter size for training. Small bite-sized pieces work better for rewards.
- Store them properly. Moisture is the enemy of crunch, so use airtight containers.
- Watch the dough texture. Add water gradually and flour as needed. Different bananas and peanut butters vary in moisture.
Variations and Add-Ins
Once you have mastered the basic recipe, you can try a few dog-safe variations. Always make sure any additions are safe for dogs and appropriate for your dog’s health, and check with your veterinarian if you are unsure.
Extra fiber. Stir in a tablespoon of plain pumpkin puree, not pumpkin pie filling, in place of some of the water. Pumpkin is commonly used in dog treats.
Apple twist. Add a few tablespoons of finely grated apple, with the seeds and core removed.
Cinnamon touch. A very small pinch of cinnamon is often used in dog treat recipes, but use it sparingly.
Mini training bites. Roll the dough thin and cut it into tiny squares with a pizza cutter before baking. Reduce the baking time slightly and check often.
Fun shapes. Use paw prints, hearts, stars, or other cutters to make the biscuits for holidays and birthdays.
Avoid adding ingredients that are harmful to dogs, including chocolate, raisins, grapes, onions, garlic, macadamia nuts, and anything containing xylitol.
How to Serve and Portion the Cookies
The right serving size depends on your dog’s size, age, weight, and activity level. As a general approach:
- Small dogs: Offer a small piece or a mini biscuit as a treat.
- Medium dogs: Offer one small biscuit, or half of a larger one.
- Large dogs: Offer one biscuit, depending on size.
Use the cookies as training rewards, afternoon snacks, or special treats on occasions like birthdays and adoption anniversaries. Break biscuits into smaller pieces whenever needed, and always offer fresh water. Remember that these are occasional treats, not a meal replacement.
Storage and Freezing
Because these cookies are made with fresh banana and egg and contain no preservatives, they should be stored carefully.
- Cool completely first. This prevents condensation and sogginess.
- Refrigerate. Store the cookies in an airtight container in the refrigerator for up to 5 to 7 days.
- Freeze for longer storage. Place the cooled cookies in a freezer-safe bag or container and freeze for up to 2 months.
- Thaw before serving. Let frozen cookies thaw at room temperature before giving them to your dog.
- Discard if spoiled. If you notice mold, an off smell, or a change in texture, throw the cookies away.
These times are general guidelines for homemade treats. When in doubt, throw it out.
Frequently Asked Questions
Is peanut butter safe for dogs?
Plain peanut butter is generally considered safe for most dogs in moderation, but it must never contain xylitol. Always read the label, and choose natural peanut butter with no added sweeteners. Some dogs have peanut allergies, so introduce it slowly.
Why is xylitol dangerous for dogs?
Xylitol is an artificial sweetener that is highly toxic to dogs. Even small amounts can cause a rapid drop in blood sugar, vomiting, weakness, seizures, and liver damage. If you suspect your dog has eaten something containing xylitol, contact your veterinarian or an emergency animal poison hotline immediately.
Are bananas good for dogs?
Bananas are generally safe for dogs in small amounts and are a common ingredient in homemade dog treats. They contain natural sugar, so they should be given in moderation.
Can I use regular flour instead of oat flour?
You can, but oat flour is used here because it is a gentle, commonly used base for dog treats. If you use another flour, the texture may change, and your dog may have different tolerance. Check with your veterinarian if your dog has grain or gluten sensitivities.
How do I make oat flour at home?
Blend plain rolled oats in a blender or food processor until they become a fine powder. Measure the flour after blending for accuracy, and make sure the oats are plain with no added sugar or flavorings.
Can I leave out the egg?
The egg helps bind the dough, so removing it may make the dough crumblier. You could try adding a little extra mashed banana or a small amount of water, but results may vary.
Why are my cookies soft instead of crunchy?
Soft cookies are usually the result of thick dough, too little baking time, skipping the oven drying step, or not cooling them completely. Roll the dough thinner, bake until firm, leave the cookies in the cooling oven, and store them in a dry, airtight container.
Why is my dough too sticky or too dry?
The moisture of the dough depends on your banana and peanut butter. If it is sticky, add a little more oat flour. If it is crumbly, add water one tablespoon at a time.
How many cookies does this recipe make?
The yield depends on the size of your cutter and the thickness of the dough. A medium bone-shaped cutter usually produces a couple dozen cookies, while a small cutter makes more.
Can I make these cookies for puppies?
Puppies have sensitive stomachs and specific nutritional needs. Check with your veterinarian before offering homemade treats to a puppy, and use very small portions.
Can senior dogs eat these cookies?
Senior dogs can often enjoy treats, but very hard biscuits may be difficult for dogs with dental problems. You can make the cookies thicker and skip the extra drying step for a softer texture, and check with your veterinarian about what is best for your dog.
Can I double the recipe?
Yes. Double all the ingredients and bake in batches, using multiple baking sheets if needed. Make sure each sheet bakes evenly.
Are these treats suitable for dogs with allergies?
Not necessarily. Peanuts, eggs, and oats can be allergens for some dogs. If your dog has known food allergies, talk to your veterinarian before trying this recipe.
Why Homemade Dog Treats Are Worth Making
Store-bought dog treats are convenient, but homemade treats offer several benefits.
- You control the ingredients. No fillers, artificial colors, or unfamiliar additives.
- Fresh flavor. Dogs often love the aroma of a freshly baked treat.
- Customizable. You can adapt shapes, sizes, and add-ins to suit your dog.
- Cost effective. A few pantry staples make a big batch.
- A bonding activity. Baking for your dog is a fun, loving way to show you care.
- Great for gifting. A bag of homemade biscuits makes a thoughtful gift for fellow dog lovers. If you give them away, label them with the ingredients, since peanuts and eggs can be allergens, and include storage instructions.
Nutrition Notes
These cookies are a treat, not a balanced meal. Oats contribute fiber, peanut butter provides protein and fat, the egg adds protein, and the banana adds natural sweetness and some vitamins and minerals. Peanut butter is calorie dense, so portion size matters, especially for small dogs and dogs who need to manage their weight. If your dog has any health condition or dietary restriction, check with your veterinarian before feeding homemade treats.
Final Thoughts: A Crunchy Treat Made with Love
Peanut butter banana crunch cookies for dogs prove that a healthy-feeling, homemade treat does not have to be complicated. With a ripe banana, xylitol-free peanut butter, an egg, oat flour, and rolled oats, you can bake golden, crunchy biscuits that your furry best friend will beg for.
Always check your peanut butter label, skip chocolate and added sugar, break biscuits into suitable portions, and serve them in moderation as occasional treats. Cool the cookies completely, store them in an airtight container in the refrigerator for up to a week, or freeze them for up to two months.
Whether you use them for training, as an afternoon snack, or as a special surprise, these cookies are sure to get tails wagging. Give the recipe a try, shape them with your favorite cutter, and share the love with the dog lovers in your life.
Print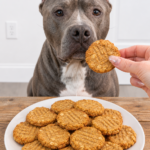
Peanut Butter Banana Crunch Cookies for Dogs: An Easy Homemade Dog Biscuit Recipe
Description
Crunchy, golden, naturally sweet, and full of tail-wagging goodness! These homemade Peanut Butter Banana Crunch Cookies combine ripe bananas, creamy peanut butter, and wholesome oats to create delicious crunchy biscuits your furry best friend will absolutely love. Perfect for training rewards, afternoon snacks, or a special homemade surprise!
Ingredients
- 1 ripe banana, mashed
- ½ cup natural peanut butter (xylitol-free)
- 1 large egg
- 1½ cups oat flour
- ½ cup rolled oats
- 1–2 tbsp water, if needed
Instructions
- Preheat your oven to 325°F (165°C).
- In a large mixing bowl, mash the ripe banana until smooth.
- Add the peanut butter and egg, then mix until creamy.
- Gradually add the oat flour and rolled oats.
- Mix until a firm dough forms. Add a little water if needed.
- Roll out the dough on a lightly floured surface to about ¼-inch thickness.
- Use a bone-shaped cookie cutter to create adorable dog biscuits.
- Arrange the cookies on a parchment-lined baking sheet.
- Bake for 25–30 minutes until lightly golden and firm.
- Turn off the oven and leave the cookies inside for another 15–20 minutes to make them extra crunchy.
- Remove and allow them to cool completely before serving.