Why No-Knead Artisan Bread Is a Game Changer for Home Bakers
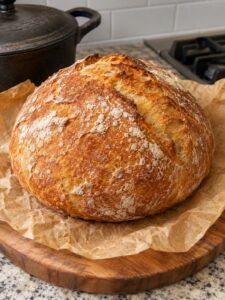
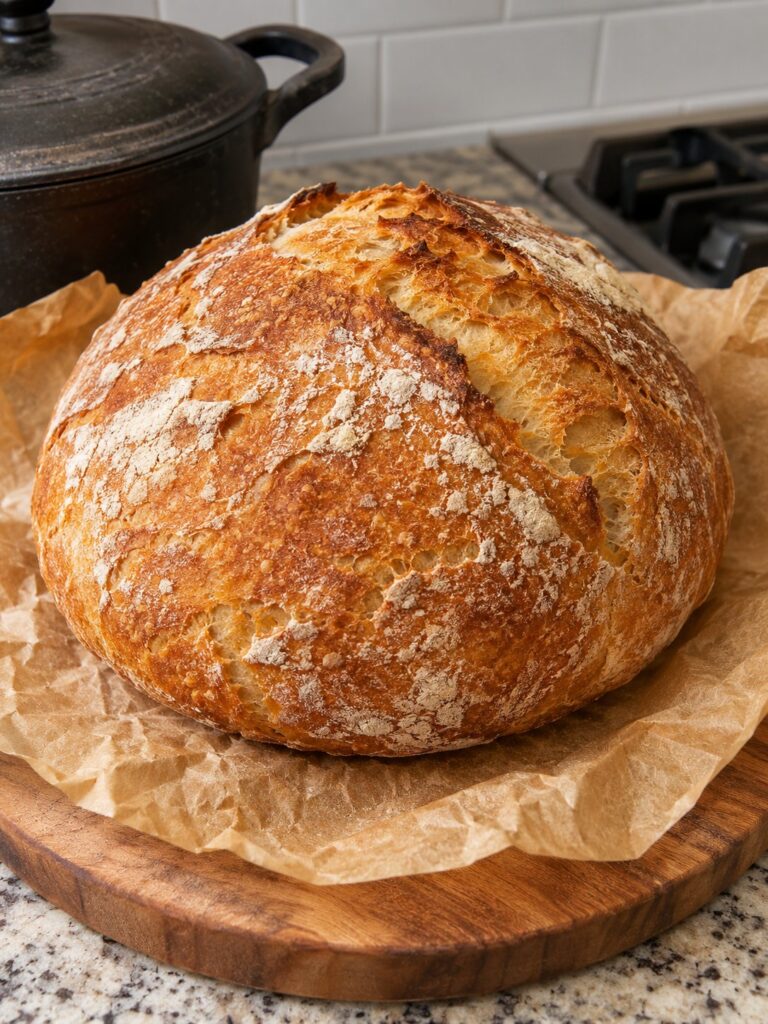
For many people, homemade bread sounds like a weekend project that demands special equipment, advanced skills, and a lot of arm strength. No-knead artisan bread changes that completely. With just four simple ingredients, a bowl, a spoon, and a Dutch oven, you can bake a loaf that looks and tastes like it came from a bakery. The crust is deeply golden, crackly, and crisp. The inside is soft, airy, and pleasantly chewy, with the open, irregular crumb that bread lovers adore.
The secret is time rather than effort. Instead of kneading the dough to develop gluten, you let a wet, sticky dough rest at room temperature for 8 to 12 hours. During that long, slow fermentation, the gluten develops on its own and the yeast builds flavor, creating a complex, slightly tangy taste that is hard to achieve in a quick loaf. All you need to do is mix the dough in a couple of minutes, walk away, and come back later to shape and bake it.
This recipe is ideal for beginners who feel intimidated by yeast bread, busy people who want homemade bread without hands-on work, and anyone who loves a crusty loaf for sandwiches, toast, soups, and serving warm with butter. There is no mixer, no kneading, no complicated shaping, and no special baking skills required.
In this guide you will find the complete recipe, an explanation of what each ingredient does, step-by-step directions, troubleshooting tips, flavor variations, serving ideas, storage and freezing advice, and answers to frequently asked questions.
What Makes This Bread Special?
Here is why this recipe is worth making again and again:
- Only four ingredients. Flour, water, salt, and instant yeast are all you need.
- No kneading. Time and hydration do the work, so there is no mixer, no stand, and no sore arms.
- Bakery-style crust. Baking in a covered, preheated Dutch oven traps steam and creates a crisp, blistered, deeply golden crust.
- Chewy, airy crumb. The wet dough and long rise create an open, tender interior with a satisfying chew.
- Deep flavor. Long fermentation develops complex, slightly tangy flavor.
- Flexible schedule. Mix the dough at night and bake the next morning, or mix it in the morning and bake in the evening.
- Budget friendly. A loaf costs only pennies compared to a bakery artisan loaf.
- Endlessly customizable. Add herbs, garlic, seeds, cheese, or other mix-ins for new flavors.
Ingredients for No-Knead Artisan Bread
- 3 cups all-purpose flour
- 1 1/2 cups warm water
- 1 teaspoon salt
- 1/2 teaspoon instant yeast
You will also need a little extra flour for dusting your work surface and hands, and parchment paper for transferring the dough to the Dutch oven.
A Closer Look at the Ingredients
All-purpose flour. All-purpose flour gives this bread a tender, chewy crumb and a golden crust. It is easy to find and works beautifully in no-knead recipes. If you want an even chewier loaf with a slightly taller rise, you can use bread flour, which has a higher protein content. Because flour measurement can vary widely by how you scoop it, the best method is to spoon the flour into the measuring cup and level it off rather than scooping straight from the bag. Too much flour makes the dough stiff and the bread dense, while the dough in this recipe should be sticky and wet.
Warm water. Water hydrates the flour and activates the yeast. The dough in this recipe is highly hydrated, which is what creates the open, airy crumb and allows gluten to develop without kneading. The water should be lukewarm, comfortably warm to the touch but not hot. Water that is too hot can kill the yeast, while very cold water will slow the fermentation. If your kitchen is cool, slightly warmer water can speed things up, and in a hot kitchen, cooler water can help prevent the dough from over-fermenting.
Salt. Salt flavors the bread, strengthens the gluten structure, and controls the speed of fermentation. Without salt, the bread will taste flat and the dough can ferment too quickly and unevenly. Fine sea salt or table salt works well. If you use a coarser salt such as kosher salt, remember that it is less dense, so a level teaspoon will deliver slightly less salinity than fine salt.
Instant yeast. Instant yeast is the leavening agent that makes the dough rise. Only half a teaspoon is needed because the fermentation time is so long. Instant yeast can be mixed directly with the flour without being activated in water first. If you only have active dry yeast, you can use it, though it may be slightly slower to start, so allow a little extra rise time and make sure the water is warm enough to activate it. Make sure your yeast is fresh. Check the expiration date, and store opened yeast in the refrigerator or freezer.
Equipment You Will Need
- A large mixing bowl
- A wooden spoon or dough whisk
- Plastic wrap or a clean kitchen towel
- A lightly floured work surface
- Parchment paper
- A Dutch oven with a lid, about 5 to 6 quarts
- Oven mitts, preferably thick ones
- A wire cooling rack
- A bread knife
The Dutch oven is the key to the bakery-style crust. It traps the steam released by the dough, which keeps the surface moist during the first part of baking so the loaf can expand fully, and then creates a crisp, golden crust when you remove the lid. If you do not have a Dutch oven, you can use another heavy, oven-safe pot with a tight-fitting lid, as long as it can safely handle a 450 degrees Fahrenheit oven. Check the maximum temperature rating on the lid, especially if it has a plastic or rubber knob.
How to Make No-Knead Artisan Bread
Step 1: Combine the Dry Ingredients
In a large mixing bowl, combine the flour, salt, and instant yeast. Stir briefly with a spoon or whisk so the salt and yeast are evenly distributed through the flour. Use a large bowl, since the dough will roughly double in size during the long rise.
Step 2: Add the Water and Mix
Add the warm water and mix with a wooden spoon until a sticky dough forms. Stir until no dry flour remains and the dough looks shaggy and rough. This takes only about a minute or two. Do not worry about making it smooth. The dough should be wet, sticky, and a little messy. Resist the urge to add more flour, since the high water content is what makes the bread so airy and chewy.
Step 3: Cover the Bowl
Cover the bowl with plastic wrap or a clean kitchen towel. Plastic wrap keeps the surface from drying out, which helps the dough rise evenly. If you use a towel, make sure it is clean and slightly damp or well fitted so the surface does not form a dry crust.
Step 4: Let the Dough Rest
Let the dough rest at room temperature for 8 to 12 hours, until it has doubled in size and is bubbly. This is the long, slow fermentation that does the work of kneading. A convenient schedule is to mix the dough in the evening and let it rest overnight, then shape and bake in the morning. The dough is ready when the surface is covered in bubbles, it looks puffy and jiggly, and it has at least doubled in volume. In a cooler kitchen, the dough may need closer to 12 hours or a little longer. In a warm kitchen, it may be ready sooner.
Step 5: Turn the Dough Out
Transfer the dough onto a lightly floured surface. The dough will be loose, sticky, and stretchy, with long strands of gluten. Lightly flour your hands and the top of the dough to make it easier to handle. Use a bench scraper or spatula to help release the dough from the bowl.
Step 6: Fold and Shape
Fold the edges of the dough toward the center several times to form a round loaf. Gently pull one edge of the dough up and fold it over the center, rotate the dough, and repeat around the circle, working quickly and gently. Flip the dough seam-side down and use your hands to tuck it into a neat round, creating a bit of surface tension. Do not overwork the dough or press out all the air bubbles. You want to keep the airy structure that developed during the long rise.
Step 7: Let the Loaf Rest
Cover the shaped dough and let it rest for another 30 minutes. This short rest relaxes the gluten and gives the dough a final bit of rise. Place the dough on a piece of parchment paper so you can use it as a sling to lower the loaf into the hot pot later.
Step 8: Preheat the Oven and Dutch Oven
While the dough rests, preheat the oven to 450 degrees Fahrenheit (230 degrees Celsius) with the Dutch oven and its lid inside. Allow at least 30 minutes for the Dutch oven to become fully hot. A thoroughly preheated pot is essential for a crisp crust and good oven spring.
Step 9: Transfer the Dough to the Dutch Oven
Carefully remove the hot Dutch oven from the oven, using thick oven mitts. Be extremely careful, since the pot and lid will be very hot. Use the parchment paper as a sling to lift the dough and lower it into the pot. Trim any excess parchment that hangs over the edge so it does not touch the oven’s heating element or burn. If you like, you can score the top of the loaf with a sharp knife or razor blade, making a shallow slash across the top to control how it expands. Place the lid on the pot.
Step 10: Bake Covered
Return the covered Dutch oven to the oven and bake for 30 minutes. During this stage, the trapped steam helps the loaf expand and create a thin, crisp crust.
Step 11: Bake Uncovered
Remove the lid carefully, since steam will escape and the lid will be very hot. Continue baking for another 10 to 15 minutes, until the crust is deeply golden and crispy. If you like a darker crust, bake closer to 15 minutes. The loaf should sound hollow when you tap the bottom, and an instant-read thermometer inserted into the center should read about 205 to 210 degrees Fahrenheit (96 to 99 degrees Celsius).
Step 12: Cool on a Wire Rack
Carefully lift the loaf out of the pot and place it on a wire rack. Let it cool completely before slicing. This is the hardest step, but it matters. The bread continues to set as it cools, and cutting into it too early can make the crumb gummy and compressed. As the loaf cools, you may hear the crust crackle and sing, which is a sign of a good crust.
Tips for the Best No-Knead Artisan Bread
- Keep the dough sticky. A wet dough produces an open, airy crumb. Avoid adding too much flour.
- Use a hot Dutch oven. A fully preheated pot is the key to a crisp, blistered crust.
- Give the dough enough time. The long rest is what develops gluten and flavor, so do not rush it.
- Watch the dough, not just the clock. The dough should be doubled, bubbly, and jiggly. Rise time varies with kitchen temperature.
- Handle the dough gently. Do not punch it down or knead it after the long rise.
- Use parchment as a sling. It makes it safe and easy to lower the dough into the hot pot.
- Use oven mitts and be careful. The pot, lid, and handles are extremely hot.
- Cool completely before slicing. This gives you clean slices and the best texture.
- Use a serrated knife. A bread knife cuts through the crust without crushing the crumb.
- Bake until deeply golden. A pale loaf may taste doughy, while a deeply colored crust adds flavor.
Troubleshooting Common Problems
My dough did not rise. The yeast may be old, the water may have been too hot or too cold, or the kitchen may be very cool. Use fresh instant yeast, check the water temperature, and allow extra time in a cool room. A slightly warmer spot, such as inside a turned-off oven with the light on, can help.
My dough is too sticky to handle. This is normal. Use lightly floured hands and a bench scraper, and flour the surface only as needed. Do not add large amounts of extra flour or the bread will be dense.
My bread is dense. Common causes include too much flour, not enough fermentation time, or overworking the dough after the rise. Measure the flour carefully, let the dough fully double and become bubbly, and handle it gently.
The crust is too pale. The Dutch oven may not have been hot enough, or the loaf may have been baked uncovered for too short a time. Preheat for at least 30 minutes and bake uncovered until deeply golden.
The crust is too hard or too dark. The loaf may have baked too long, or your oven may run hot. Check for doneness a little earlier next time, and reduce the uncovered baking time slightly.
The bottom of the loaf is too dark. Very high heat can scorch the bottom. Place a baking sheet on the rack below the Dutch oven to shield the base, or reduce the preheating time slightly.
The inside is gummy. The bread may have been sliced before cooling, or it may be underbaked. Let the loaf cool completely and check for a hollow sound and an internal temperature of about 205 degrees Fahrenheit.
The loaf spread out flat. The dough may have over-fermented or not had enough tension when shaped. Shape the loaf gently but firmly, and bake it promptly after the short rest.
The bread tastes too yeasty or sour. The dough may have fermented too long in a very warm kitchen. Use cooler water or reduce the rise time next time.
Flavor Variations
Once you master the basic loaf, it is easy to make it your own.
Rosemary and garlic bread. Mix a tablespoon of chopped fresh rosemary and a few minced garlic cloves into the dough with the dry ingredients.
Seeded crust. Sprinkle sesame seeds, poppy seeds, or sunflower seeds on top of the loaf before baking. Brush the surface lightly with water so they stick.
Cheese bread. Fold in a half cup of shredded cheddar, parmesan, or Gruyere when you shape the loaf.
Olive bread. Add chopped olives to the dough for a briny, Mediterranean flavor. Pat them dry first.
Herb bread. Add dried Italian herbs, thyme, or oregano for a savory, aromatic loaf.
Whole wheat blend. Replace up to a third of the flour with whole wheat flour for a nuttier, heartier loaf. You may need slightly more water.
Cinnamon raisin version. Add cinnamon and raisins for a lightly sweet breakfast bread.
Jalapeno cheddar. Fold in diced jalapeno and cheddar for a spicy, cheesy loaf.
When adding mix-ins, keep amounts modest so they do not weigh down the dough or interfere with the rise.
How to Serve No-Knead Artisan Bread
This loaf is versatile enough for any meal.
With butter. A warm slice of crusty bread with butter is hard to beat. Add flaky salt or honey for extra flavor.
As toast. Slice and toast it for breakfast with jam, avocado, eggs, or cream cheese.
For sandwiches. The sturdy crumb and crisp crust make excellent sandwiches, from grilled cheese to turkey and tomato.
With soup and stew. Serve thick slices alongside tomato soup, chili, or beef stew for dipping.
With olive oil and balsamic. Tear off pieces and dip them in olive oil with balsamic vinegar and herbs.
As bruschetta. Top toasted slices with tomatoes, basil, garlic, and olive oil.
On a cheese board. Serve sliced or torn bread with cheeses, cured meats, and fruit.
As croutons or breadcrumbs. Use leftover bread to make croutons, breadcrumbs, or bread pudding.
As French toast. Slightly stale slices soak up custard beautifully.
Storage and Freezing
Homemade bread has no preservatives, so it is best stored with care.
- Cool completely first. Do not store warm bread, which can cause condensation and a soggy crust.
- Room temperature. Store the cooled loaf cut-side down on a cutting board, or in a bread bag, for up to 2 days. A paper bag helps preserve the crust better than plastic.
- Avoid the refrigerator. Refrigeration can dry out bread and make it go stale faster.
- Freeze for longer storage. Slice the cooled loaf, wrap it tightly or place it in a freezer-safe bag, and freeze for up to 2 months.
- Reheat. Toast frozen slices directly, or warm a whole loaf in a 350 degrees Fahrenheit oven for 10 to 15 minutes to revive the crust.
- Discard if spoiled. If you see mold or notice an off smell, throw the bread away.
These times are general guidelines. Humidity and kitchen temperature can affect how long bread stays fresh.
Frequently Asked Questions
Do I really not need to knead this bread?
Correct. The long rest allows gluten to develop naturally, which replaces kneading. You only need to mix the ingredients until combined and gently fold the dough before baking.
Do I need a Dutch oven?
A Dutch oven gives the best results because it traps steam and creates a bakery-style crust. If you do not have one, use another heavy, oven-safe pot with a lid. You can also bake the loaf on a preheated baking stone or sheet with a pan of hot water on a lower rack, though the crust may not be as crisp.
Can I use active dry yeast?
Yes. Active dry yeast can replace instant yeast in a similar amount. It may be slower to start, so make sure the water is warm and allow extra time if needed.
Can I use bread flour?
Yes. Bread flour gives a slightly chewier, taller loaf. You may need a touch more water because bread flour absorbs more liquid.
Can I use whole wheat flour?
Yes. Replace up to a third of the all-purpose flour with whole wheat flour. The loaf will be denser and nuttier, and you may need a little more water.
How long can the dough rest?
The recipe calls for 8 to 12 hours at room temperature. Longer rests can lead to over-fermentation, especially in a warm kitchen. If you need more time, you can place the dough in the refrigerator after mixing, where it can rest for longer, and let it come to room temperature before shaping.
Can I let the dough rise in the refrigerator?
Yes. A cold rise develops even more flavor, though it takes longer. Let the dough come closer to room temperature before shaping, and add a little extra rest time if it seems sluggish.
How do I know when the dough is ready?
The dough should have doubled in size, look bubbly on the surface, and feel jiggly and airy when you shake the bowl.
Can I bake the dough without the 30-minute rest after shaping?
The short rest helps relax the gluten and improves the rise. You can shorten it if you are in a hurry, but the loaf may be slightly less airy.
Why did the parchment paper burn?
Parchment paper can darken at high temperatures. Trim away excess paper so it does not hang over the edge of the pot, and make sure it is rated for the temperature you are using. Some parchment is rated up to 420 to 450 degrees Fahrenheit, so check the package.
Can I make the bread without parchment?
Yes. You can lightly flour the dough and carefully drop it into the hot pot, or dust the pot with a little cornmeal or flour. Parchment simply makes it safer and easier.
Can I double the recipe?
Yes, but you will need two Dutch ovens or to bake the loaves one after the other. Mix and rest the dough in separate bowls.
Can I add sugar?
You do not need sugar for this bread because the long fermentation develops flavor. A small pinch can help the crust brown, but it is not necessary.
How do I get an even crispier crust?
Preheat the Dutch oven thoroughly, bake covered for the full 30 minutes, and uncover long enough to achieve a deep golden color. Cooling the loaf on a wire rack also helps keep the crust crisp.
Why Bake Your Own Artisan Bread?
Bakery bread is wonderful, but baking at home offers real advantages.
- Better flavor and freshness. Nothing beats bread straight from your own oven.
- Simple ingredients. You know exactly what is in your loaf, with no additives.
- Cost savings. A homemade loaf costs a fraction of a bakery loaf.
- Minimal effort. The dough needs only a few minutes of hands-on time.
- Customizable. You can add herbs, cheese, seeds, or other flavors.
- Impressive results. The crackling crust and airy crumb make this loaf perfect for sharing.
- Great for gifting. A fresh loaf makes a warm, thoughtful gift for neighbors and friends.
A Simple Schedule for Busy Days
Because this recipe is mostly hands-off, it fits easily into a busy schedule. One easy plan is to mix the dough in the evening, cover it, and leave it on the counter overnight. In the morning, fold and shape the loaf, let it rest while the oven and Dutch oven preheat, and bake. You will have fresh bread in time for lunch or dinner. Another option is to mix the dough in the morning before work, let it rest during the day, and bake it in the evening.
Nutrition Notes
This bread is made from a small number of simple ingredients and is a source of carbohydrates and some protein. Exact nutrition depends on the type of flour you use and the size of your slices. If you want more fiber, replace some of the flour with whole wheat flour. If you have dietary restrictions or health conditions, read ingredient labels carefully and consult a qualified professional as needed.
Final Thoughts: Bakery-Style Bread with Almost No Effort
No-knead artisan bread proves that great bread is mostly about patience, not skill. With flour, water, salt, and a little yeast, you can bake a loaf with a crackling golden crust and a soft, chewy, airy center, all without kneading a single time.
Mix the dough, let it rest overnight, shape it gently, and bake it in a hot Dutch oven. Let it cool completely before slicing, and enjoy it with butter, soup, sandwiches, or anything you like. Store leftovers in a bread bag for up to two days, or freeze slices for up to two months.
Once you see how easy it is, this loaf may become a weekly habit. Give the recipe a try, experiment with herbs, seeds, and cheese, and share a warm slice with someone who loves fresh bread as much as you do.
Print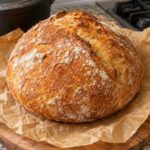
No-Knead Artisan Bread: An Easy 4-Ingredient Dutch Oven Loaf with a Crackling Crust
Description
A beautiful homemade artisan bread with a crispy, golden crust and a soft, airy, chewy center! This easy no-knead bread requires just a few simple ingredients and almost no effort. No mixer, no complicated kneading, and no special baking skills needed! Perfect for sandwiches, breakfast toast, or serving warm with butter.
Ingredients
- 3 cups all-purpose flour
- 1 ½ cups warm water
- 1 tsp salt
- ½ tsp instant yeast
Instructions
- In a large mixing bowl, combine flour, salt, and instant yeast.
- Add warm water and mix with a wooden spoon until a sticky dough forms.
- Cover the bowl with plastic wrap or a clean kitchen towel.
- Let the dough rest at room temperature for 8–12 hours, until doubled in size and bubbly.
- Transfer the dough onto a lightly floured surface.
- Fold the edges toward the center several times to form a round loaf.
- Cover and let rest for another 30 minutes.
- Preheat the oven to 450°F (230°C) with a Dutch oven inside.
- Carefully transfer the dough onto parchment paper and place it into the hot Dutch oven.
- Cover and bake for 30 minutes.
- Remove the lid and bake for another 10–15 minutes until deeply golden and crispy.
- Let cool on a wire rack before slicing.