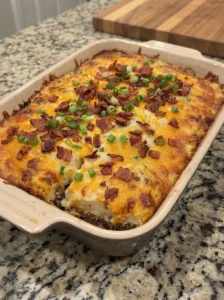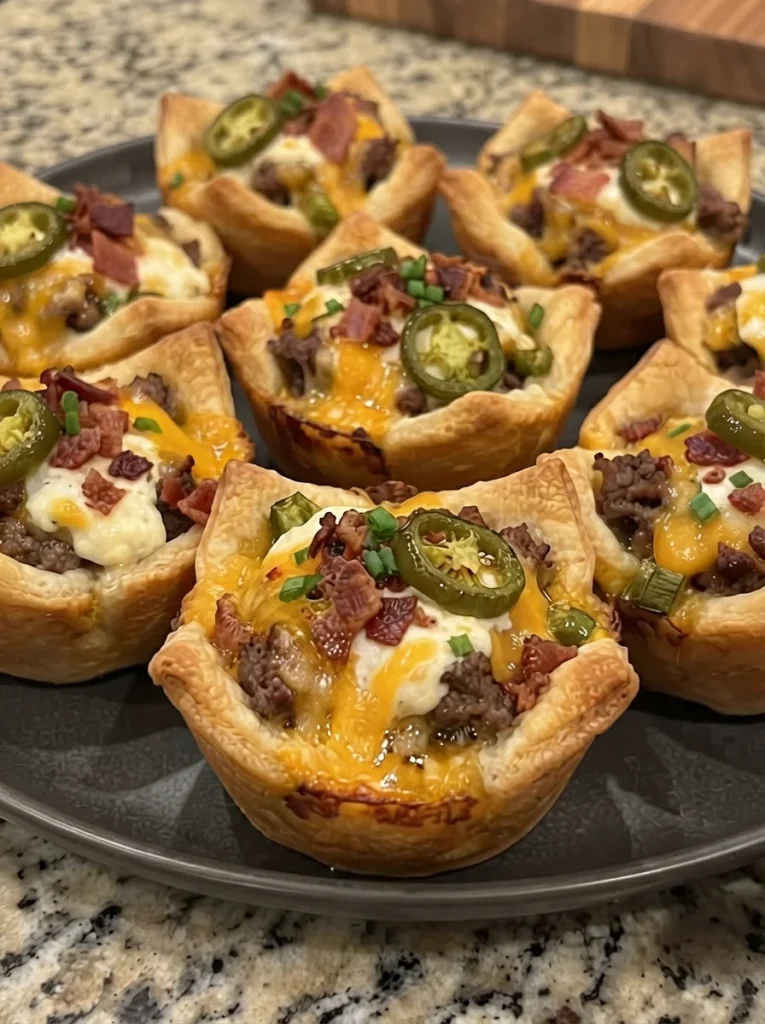
Jalapeño Popper Bacon Cheeseburger Cups bring together juicy seasoned beef, smoky bacon, creamy cheese, and fresh jalapeños in crisp tortilla shells. They have the rich filling of a jalapeño popper and the savory flavor of a bacon cheeseburger, all baked into individual portions that are easy to serve.
A standard muffin pan gives the tortillas their shape. The shells get a short bake before the filling goes in, which helps the bottoms hold up beneath the creamy beef. A final layer of cheddar melts over the top, while reserved bacon adds a crisp finish.
Serve them for a casual family dinner, a game-day spread, or a weekend appetizer. A few chopped pickles and a little burger sauce make the cheeseburger flavor more noticeable, while sour cream gives the jalapeño heat a cooling contrast.
This suggested recipe was developed from the supplied title and has not been kitchen-tested. It uses tortilla shells; it is not a low-carb cabbage-cup recipe. The timing and filling amounts below are starting points, with visual cues included to help you adjust for your pan and tortillas.
Recipe at a Glance
- Yield: 12 standard muffin-size cups
- Dinner servings: 4, with 3 cups per person
- Appetizer servings: 6, with 2 cups per person
- Prep time: About 20 minutes
- Cooking and baking: About 25–30 minutes, with some overlap
- Resting: 5 minutes
- Total: About 45–55 minutes
- Oven: 375°F
These cups are best while the shells are freshly crisp and the cheese is warm. Prepare the filling ahead if needed, then assemble close to serving time.
What Makes These Cups Work
The filling starts with beef and onion cooked together until the onion softens and the meat is fully cooked. Jalapeños get a few minutes in the skillet, taking away some of their raw edge without removing their flavor.
Cream cheese binds the filling so the beef stays together when you lift a cup from the pan. A little cheddar mixed into the filling adds flavor, and the remaining cheddar creates the melted topping. Bacon is divided between the filling and finish so some of it retains a crisp texture.
The shells are made from 4½–5-inch flour tortilla rounds. This size gives a shallow base with enough tortilla extending up the sides to hold the filling. Since muffin wells vary, test one round in your pan before cutting the rest.
Ingredients
For the Tortilla Cups
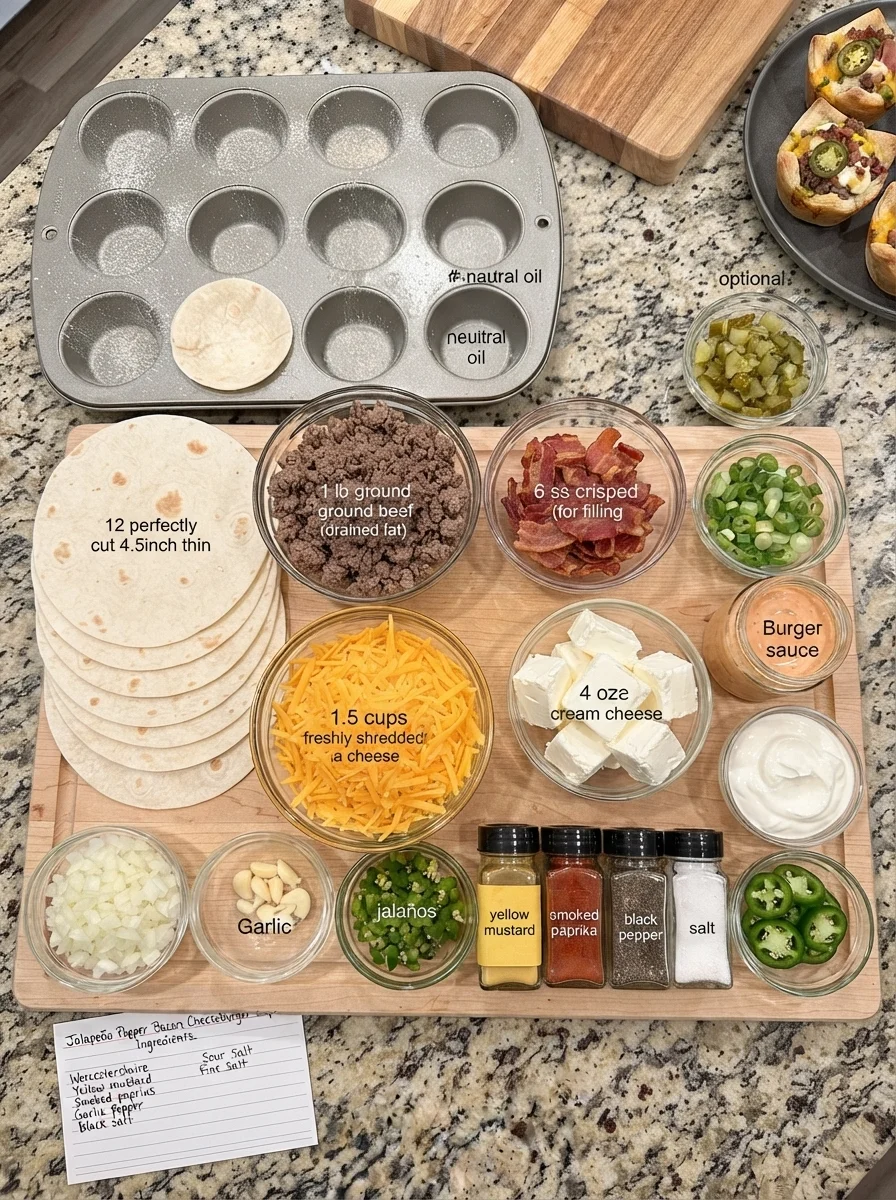
- 12 thin flour tortilla rounds, about 4½–5 inches across, cut from larger flour tortillas as needed
- 1–2 teaspoons neutral oil or cooking spray, for the muffin pan and a light coating on the tortillas
For the Bacon Cheeseburger Filling
- 1 pound lean ground beef, preferably 90% lean
- 6 slices bacon
- ½ small yellow onion, finely diced
- 2 medium jalapeños, finely diced, with seeds and pale inner membranes removed for less heat
- 2 garlic cloves, minced
- 4 ounces cream cheese, softened and cut into small pieces
- 1½ cups shredded sharp cheddar, divided
- 1 teaspoon Worcestershire sauce
- 1 teaspoon yellow mustard
- ½ teaspoon smoked paprika
- ¼ teaspoon garlic powder
- ¼ teaspoon black pepper
- ¼ teaspoon fine salt, optional and adjusted to taste
Optional Toppings
- Chopped dill pickles, well drained
- Thinly sliced green onions
- A small drizzle of burger sauce or ranch dressing
- Sour cream
- Thin jalapeño slices
Toppings are additional ingredients and are not included in the basic nutrition estimate. For a less spicy batch, start with one small jalapeño and offer extra peppers separately.
Ingredient Notes and Substitutions
Ground Beef
Lean beef helps reduce grease in the tortilla shells. If using a fattier blend, drain it thoroughly before adding cream cheese. Leave enough moisture for a pleasant filling, but avoid a visible pool of fat in the skillet.
Ground turkey can replace the beef, although the result will taste different and needs to reach 165°F during cooking. Beef should reach 160°F. Do not depend on color alone to establish doneness.
Bacon
Cook the bacon before adding it to the filling. Raw strips or pieces will not become evenly crisp inside a moist cheese mixture during the short final bake.
Bacon thickness affects both cooking time and the amount of rendered fat. Use the crispness of the pieces as your guide rather than relying on a fixed number of minutes.
Jalapeños
Heat varies from pepper to pepper. Removing the pale inner membranes usually makes a bigger difference than removing loose seeds alone. Wear gloves when handling peppers if needed, and wash your hands and tools before touching your face.
For pickled jalapeños, replace the fresh peppers with about 2–3 tablespoons finely chopped, well-drained slices. They add vinegar tang as well as heat. Pat them dry so they do not loosen the filling.
Cream Cheese and Cheddar
Block cream cheese gives the filling a thick consistency. Whipped or very soft tub-style products may behave differently. Full-fat cream cheese produces the richest result; a reduced-fat block may work but can change the texture.
Freshly shredded cheddar generally melts smoothly. Pepper Jack can replace some of the cheddar for additional pepper flavor, though this also changes the heat level.
Tortillas
Thin flour tortillas are easier to fit into a muffin pan than very thick ones. They should be flexible enough to pleat against the sides without splitting. Brief warming helps if they are stiff.
Corn tortillas need a different handling approach and can crack more easily in this shape. This recipe is written for flour tortillas. Wonton wrappers also bake differently, so do not assume the same size and timing will work without adjustment.
Equipment
Use a standard 12-well metal muffin pan, a large skillet, a cutting board, a knife, tongs, and a spoon. A round cutter or an inverted bowl helps cut even tortilla circles. Kitchen scissors also work well.
An instant-read thermometer is useful for checking the meat and reheated filling. Have a plate lined with paper towels ready for the bacon and a wire rack available for the finished cups.
Silicone muffin molds tend to give less browning than metal, so the shells may not become as crisp. A mini muffin pan is too small for the stated tortilla rounds and filling portions.
Step-by-Step Instructions
1. Heat the Oven and Prepare the Pan
Preheat the oven to 375°F. Lightly grease all 12 muffin wells, including the upper edges where the tortilla folds will touch.
Cut the tortilla rounds and test one in a well. It should cover the base and extend up the sides without forming a thick stack of folds. If needed, trim the round slightly or choose a more flexible tortilla.
2. Shape and Prebake the Shells
Warm the tortilla rounds briefly in small stacks, covered with a slightly damp paper towel, just until flexible. Press one round gently into each well, allowing a few loose pleats around the sides.
Brush or spray very lightly with oil. Bake for about 5–7 minutes, until the shells begin to hold their shape and feel a little dry at the edges. They do not need to be fully browned yet because they will return to the oven.
Set the pan aside. If a shell puffs in the center, gently settle it with the back of a spoon while it is warm, taking care not to tear it.
3. Cook the Bacon
Cook the bacon in the skillet over medium heat until crisp, turning or stirring as needed. Transfer it to the lined plate, then chop or crumble it when cool enough to handle.
Pour off the rendered fat, leaving about 1 teaspoon in the skillet for flavor. If the pan has scorched bits rather than browned residue, wipe it out before proceeding.
Reserve about one-third of the bacon for the final topping. The rest will go into the filling.
4. Cook the Beef and Vegetables
Add the ground beef and diced onion to the skillet. Cook over medium to medium-high heat for about 6–8 minutes, breaking the meat into small crumbles.
Add the diced jalapeños when the beef is mostly broken up and continue cooking for 2–3 minutes, until the onion and peppers have softened. Add the garlic and stir for about 30 seconds.
Check that the ground beef reaches 160°F. Gather some crumbles together and insert the thermometer into the meat rather than touching the skillet. Drain excess grease before adding the dairy.
5. Season and Make the Filling Creamy
Reduce the heat to low. Stir in Worcestershire sauce, mustard, smoked paprika, garlic powder, and black pepper.
Add the cream cheese in small pieces and stir until it softens and coats the beef. Fold in ½ cup cheddar and the bacon intended for the filling. Remove the skillet from the heat once the mixture is combined.
Taste the fully cooked filling before adding optional salt. Bacon, cheddar, and Worcestershire sauce already contribute salt, so the extra amount may not be needed.
The filling should be thick enough to mound on a spoon. If it looks greasy, spoon off excess fat. Do not add broth or sauce simply to make it looser; a wet filling makes soft tortilla bottoms.
6. Fill the Cups
Divide the warm filling between the prebaked shells, starting with about 3 tablespoons per cup. Distribute any remaining mixture only if the wells have room. Keep the filling at or just below the tortilla rim rather than building a tall mound.
Pan capacity varies. If there is extra filling, serve it separately or bake a second small batch of shells. Overfilling can make the cups spill when lifted.
Sprinkle the remaining 1 cup cheddar evenly over the cups.
7. Bake Until the Cheese Melts
Return the pan to the oven for about 8–12 minutes, until the cheese is melted and the tortilla edges are golden and crisp.
The beef is already cooked; this stage warms the assembled cups and melts the topping. Watch the exposed tortilla edges closely during the final few minutes. If they brown quickly, check whether the cheese and filling are ready rather than continuing solely to reach the maximum time.
8. Rest, Remove, and Garnish
Let the cups stand in the pan for about 5 minutes. This allows the filling to settle and makes them easier to lift.
Run a small offset spatula or a thin blunt utensil around each cup, then lift it carefully. Place the cups on a serving platter or rack rather than leaving them in the hot pan for a long time, where trapped moisture can soften the bottoms.
Finish with the reserved bacon and any desired toppings. Add sauces sparingly and just before eating to preserve the crisp shells.
Tips for Crisp, Sturdy Cups
Prebake the shells, but stop before they are deeply browned. They need enough structure to support the filling and enough remaining baking time to finish without burning.
Drain the beef well. Lean meat helps, but even lean beef can release moisture and fat. Let excess liquid cook away before stirring in the cream cheese.
Use small beef crumbles and finely diced vegetables. Large pieces are harder to portion and can pull the cup apart during a bite.
Keep sauces and wet toppings separate until serving. Drained pickles work better than spooning pickle brine onto the cheese. The same applies to tomatoes, salsa, and ranch dressing.
Serve soon after baking. A filled tortilla cup will gradually absorb moisture even when it starts crisp. For a party, smaller freshly baked batches give a better texture than holding one large batch for a long time.
Troubleshooting
| Problem | Likely cause | How to improve it |
|---|---|---|
| Tortillas split while shaping | They are cold, thick, or too dry | Warm briefly and use thin, flexible rounds. |
| Bottoms are soft | Wet filling, excess grease, or no prebake | Drain the filling and prebake the shells. |
| Edges burn before the cheese melts | Shells were prebaked too far or the oven runs hot | Shorten the prebake and monitor the final bake early. |
| Cups stick to the pan | Too little grease or cheese overflow | Grease the wells and keep cheese within the shells. |
| Filling falls out | Cups are overfilled or lifted immediately | Reduce the portion and rest for 5 minutes. |
| Filling tastes too salty | Salty bacon and cheese plus added salt | Taste the cooked mixture before adding salt. |
| Cups are hotter than expected | Jalapeño heat varies | Use fewer peppers and offer extra heat separately next time. |
Flavor Variations
Milder cheeseburger cups: Use one small jalapeño with its membranes removed, or replace it with a little finely diced green bell pepper. The dish will have less popper flavor but keeps the creamy bacon-cheddar filling.
Pepper Jack version: Replace half the cheddar with Pepper Jack. Check the heat level before adding extra red pepper flakes or hot sauce.
Pickle cheeseburger finish: Add finely chopped drained dill pickles after baking, along with a little mustard or burger sauce. Keeping pickles out of the skillet helps maintain a thicker filling.
Smoky barbecue version: Offer a small drizzle of barbecue sauce at the table. Mixing a large amount into the filling can make the shells soggy and increase sweetness.
Cabbage alternative: The filling can be served in separately cooked cabbage leaves, but that is a different preparation with a softer, vegetable-based shell. It needs its own portioning and cooking adjustments; the tortilla recipe is not automatically low-carb because a cabbage option is mentioned.
Beef filling bowl: Skip the shells and spoon the hot filling over chopped lettuce after it has cooled slightly. Add pickles and fresh vegetables. This changes the serving style and nutrition, but is a practical way to use extra filling.
What to Serve Alongside
For dinner, pair three cups with a crisp green salad, slaw, or roasted vegetables. A fresh side helps balance the bacon and creamy cheese.
For an appetizer spread, serve two cups per person alongside vegetable sticks and a simple dip. Set out sour cream, ranch, and burger sauce in separate bowls so guests can choose their own finish.
For a more substantial meal, add oven fries or potato wedges. Since the cups already include tortilla shells, you do not need another bread component unless you want it.
Make-Ahead Instructions
Cook the filling up to a day ahead and refrigerate promptly in a shallow airtight container. Store the reserved bacon separately. Keep the tortillas unfilled until close to baking time.
When ready to serve, prebake the shells and warm the filling in a skillet, stirring frequently. Reheat the filling to 165°F before assembling. Add a small splash of water only if needed to prevent scorching, then let that moisture evaporate so the mixture is thick again.
Fill the shells, add cheddar, and complete the final bake. This sequence is more reliable for crispness than refrigerating filled shells overnight.
You can cut the tortilla rounds ahead and keep them tightly covered according to the tortilla package’s storage instructions. Do not leave them exposed to air, which makes them harder to shape.
Storage and Reheating
Refrigerator
Refrigerate leftovers within 2 hours of cooking, or within 1 hour if temperatures are above 90°F. Store in shallow airtight containers at 40°F or below and use within 3–4 days. Avoid stacking warm cups tightly together.
The shells soften during storage. This is an expected texture change rather than a reason to add more cheese or fat during reheating.
Reheating
Place refrigerated cups on a baking sheet and reheat in a 350°F oven until the centers reach 165°F. Begin checking around 10 minutes, allowing longer as needed. Tent loosely with foil if the edges darken before the filling is hot.
A microwave is convenient but leaves softer tortillas. Use short intervals and check the center temperature. Add fresh toppings after reheating.
Freezing
For best texture, freeze the cooked filling separately for up to 2 months as a quality target. Thaw in the refrigerator, reheat thoroughly, and assemble in freshly prebaked shells.
Assembled cups can be frozen, but the tortillas and cream cheese filling may change texture after thawing. Freeze without sauces or fresh toppings, wrap well, and reheat until the center reaches 165°F.
Serving at a Gathering
Put out smaller portions and replenish as needed. Do not leave a platter at room temperature throughout a long event. Keep hot food at 140°F or above if holding it hot, though extended holding will reduce crispness.
Nutrition Estimate
A broad estimate is approximately 190–240 calories and 12–15 grams of protein per cup, before optional sauces and toppings. Three cups would provide roughly 570–720 calories.
The tortilla size and brand make a substantial difference, as do bacon thickness, beef fat content, and the amount of rendered fat drained away. These figures are illustrative estimates, not a calculated nutrition label.
This tortilla-based recipe contains carbohydrates and is not presented as keto or gluten-free. Check Worcestershire sauce and all packaged ingredients if a specific dietary restriction applies.
Frequently Asked Questions
Can I use a mini muffin pan?
Not with the stated tortilla sizes and portions. A mini pan requires smaller rounds, less filling, and a shorter baking time. Use a standard muffin pan for this version.
Do I need to cook the beef first?
Yes. The filling is fully cooked in the skillet before it goes into the shells. The brief final bake is intended to melt the cheese and crisp the tortilla edges, not to cook raw beef safely.
Can I leave out the cream cheese?
It is the ingredient that gives the filling its jalapeño-popper character and helps bind it. Without it, the filling becomes looser and less creamy. Use a different filling formula if you want a dairy-free version; removing cream cheese alone does not address the cheddar.
Can I use leftover cooked bacon?
Yes, if it has been stored safely. Chop it and divide between the filling and topping. Remember that using older leftovers does not reset their storage clock when added to a new dish.
Why are my tortilla cups chewy?
They may be too thick, insufficiently prebaked, or softened by a wet filling. Thin tortillas, a short prebake, and well-drained beef help. Stored cups will naturally be softer than freshly baked ones.
Can I double the recipe?
Use two standard muffin pans and cook the beef in a large enough skillet, or work in batches. Crowding the meat encourages steaming. If baking two pans at once, allow room for airflow and check both pans because they may brown at different rates.
Can I prepare the entire tray the night before?
The shells are likely to soften. Prepare the filling and tortilla rounds separately, then assemble near serving time for a better result.
Recipe Card
Jalapeño Popper Bacon Cheeseburger Cups
Crisp flour tortilla cups filled with creamy jalapeño beef, bacon, and melted cheddar.
Yield: 12 cups
Servings: 4 dinners or 6 appetizer servings
Prep: 20 minutes
Cooking and baking: 25–30 minutes with overlap
Rest: 5 minutes
Total: About 45–55 minutes
Oven: 375°F
Ingredients
- 12 thin flour tortilla rounds, 4½–5 inches across
- 1–2 teaspoons neutral oil or cooking spray
- 1 pound 90% lean ground beef
- 6 slices bacon
- ½ small onion, finely diced
- 2 medium jalapeños, finely diced; remove membranes for less heat
- 2 garlic cloves, minced
- 4 ounces block cream cheese, softened
- 1½ cups shredded cheddar, divided
- 1 teaspoon Worcestershire sauce
- 1 teaspoon yellow mustard
- ½ teaspoon smoked paprika
- ¼ teaspoon garlic powder
- ¼ teaspoon black pepper
- Up to ¼ teaspoon fine salt, optional
- Optional toppings: drained chopped pickles, green onions, sour cream, or burger sauce
Instructions
- Heat the oven to 375°F. Lightly grease a standard 12-well muffin pan.
- Warm tortilla rounds until flexible. Press into the wells, lightly oil, and prebake for 5–7 minutes until beginning to hold their shape.
- Cook bacon in a skillet until crisp. Drain and crumble. Reserve one-third for topping. Leave about 1 teaspoon drippings in the skillet.
- Cook beef and onion, breaking up the meat, for about 6–8 minutes. Add jalapeños and cook 2–3 minutes more. Add garlic for 30 seconds. Verify that the beef reaches 160°F, then drain excess grease.
- Reduce heat to low. Stir in Worcestershire, mustard, paprika, garlic powder, and pepper. Add cream cheese and stir until creamy. Fold in ½ cup cheddar and the bacon for the filling. Taste before adding optional salt.
- Divide the warm mixture among shells, beginning with about 3 tablespoons each. Do not overfill; reserve extra filling if the pan is small. Top with the remaining 1 cup cheddar.
- Bake 8–12 minutes until cheese is melted and tortilla edges are golden. Rest 5 minutes, remove carefully, and finish with reserved bacon and optional toppings.
Storage: Refrigerate promptly and use within 3–4 days. Reheat leftovers to 165°F. Shells are crispest when freshly baked.
Estimated nutrition: About 190–240 calories per cup before optional toppings; actual values vary.
Development note: Suggested formula developed from the title; not kitchen-tested. Pan size, tortilla thickness, and filling yield may require adjustment.
Print
Jalapeño Popper Bacon Cheeseburger Cups
Description
Crisp flour tortilla cups filled with creamy jalapeño beef, bacon, and melted cheddar.
Yield: 12 cups
Servings: 4 dinners or 6 appetizer servings
Prep: 20 minutes
Cooking and baking: 25–30 minutes with overlap
Rest: 5 minutes
Total: About 45–55 minutes
Oven: 375°F
Ingredients
- 12 thin flour tortilla rounds, 4½–5 inches across
- 1–2 teaspoons neutral oil or cooking spray
- 1 pound 90% lean ground beef
- 6 slices bacon
- ½ small onion, finely diced
- 2 medium jalapeños, finely diced; remove membranes for less heat
- 2 garlic cloves, minced
- 4 ounces block cream cheese, softened
- 1½ cups shredded cheddar, divided
- 1 teaspoon Worcestershire sauce
- 1 teaspoon yellow mustard
- ½ teaspoon smoked paprika
- ¼ teaspoon garlic powder
- ¼ teaspoon black pepper
- Up to ¼ teaspoon fine salt, optional
- Optional toppings: drained chopped pickles, green onions, sour cream, or burger sauce
Instructions
- Heat the oven to 375°F. Lightly grease a standard 12-well muffin pan.
- Warm tortilla rounds until flexible. Press into the wells, lightly oil, and prebake for 5–7 minutes until beginning to hold their shape.
- Cook bacon in a skillet until crisp. Drain and crumble. Reserve one-third for topping. Leave about 1 teaspoon drippings in the skillet.
- Cook beef and onion, breaking up the meat, for about 6–8 minutes. Add jalapeños and cook 2–3 minutes more. Add garlic for 30 seconds. Verify that the beef reaches 160°F, then drain excess grease.
- Reduce heat to low. Stir in Worcestershire, mustard, paprika, garlic powder, and pepper. Add cream cheese and stir until creamy. Fold in ½ cup cheddar and the bacon for the filling. Taste before adding optional salt.
- Divide the warm mixture among shells, beginning with about 3 tablespoons each. Do not overfill; reserve extra filling if the pan is small. Top with the remaining 1 cup cheddar.
- Bake 8–12 minutes until cheese is melted and tortilla edges are golden. Rest 5 minutes, remove carefully, and finish with reserved bacon and optional toppings.
Storage: Refrigerate promptly and use within 3–4 days. Reheat leftovers to 165°F. Shells are crispest when freshly baked.
Estimated nutrition: About 190–240 calories per cup before optional toppings; actual values vary.
Development note: Suggested formula developed from the title; not kitchen-tested. Pan size, tortilla thickness, and filling yield may require adjustment.