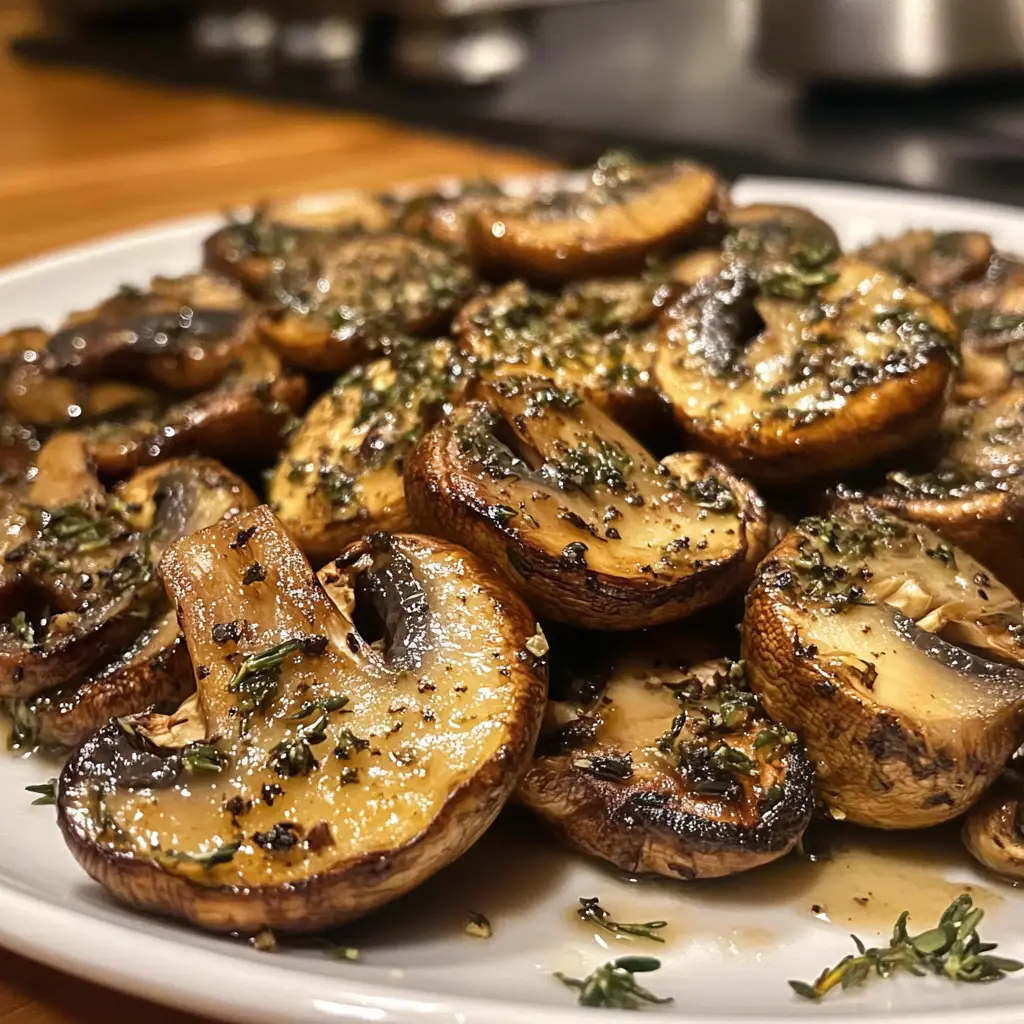
Introduction to Roasted Garlic Herb Mushrooms
Ah, the aroma of roasted garlic wafting through the kitchen! It’s like a warm hug on a chilly day. I remember the first time I made Roasted Garlic Herb Mushrooms. It was a cozy evening, and I had friends over for dinner. I wanted to impress them with something simple yet delicious. As I tossed the mushrooms with garlic and fresh herbs, I could hardly wait for them to roast in the oven. The anticipation was almost as delightful as the dish itself!
These mushrooms are not just a side dish; they’re a celebration of flavors. The earthy taste of the mushrooms combined with the rich, buttery notes of roasted garlic creates a symphony in your mouth. And let’s not forget the fresh herbs! They add a burst of color and freshness that makes this dish truly special. I often find myself making these mushrooms for gatherings, potlucks, or even just a quiet night in. They’re versatile and can complement any meal, from grilled meats to a simple pasta dish.
What I love most about this recipe is its simplicity. With just a handful of ingredients, you can create something that feels gourmet. Plus, it’s a fantastic way to showcase seasonal produce. Whether you’re using button mushrooms, cremini, or even shiitake, each variety brings its own unique flavor to the table. So, let’s dive into the world of Roasted Garlic Herb Mushrooms and discover how to make this delightful dish that will surely become a favorite in your home!
Ingredients for Roasted Garlic Herb Mushrooms
Gathering the right ingredients is like setting the stage for a beautiful performance. Each component plays its part in creating the delightful symphony of flavors in Roasted Garlic Herb Mushrooms. Here’s what you’ll need to bring this dish to life!
Main Ingredients
- 1 pound of fresh mushrooms (button, cremini, or shiitake work beautifully)
- 4 cloves of garlic, minced (the more, the merrier!)
- 3 tablespoons of olive oil (extra virgin for that rich flavor)
- 1 teaspoon of salt (to enhance all those lovely flavors)
- 1/2 teaspoon of black pepper (for a little kick)
- 2 tablespoons of fresh herbs (like thyme, rosemary, or parsley, finely chopped)
When selecting mushrooms, I always opt for firm, plump ones. They should feel heavy for their size and have a fresh, earthy smell. If you can, visit a local farmer’s market for the best quality. Fresh herbs are also key; they should be vibrant and fragrant. Trust me, the difference is noticeable!
Optional Add-ons
- 1 tablespoon of balsamic vinegar (for a tangy twist)
- 1/4 teaspoon of red pepper flakes (if you like a bit of heat)
- Grated Parmesan cheese (to sprinkle on top before serving)
- Chopped nuts (like walnuts or pine nuts for added crunch)
Feel free to get creative! Sometimes, I toss in a splash of balsamic vinegar for a sweet and tangy flavor. Or, if I’m in the mood for a little heat, a pinch of red pepper flakes does the trick. The beauty of this recipe is its flexibility. You can easily adapt it to suit your taste or what you have on hand. So, gather your ingredients, and let’s get cooking!
How to Prepare Roasted Garlic Herb Mushrooms
Now that we have our ingredients ready, it’s time to roll up our sleeves and get cooking! Preparing Roasted Garlic Herb Mushrooms is a delightful process that fills your kitchen with mouthwatering aromas. I always find that the act of cooking is just as enjoyable as the eating. So, let’s dive into the steps!
Step 1: Clean and Prepare the Mushrooms
First things first, we need to clean our mushrooms. I like to gently wipe them with a damp cloth or paper towel. Mushrooms are like little sponges, and soaking them in water can make them soggy. Just a quick wipe will do the trick!
Tips for Cleaning Mushrooms
- Use a damp cloth instead of rinsing them under water.
- Trim the stems if they look dry or tough.
- Keep the mushrooms whole for roasting; they’ll hold their flavor better!
Step 2: Prepare the Garlic and Herbs
Next, let’s tackle the garlic and herbs. I love the smell of freshly minced garlic; it’s like a magic potion for flavor! I usually mince the garlic finely so it can infuse every bite of the mushrooms. As for the herbs, I chop them just enough to release their fragrant oils.
Tips for Choosing Fresh Herbs
- Look for vibrant green leaves without any wilting.
- Smell the herbs! Fresh herbs should have a strong, pleasant aroma.
- Use a mix of herbs for a more complex flavor profile.
Step 3: Combine Ingredients
Now comes the fun part—mixing everything together! In a large bowl, I combine the cleaned mushrooms, minced garlic, olive oil, salt, pepper, and chopped herbs. I like to use my hands to toss everything gently. It’s a great way to feel connected to the food!
Tips for Mixing Flavors
- Make sure the mushrooms are evenly coated with oil and seasonings.
- Don’t be afraid to get your hands in there; it’s part of the fun!
- Let the mixture sit for a few minutes to allow the flavors to meld.
Step 4: Roast the Mushrooms
Finally, it’s time to roast! I spread the mushroom mixture in a single layer on a baking sheet. This helps them roast evenly and get that lovely golden color. I pop them in a preheated oven and let the magic happen!
Tips for Achieving Perfect Roasting
- Preheat your oven to 400°F (200°C) for the best results.
- Don’t overcrowd the baking sheet; give them space to breathe.
- Stir the mushrooms halfway through roasting for even cooking.
As the mushrooms roast, I can hardly contain my excitement. The aroma fills the kitchen, and I know I’m in for a treat. In just a short while, I’ll have a dish that’s bursting with flavor and ready to impress!
Equipment Needed for Roasted Garlic Herb Mushrooms
Before we dive into the delicious world of Roasted Garlic Herb Mushrooms, let’s make sure we have the right tools at our disposal. Having the right equipment can make the cooking process smoother and more enjoyable. Here’s what you’ll need:
- Baking Sheet: A sturdy baking sheet is essential for roasting the mushrooms evenly. If you don’t have one, a large oven-safe dish will work just fine.
- Mixing Bowl: A large bowl is perfect for combining all the ingredients. If you’re in a pinch, any bowl will do, just make sure it’s big enough to toss everything together!
- Measuring Spoons: Accurate measurements are key to achieving the best flavor. If you don’t have measuring spoons, you can use a regular spoon, but keep in mind that the results may vary.
- Knife and Cutting Board: A sharp knife and a sturdy cutting board are necessary for chopping garlic and herbs. If you’re short on space, a small cutting board will work just as well.
- Spatula or Tongs: These tools are great for stirring the mushrooms halfway through roasting. If you don’t have either, a wooden spoon can do the trick!
With these simple tools, you’ll be well on your way to creating a mouthwatering dish of Roasted Garlic Herb Mushrooms. Remember, cooking is all about improvisation, so don’t hesitate to use what you have on hand. Let’s get cooking!
Variations of Roasted Garlic Herb Mushrooms
One of the things I adore about Roasted Garlic Herb Mushrooms is their versatility. Just like a blank canvas, you can add your own flair and creativity to this dish. Here are a few variations that I’ve tried and loved:
- Asian-Inspired: Add a splash of soy sauce and a sprinkle of sesame seeds before roasting. This gives the mushrooms a delightful umami flavor that pairs beautifully with rice or noodles.
- Italian Twist: Mix in some sun-dried tomatoes and a sprinkle of Italian seasoning. This variation is perfect for tossing with pasta or serving on bruschetta.
- Cheesy Delight: For a rich and creamy version, add a dollop of cream cheese or goat cheese before roasting. The cheese melts beautifully, creating a luscious sauce.
- Herb Medley: Experiment with different herbs like basil, oregano, or dill. Each herb brings its own unique flavor, making the dish feel fresh and exciting every time.
These variations not only keep things interesting but also allow you to tailor the dish to your taste preferences or the ingredients you have on hand. I often find myself trying new combinations, and it’s always a delightful surprise! So, don’t hesitate to get creative and make this recipe your own.
Cooking Notes for Roasted Garlic Herb Mushrooms
As I’ve journeyed through the delightful world of Roasted Garlic Herb Mushrooms, I’ve picked up a few cooking notes that can elevate your dish to new heights. These little tips and tricks can make a big difference in flavor and texture, so let’s dive in!
- Freshness Matters: Always use the freshest ingredients you can find. Fresh mushrooms and herbs not only taste better but also enhance the overall dish.
- Don’t Rush the Roasting: Allow the mushrooms to roast until they’re golden brown and caramelized. This brings out their natural sweetness and adds depth to the flavor.
- Experiment with Oils: While olive oil is my go-to, feel free to try other oils like avocado or garlic-infused oil for a unique twist.
- Seasoning is Key: Taste your mixture before roasting. Adjust the salt and pepper to your liking, as this can make all the difference in the final dish.
- Leftovers are Gold: If you have any leftovers, they make a fantastic addition to omelets, salads, or grain bowls. Don’t let them go to waste!
These cooking notes have helped me refine my approach to making Roasted Garlic Herb Mushrooms. I hope they inspire you to experiment and enjoy the process as much as the delicious results!
Serving Suggestions for Roasted Garlic Herb Mushrooms
Now that we’ve created a beautiful dish of Roasted Garlic Herb Mushrooms, it’s time to think about how to serve them. Presentation can elevate the experience, and I love to get a little creative! Here are some of my favorite serving suggestions that will make your mushrooms shine:
- As a Side Dish: These mushrooms pair wonderfully with grilled meats, like chicken or steak. Their rich flavors complement the savory notes of the main dish.
- On Toast: Serve the roasted mushrooms on a slice of crusty bread or toasted baguette. A drizzle of balsamic glaze on top adds a touch of sweetness!
- In Pasta: Toss the mushrooms with your favorite pasta and a splash of olive oil for a quick and satisfying meal. Add some grated Parmesan for an extra layer of flavor.
- In Salads: Mix them into a fresh salad for a warm, hearty touch. They add a delightful earthiness that balances out crisp greens.
- As a Topping: Use them as a topping for pizzas or flatbreads. The roasted garlic and herbs will bring a burst of flavor to every bite!
These serving ideas not only enhance the dish but also allow you to enjoy Roasted Garlic Herb Mushrooms in various ways. I often find myself experimenting with different pairings, and it’s always a hit! So, don’t hesitate to get creative and make this dish your own. Happy cooking!
Tips for Perfect Roasted Garlic Herb Mushrooms
As I’ve perfected my recipe for Roasted Garlic Herb Mushrooms, I’ve gathered a few golden nuggets of wisdom that can help you achieve mushroom perfection every time. These tips are like little secrets that can elevate your dish from good to absolutely fantastic!
- Choose the Right Mushrooms: Different mushrooms bring different flavors. I love using a mix of button and cremini for a delightful contrast. Experiment with shiitake or portobello for a heartier bite!
- Don’t Skip the Marinating: If you have time, let the mushroom mixture sit for about 15 minutes before roasting. This allows the flavors to meld beautifully, making each bite more flavorful.
- Use High-Quality Olive Oil: A good quality extra virgin olive oil can make a world of difference. It adds richness and depth that enhances the overall taste of the dish.
- Watch the Roasting Time: Keep an eye on your mushrooms as they roast. Depending on your oven, they may need a little more or less time. You want them golden brown and tender, not mushy!
- Finish with Fresh Herbs: For an extra pop of flavor, sprinkle some fresh herbs on top just before serving. It adds a burst of color and freshness that’s simply irresistible!
With these tips in your back pocket, you’re well on your way to creating the most delicious Roasted Garlic Herb Mushrooms that will impress your family and friends. Enjoy the process, and happy cooking!
Breakdown of Time for Roasted Garlic Herb Mushrooms
When it comes to cooking, timing is everything! Knowing how long each step takes can help you plan your meal perfectly. Here’s a quick breakdown of the time needed to prepare Roasted Garlic Herb Mushrooms:
- Prep Time: 15 minutes
- Cooking Time: 25 minutes
- Total Time: 40 minutes
In just 40 minutes, you can have a delicious dish ready to impress! The prep time includes cleaning and chopping the mushrooms, garlic, and herbs. The cooking time is when the magic happens in the oven, transforming simple ingredients into a flavorful masterpiece. I love how quickly this dish comes together, making it perfect for a weeknight dinner or a last-minute gathering. So, let’s get cooking and enjoy every minute of it!
Nutritional Information for Roasted Garlic Herb Mushrooms
As a passionate home cook, I always find it important to know what I’m putting on the table. Roasted Garlic Herb Mushrooms not only taste amazing but also offer some great nutritional benefits. Here’s a quick look at the nutritional information for a serving of this delightful dish:
- Calories: Approximately 120 calories
- Protein: 3 grams
- Fat: 10 grams (mostly healthy fats from olive oil)
- Carbohydrates: 7 grams
- Fiber: 2 grams
- Sodium: 200 mg (can be adjusted based on salt usage)
- Vitamins & Minerals: Rich in Vitamin D, B vitamins, and antioxidants
These mushrooms are low in calories and packed with flavor, making them a fantastic addition to any meal. Plus, they’re a great source of fiber, which is essential for digestion. I love how I can enjoy a delicious dish while also nourishing my body. So, whether you’re serving them as a side or incorporating them into a main dish, you can feel good about enjoying Roasted Garlic Herb Mushrooms!
Frequently Asked Questions about Roasted Garlic Herb Mushrooms
As I’ve shared my love for Roasted Garlic Herb Mushrooms, I’ve often received questions from fellow home cooks eager to try this delightful dish. I love answering these queries because it shows just how much excitement there is around cooking! Here are some of the most frequently asked questions, along with my personal insights:
Can I use different types of mushrooms?
Absolutely! While I often use button or cremini mushrooms, you can experiment with shiitake, portobello, or even oyster mushrooms. Each type brings its own unique flavor and texture, making the dish even more exciting. Just remember to adjust the cooking time if you’re using larger mushrooms like portobello!
How do I store leftovers?
If you have any leftovers (which is rare in my house!), store them in an airtight container in the refrigerator. They’ll keep well for about 3-4 days. I love reheating them in a skillet for a quick snack or adding them to salads and omelets!
Can I make this dish ahead of time?
Yes, you can! I often prepare the mushroom mixture a few hours in advance and let it sit in the fridge. Just remember to bring it back to room temperature before roasting. This allows the flavors to meld beautifully, making each bite even more delicious!
What can I serve with Roasted Garlic Herb Mushrooms?
The possibilities are endless! I love serving them alongside grilled meats, on top of pasta, or even as a topping for bruschetta. They also make a fantastic addition to grain bowls or salads. Get creative and let your taste buds guide you!
Can I freeze Roasted Garlic Herb Mushrooms?
While I recommend enjoying them fresh for the best flavor, you can freeze the roasted mushrooms. Just let them cool completely, then transfer them to a freezer-safe container. They’ll keep for about 2-3 months. When you’re ready to enjoy them, simply reheat in the oven or skillet!
These questions reflect the curiosity and enthusiasm that comes with cooking. I hope my answers inspire you to dive into the world of Roasted Garlic Herb Mushrooms and create your own culinary adventures. Happy cooking!
Conclusion on Roasted Garlic Herb Mushrooms
As I wrap up my culinary journey with Roasted Garlic Herb Mushrooms, I can’t help but reflect on why this dish holds a special place in my heart. It’s not just about the delightful flavors that dance on your palate; it’s about the memories created around the dinner table. This recipe is a testament to the beauty of simplicity, allowing fresh ingredients to shine through with minimal fuss.
Whether you’re hosting a gathering or enjoying a quiet night in, these mushrooms are the perfect companion. They’re versatile, easy to prepare, and can elevate any meal. Plus, the health benefits packed into each bite make them a guilt-free indulgence. I love how they can be dressed up or down, fitting seamlessly into any occasion.
So, if you’re looking to impress your family and friends or simply treat yourself to something delicious, I encourage you to give Roasted Garlic Herb Mushrooms a try. With just a few ingredients and a little love, you can create a dish that’s not only satisfying but also brings joy to your kitchen. Happy cooking, and may your culinary adventures be as delightful as the flavors of these mushrooms!