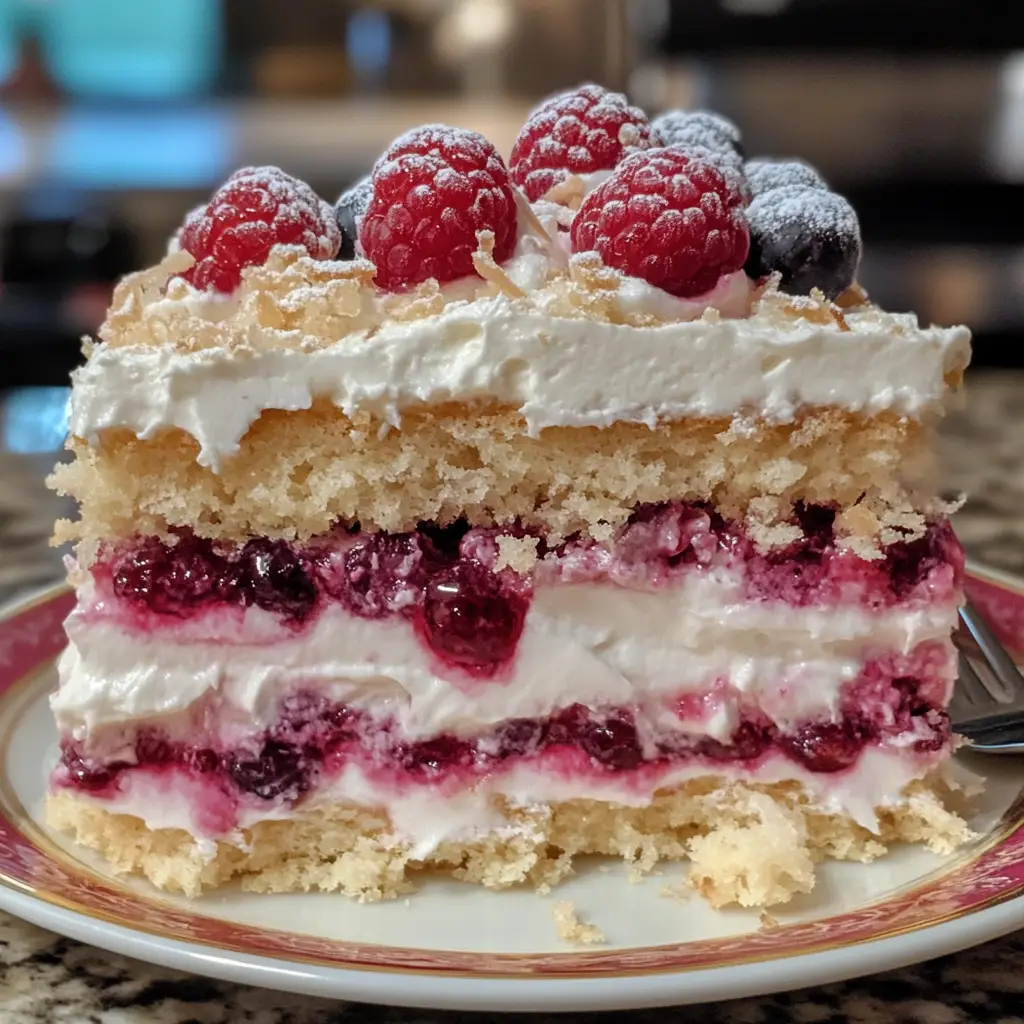
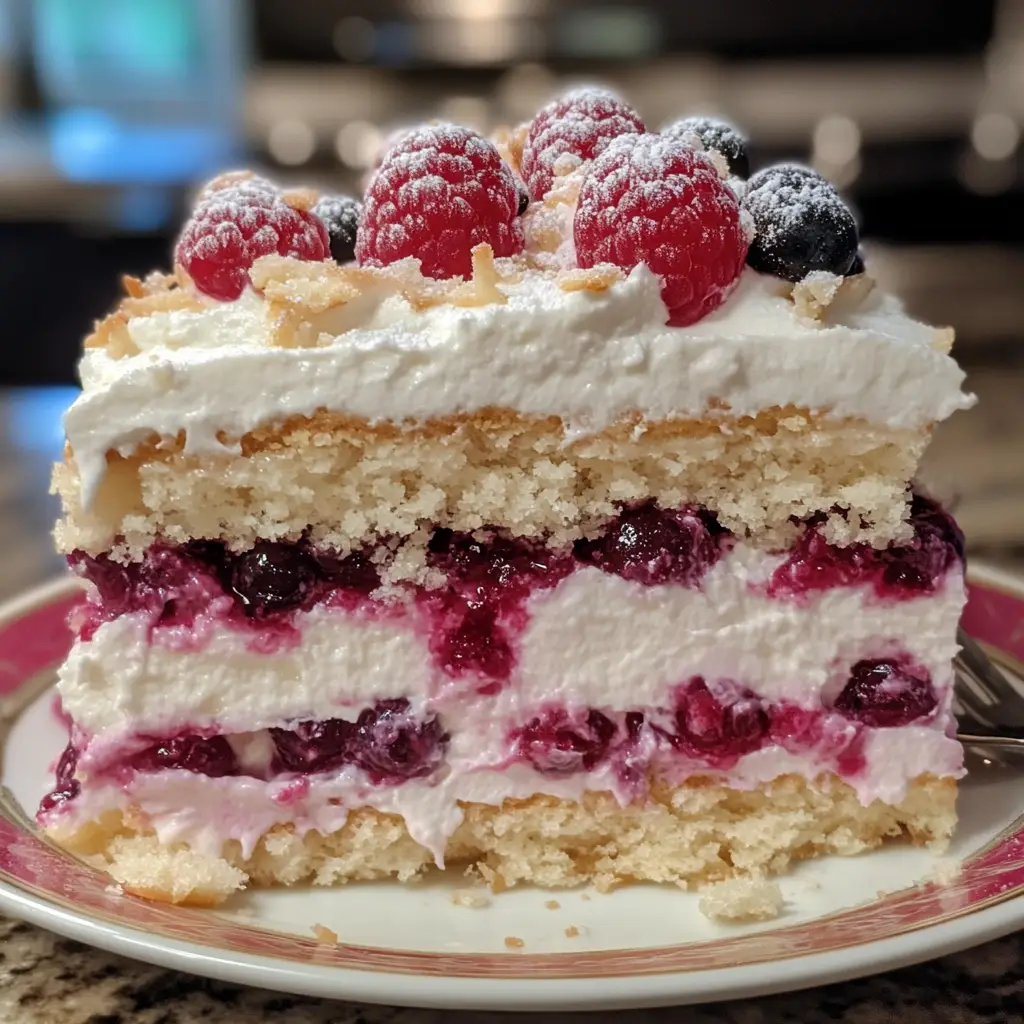
Introduction to Coconut Berry Layered Icebox Cake
As a busy mom, I know how precious time can be, especially when it comes to preparing desserts. That’s why I absolutely adore this Coconut Berry Layered Icebox Cake! It’s a delightful treat that requires no baking, making it a quick solution for those hot summer days when you want something refreshing yet impressive. The combination of creamy coconut and vibrant mixed berries creates a symphony of flavors that will have your loved ones asking for seconds. Trust me, this dessert is not just easy to make; it’s a showstopper that will brighten any gathering!
Why You’ll Love This Coconut Berry Layered Icebox Cake
This Coconut Berry Layered Icebox Cake is a dream come true for busy moms and professionals alike. It’s incredibly easy to whip up, taking just 20 minutes of your time. Plus, it’s a no-bake dessert, so you can avoid the heat of the oven. The refreshing taste of coconut paired with juicy berries makes it a crowd-pleaser. You’ll love how it brings smiles to faces without the stress of complicated recipes!
Ingredients for Coconut Berry Layered Icebox Cake
Gathering the right ingredients is the first step to creating this delightful Coconut Berry Layered Icebox Cake. Here’s what you’ll need:
- Coconut cream: This rich and creamy base gives the cake its tropical flavor. Look for full-fat coconut cream for the best results.
- Mixed berries: A colorful mix of strawberries, blueberries, and raspberries adds a burst of freshness. Feel free to use your favorites or whatever is in season!
- Whipped cream: Light and fluffy, it adds a lovely texture. You can use store-bought or make your own for a personal touch.
- Graham crackers: These provide a crunchy layer that contrasts beautifully with the creamy filling. You can substitute with gluten-free crackers if needed.
- Shredded coconut: This adds a delightful chewiness and enhances the coconut flavor. Toast it lightly for an extra layer of flavor.
- Honey or maple syrup: A natural sweetener that balances the flavors. Maple syrup is a great vegan alternative.
For exact measurements, check the bottom of the article where you can find everything listed for easy printing. Enjoy the process of gathering these ingredients, as each one plays a vital role in creating this refreshing dessert!

How to Make Coconut Berry Layered Icebox Cake
Step 1: Prepare the Coconut Mixture
Start by grabbing a mixing bowl. Add the coconut cream and honey together. Use a whisk or spatula to mix them until they’re well combined. You want a smooth and creamy texture, so take your time. This mixture is the heart of your Coconut Berry Layered Icebox Cake, bringing that tropical flavor to life. The sweetness of the honey will balance perfectly with the tartness of the berries!
Step 2: Fold in the Whipped Cream
Next, take your whipped cream and gently fold it into the coconut mixture. Use a spatula and a light hand to combine them. The goal is to keep the whipped cream airy and fluffy. This step is crucial for achieving that light texture in your cake. Remember, we want it to be as light as a cloud, so be gentle and patient as you mix!
Step 3: Layer the Graham Crackers
Now it’s time to build the base of your cake! Grab your baking dish and layer the graham crackers at the bottom. You can break them if needed to fit perfectly. This crunchy layer will provide a delightful contrast to the creamy filling. Make sure to cover the entire bottom, as this will be the foundation of your Coconut Berry Layered Icebox Cake!
Step 4: Add the Coconut Mixture
Spread a generous layer of the coconut mixture over the graham crackers. Use a spatula to smooth it out evenly. This creamy layer is where the magic happens, so don’t be shy! Make sure every cracker is covered, as this will help keep everything together. The coconut flavor will seep into the crackers, creating a delicious harmony of taste!
Step 5: Layer the Mixed Berries
Now, it’s time to add a burst of color and flavor! Scatter a layer of mixed berries on top of the coconut mixture. You can arrange them however you like, but I love a random, colorful approach. The berries will add freshness and a pop of sweetness. Plus, they look so pretty peeking through the layers of your Coconut Berry Layered Icebox Cake!
Step 6: Repeat the Layers
Continue the layering process by repeating the steps until all your ingredients are used up. Start with graham crackers, then the coconut mixture, and finally the berries. Finish with a final layer of the coconut mixture on top. This will create a beautiful, towering dessert that’s as pleasing to the eye as it is to the palate. Each bite will be a delightful surprise!
Step 7: Garnish and Refrigerate
To finish, sprinkle shredded coconut and a few extra berries on top for garnish. This adds a lovely touch and makes your dessert look even more inviting. Cover the dish with plastic wrap and refrigerate for at least 4 hours, or overnight if you can wait! This chilling time allows the flavors to meld beautifully, making each slice a refreshing delight!
Tips for Success
- Use full-fat coconut cream for a richer flavor and creamier texture.
- Let the Coconut Berry Layered Icebox Cake sit overnight for the best taste.
- Experiment with different berries based on what’s in season or your family’s favorites.
- For a fun twist, add a splash of vanilla extract to the coconut mixture.
- Keep the cake covered in the fridge to maintain its freshness.
 Equipment Needed
- Mixing bowls: A set of various sizes is handy. You can also use any large bowl you have.
- Spatula: A rubber spatula works best for folding. A wooden spoon can be a good alternative.
- Baking dish: A 9×9 inch dish is ideal, but any similar-sized dish will do.
- Whisk: A hand whisk is perfect for mixing. A fork can work in a pinch!
Variations
- Vegan Option: Substitute coconut whipped cream and maple syrup for a completely plant-based dessert.
- Chocolate Lovers: Add a layer of chocolate ganache between the coconut and berry layers for a decadent twist.
- Nutty Crunch: Incorporate crushed nuts, like almonds or pecans, between the layers for added texture and flavor.
- Fruit Fusion: Experiment with different fruits, such as peaches or mangoes, for a tropical flair.
- Gluten-Free: Use gluten-free graham crackers or a nut-based crust to make this dessert suitable for gluten-sensitive guests.
Serving Suggestions
- Pair your Coconut Berry Layered Icebox Cake with a refreshing glass of iced tea or lemonade.
- Serve with a dollop of extra whipped cream on the side for added indulgence.
- Garnish each slice with a sprig of mint for a pop of color and freshness.
- Consider a light fruit salad as a side for a balanced dessert experience.
FAQs about Coconut Berry Layered Icebox Cake
Can I make this Coconut Berry Layered Icebox Cake ahead of time?
Absolutely! In fact, making it a day in advance enhances the flavors. Just cover it well and refrigerate. The longer it sits, the more delicious it becomes!
What can I substitute for graham crackers?
If you’re looking for alternatives, try using gluten-free graham crackers or even crushed cookies like Oreos for a chocolatey twist. A nut-based crust is also a fantastic option!
How do I store leftovers?
Store any leftovers in an airtight container in the refrigerator. It should stay fresh for up to three days, but I doubt it will last that long!
Can I use frozen berries instead of fresh?
Yes, frozen berries work well! Just make sure to thaw and drain them before layering to avoid excess moisture in your Coconut Berry Layered Icebox Cake.
Is this dessert suitable for a vegan diet?
Definitely! Simply swap the whipped cream for coconut whipped cream and use maple syrup instead of honey. You’ll have a delightful vegan treat that everyone can enjoy!
Final Thoughts
Creating this Coconut Berry Layered Icebox Cake is more than just making a dessert; it’s about bringing joy to your table. Each layer tells a story of summer, family gatherings, and sweet moments shared. The refreshing combination of coconut and berries is like a mini-vacation for your taste buds, transporting you to a tropical paradise with every bite. Plus, the ease of preparation means you can focus on what truly matters—making memories with your loved ones. So, roll up your sleeves, dive into this delightful recipe, and let the smiles unfold as you serve this beautiful cake!
Print
Coconut Berry Layered Icebox Cake Delights Your Taste Buds!
- Total Time: 4 hours 20 minutes
- Yield: 8 servings 1x
- Diet: Vegetarian
Description
A refreshing and delightful dessert that combines layers of coconut and mixed berries, perfect for summer gatherings.
Ingredients
- 1 cup coconut cream
- 1 cup mixed berries (strawberries, blueberries, raspberries)
- 1 cup whipped cream
- 1 package of graham crackers
- 1/2 cup shredded coconut
- 1/4 cup honey or maple syrup
Instructions
- In a bowl, mix the coconut cream and honey until well combined.
- In a separate bowl, fold the whipped cream into the coconut mixture.
- In a baking dish, layer graham crackers at the bottom.
- Spread a layer of the coconut mixture over the graham crackers.
- Add a layer of mixed berries on top of the coconut mixture.
- Repeat the layers until all ingredients are used, finishing with a layer of coconut mixture.
- Top with shredded coconut and additional berries for garnish.
- Cover and refrigerate for at least 4 hours or overnight before serving.
Notes
- For a vegan version, use coconut whipped cream and maple syrup.
- Feel free to use any combination of berries you prefer.
- Let the cake sit overnight for the best flavor and texture.
- Prep Time: 20 minutes
- Cook Time: 0 minutes
- Category: Dessert
- Method: No-bake
- Cuisine: American
Nutrition
- Serving Size: 1 slice
- Calories: 250
- Sugar: 15g
- Sodium: 50mg
- Fat: 15g
- Saturated Fat: 10g
- Unsaturated Fat: 3g
- Trans Fat: 0g
- Carbohydrates: 30g
- Fiber: 2g
- Protein: 3g
- Cholesterol: 30mg
Keywords: Coconut Berry Layered Icebox Cake, no-bake dessert, summer dessert, coconut dessert, berry dessert