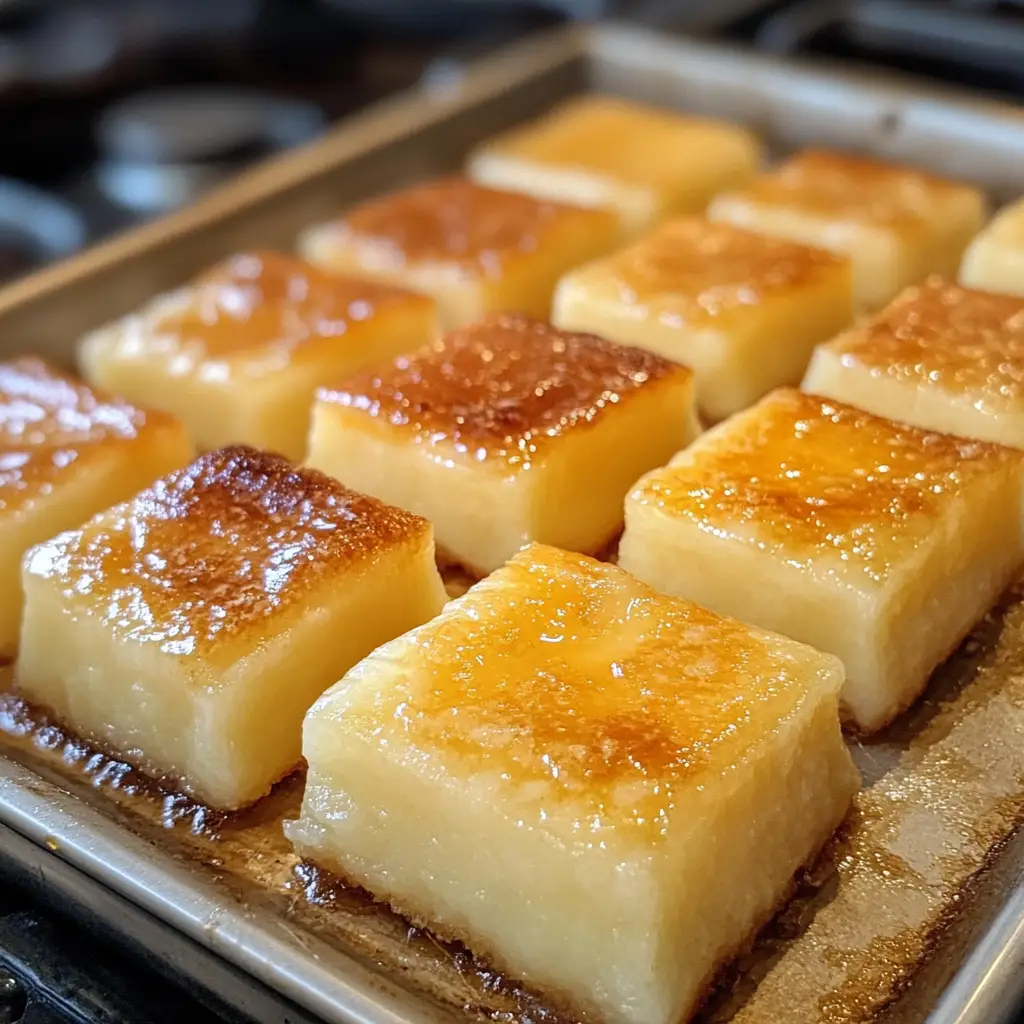
Introduction to Butter Mochi
Have you ever craved a dessert that feels like a warm hug? Butter Mochi is just that! This delightful Hawaiian treat combines the chewy goodness of glutinous rice flour with the rich flavors of coconut milk and butter. It’s perfect for busy moms like us who want to whip up something special without spending hours in the kitchen. Whether you’re looking to impress your loved ones or simply indulge in a sweet moment, this recipe is a quick solution that will leave everyone asking for seconds. Trust me, once you try it, you’ll be hooked!
Why You’ll Love This Butter Mochi
This Butter Mochi recipe is a game-changer for busy days. It’s incredibly easy to make, requiring just a handful of ingredients and minimal prep time. In about an hour, you can have a delicious dessert that’s chewy, rich, and utterly satisfying. Plus, it’s a crowd-pleaser! Your family and friends will rave about it, making you the star of every gathering. Who doesn’t love a sweet treat that brings smiles all around?
Ingredients for Butter Mochi
Gathering the right ingredients is key to making the perfect Butter Mochi. Here’s what you’ll need:
- Glutinous rice flour: This is the star of the show! It gives Butter Mochi its signature chewy texture.
- Sugar: A touch of sweetness balances the rich flavors. You can use granulated sugar or even coconut sugar for a deeper taste.
- Baking powder: This helps the mochi rise slightly, giving it a light and fluffy bite.
- Salt: Just a pinch enhances all the flavors, making each bite more delicious.
- Coconut milk: This creamy ingredient adds richness and a tropical flair. You can substitute with almond milk for a lighter version.
- Unsalted butter: Melted butter brings a luscious flavor. If you prefer a dairy-free option, coconut oil works beautifully.
- Eggs: They help bind everything together, creating a moist texture. For a vegan alternative, try using flax eggs.
- Vanilla extract: A splash of vanilla adds warmth and depth to the flavor profile.
For those who want to get creative, consider adding shredded coconut for extra texture or a hint of chocolate chips for a sweet surprise. You can find the exact measurements for these ingredients at the bottom of the article, ready for printing!
How to Make Butter Mochi
Now that you have all your ingredients ready, let’s dive into making this delightful Butter Mochi! Follow these simple steps, and you’ll have a delicious dessert in no time.
Step 1: Preheat the Oven
First things first, preheat your oven to 350°F (175°C). This step is crucial because it ensures even baking. While the oven warms up, grease a 9×13 inch baking dish with a little butter or cooking spray. This will help your Butter Mochi come out easily once it’s baked.
Step 2: Mix Dry Ingredients
In a large bowl, combine the glutinous rice flour, sugar, baking powder, and salt. Use a whisk to mix them well. This helps to evenly distribute the baking powder, ensuring your mochi rises perfectly. The dry ingredients are the foundation of your Butter Mochi, so take a moment to get this right!
Step 3: Whisk Wet Ingredients
In another bowl, whisk together the coconut milk, melted butter, eggs, and vanilla extract. Make sure the butter isn’t too hot, or it might cook the eggs. You want a smooth, creamy mixture that smells heavenly. This blend adds richness and flavor to your Butter Mochi.
Step 4: Combine Ingredients
Now, pour the wet ingredients into the bowl with the dry ingredients. Stir gently until everything is well combined and smooth. Don’t overmix; just blend until you see no dry flour. This is where the magic happens, transforming simple ingredients into a luscious batter!
Step 5: Pour and Spread
Carefully pour the batter into your prepared baking dish. Use a spatula to spread it evenly. This ensures that every piece of Butter Mochi bakes uniformly. The anticipation is building, and you’re almost there!
Step 6: Bake
Place the baking dish in the preheated oven and bake for 45-50 minutes. Keep an eye on it! You’ll know it’s done when the top is golden brown and a toothpick inserted in the center comes out clean. The aroma wafting through your kitchen will be irresistible!
Step 7: Cool and Serve
Once baked, remove the dish from the oven and let it cool for about 10-15 minutes. This cooling time helps the mochi set. After it’s cooled, cut it into squares. Serve warm or at room temperature, and watch as everyone enjoys this delightful treat!
Tips for Success
- Measure your ingredients accurately for the best results.
- Don’t skip the greasing step; it makes a world of difference when removing the mochi.
- Let the Butter Mochi cool completely before cutting for cleaner squares.
- Experiment with flavors by adding spices like cinnamon or nutmeg.
- Store leftovers in an airtight container to keep them fresh and chewy.
Equipment Needed
- 9×13 inch baking dish: A standard size for even baking. You can use a glass or metal dish.
- Mixing bowls: A set of various sizes is handy for combining ingredients.
- Whisk: Essential for mixing wet ingredients smoothly. A fork can work in a pinch.
- Spatula: Perfect for spreading the batter evenly in the baking dish.
- Measuring cups and spoons: Accurate measurements are key to success!
Variations of Butter Mochi
- Chocolate Chip Butter Mochi: Add a cup of semi-sweet chocolate chips to the batter for a delightful twist that chocolate lovers will adore.
- Matcha Butter Mochi: Incorporate 2 tablespoons of matcha powder into the dry ingredients for a vibrant green color and a unique flavor.
- Pineapple Coconut Butter Mochi: Mix in crushed pineapple for a tropical burst that pairs beautifully with the coconut milk.
- Nutty Butter Mochi: Fold in chopped nuts like macadamia or almonds for added crunch and flavor.
- Vegan Butter Mochi: Substitute eggs with flax eggs and use coconut oil instead of butter for a delicious dairy-free version.
Serving Suggestions for Butter Mochi
- Pair Butter Mochi with a scoop of vanilla ice cream for a delightful contrast in temperature and texture.
- Serve with fresh tropical fruits like mango or pineapple to enhance the Hawaiian vibe.
- Drizzle with chocolate or caramel sauce for an extra indulgent touch.
- Garnish with shredded coconut or chopped nuts for added visual appeal.
- Enjoy with a cup of hot tea or coffee to balance the sweetness.
FAQs about Butter Mochi
As you embark on your Butter Mochi journey, you might have a few questions. Here are some common queries that can help you along the way:
Can I use regular rice flour instead of glutinous rice flour?
No, glutinous rice flour is essential for that chewy texture. Regular rice flour won’t give you the same delightful results.
How do I store leftover Butter Mochi?
Store any leftovers in an airtight container at room temperature for up to three days. If you want to keep it longer, refrigerate it for up to a week.
Can I freeze Butter Mochi?
Absolutely! Wrap individual squares in plastic wrap and place them in a freezer-safe bag. They can last up to three months in the freezer.
What can I serve with Butter Mochi?
Butter Mochi pairs wonderfully with fresh fruits, ice cream, or a drizzle of chocolate sauce. It’s a versatile dessert that complements many flavors!
Is Butter Mochi gluten-free?
Yes! Since it’s made with glutinous rice flour, Butter Mochi is naturally gluten-free, making it a great option for those with gluten sensitivities.
Final Thoughts
Making Butter Mochi is more than just baking; it’s about creating sweet memories in your kitchen. The joy of pulling a golden-brown dish from the oven, the aroma filling your home, and the smiles on your loved ones’ faces as they take their first bite—these moments are priceless. This delightful Hawaiian dessert is not only easy to prepare but also brings a taste of the tropics to your table. So, whether it’s a special occasion or just a Tuesday, treat yourself and your family to this chewy, buttery delight. You deserve it!
PrintButter Mochi: Discover the Best Recipe Today!
- Total Time: 1 hour 5 minutes
- Yield: 12 servings 1x
- Diet: Vegetarian
Description
Butter Mochi is a delicious Hawaiian dessert made with glutinous rice flour, coconut milk, and butter, resulting in a chewy and rich treat.
Ingredients
- 2 cups glutinous rice flour
- 1 cup sugar
- 1 teaspoon baking powder
- 1/2 teaspoon salt
- 1 cup coconut milk
- 1/2 cup unsalted butter, melted
- 2 large eggs
- 1 teaspoon vanilla extract
Instructions
- Preheat the oven to 350°F (175°C) and grease a 9×13 inch baking dish.
- In a large bowl, mix together the glutinous rice flour, sugar, baking powder, and salt.
- In another bowl, whisk together the coconut milk, melted butter, eggs, and vanilla extract.
- Combine the wet ingredients with the dry ingredients and mix until smooth.
- Pour the batter into the prepared baking dish and spread evenly.
- Bake for 45-50 minutes or until the top is golden brown and a toothpick comes out clean.
- Let it cool before cutting into squares and serving.
Notes
- For a richer flavor, you can add shredded coconut to the batter.
- Store leftovers in an airtight container at room temperature for up to 3 days.
- This dessert can be served warm or at room temperature.
- Prep Time: 15 minutes
- Cook Time: 50 minutes
- Category: Dessert
- Method: Baking
- Cuisine: Hawaiian
Nutrition
- Serving Size: 1 square
- Calories: 180
- Sugar: 12g
- Sodium: 150mg
- Fat: 7g
- Saturated Fat: 4g
- Unsaturated Fat: 2g
- Trans Fat: 0g
- Carbohydrates: 25g
- Fiber: 1g
- Protein: 2g
- Cholesterol: 30mg
Keywords: Butter Mochi, Hawaiian dessert, glutinous rice flour, coconut milk


