Introduction to Zucchini Enchilada Roll-Ups
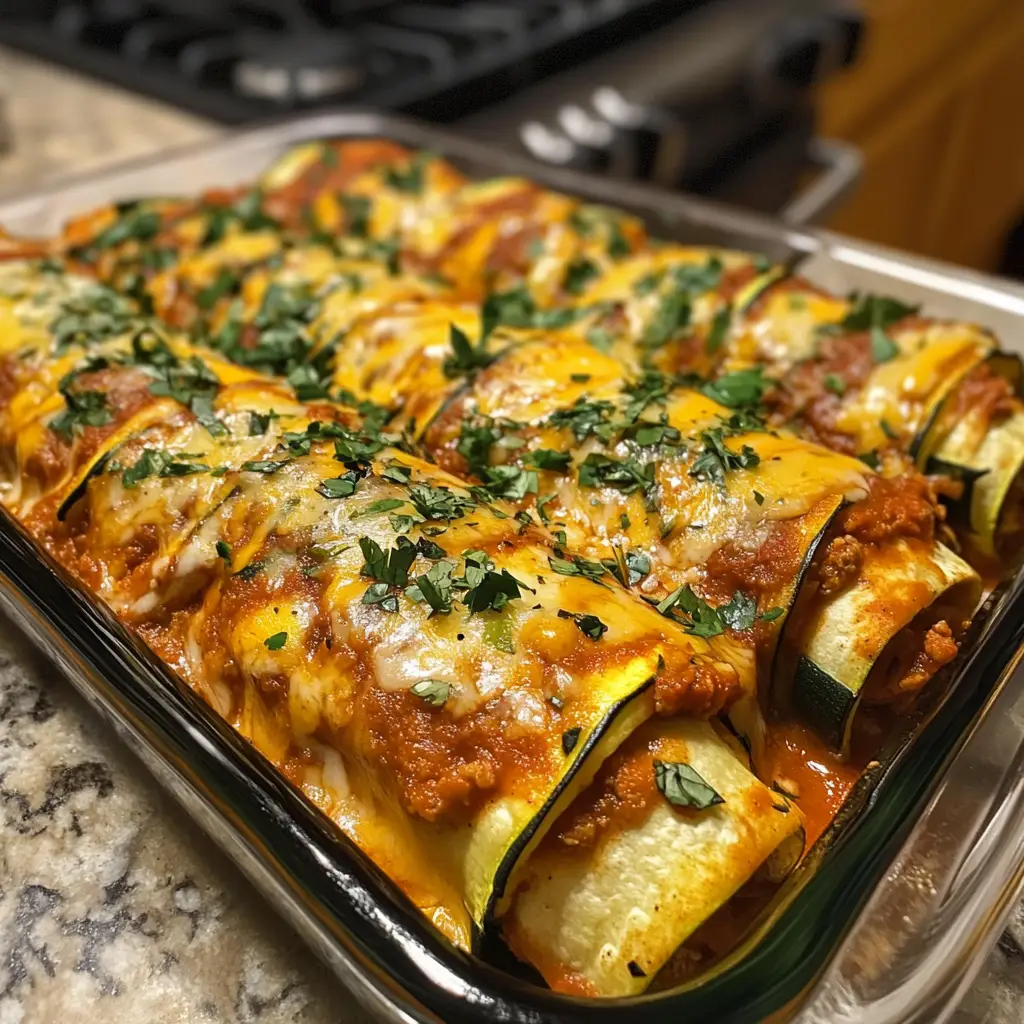
As a passionate home cook, I find joy in experimenting with flavors and textures in the kitchen. One of my favorite culinary adventures has been creating Zucchini Enchilada Roll-Ups. These delightful bites are not just a feast for the eyes but also a celebration of fresh ingredients and vibrant tastes. Imagine tender zucchini wrapped around a savory filling, all smothered in rich enchilada sauce. It’s a dish that brings warmth and comfort, much like a hug from a loved one.
My journey with these roll-ups began on a sunny afternoon when I had an abundance of zucchini from my garden. I wanted to create something that would highlight the vegetable’s natural sweetness while also being a bit indulgent. After a few trials, I discovered the perfect balance of flavors and textures. The result? A dish that’s not only healthy but also bursting with flavor!
What I love most about Zucchini Enchilada Roll-Ups is their versatility. You can customize the filling to suit your taste, whether you prefer a classic cheese blend or a hearty mix of beans and veggies. Plus, they’re a fantastic way to sneak in some extra greens, making them a hit with both kids and adults alike. Every time I serve these roll-ups, I’m met with smiles and satisfied bellies, which is the ultimate reward for any home cook.
So, if you’re looking for a fun and delicious way to enjoy zucchini, you’ve come to the right place! Let’s dive into the ingredients and get started on this culinary adventure together.
Ingredients for Zucchini Enchilada Roll-Ups
Before we embark on this delicious journey, let’s gather our ingredients. Having everything prepped and ready makes the cooking process smoother and more enjoyable. Here’s what you’ll need to create these scrumptious Zucchini Enchilada Roll-Ups.
Main Ingredients
- 4 medium zucchinis (about 1 pound) – Look for firm zucchinis with a vibrant green color. Freshness is key!
- 1 cup ricotta cheese – This creamy cheese adds a lovely richness. You can also use cottage cheese for a lighter option.
- 1 cup shredded mozzarella cheese – I prefer using whole milk mozzarella for its meltiness, but part-skim works too.
- 1 cup enchilada sauce – Store-bought is convenient, but homemade enchilada sauce can elevate the flavors even more.
- 1 teaspoon garlic powder – A little sprinkle of garlic powder brings a warm, aromatic touch.
- 1 teaspoon cumin – This spice adds a lovely earthiness that complements the zucchini beautifully.
- Salt and pepper to taste – Don’t forget to season your filling for the best flavor!
Optional Add-ons
- 1 cup cooked black beans – For added protein and fiber, black beans are a fantastic choice.
- 1/2 cup corn – Sweet corn adds a delightful crunch and sweetness to the filling.
- Chopped fresh cilantro – A sprinkle of cilantro before serving can brighten up the dish.
- Jalapeños or diced green chilies – If you like a bit of heat, these are perfect for spicing things up!
- Additional veggies like bell peppers or spinach – Feel free to sneak in more greens for extra nutrition.
When selecting your ingredients, I always recommend choosing organic when possible, especially for the zucchinis. They tend to have a more robust flavor and are free from harmful pesticides. Plus, supporting local farmers is a win-win! Now that we have our ingredients ready, let’s move on to the fun part—preparing our Zucchini Enchilada Roll-Ups!
How to Prepare Zucchini Enchilada Roll-Ups
Now that we have our ingredients ready, it’s time to roll up our sleeves and dive into the preparation of these delightful Zucchini Enchilada Roll-Ups. I promise, the process is as enjoyable as the final dish! Let’s break it down step by step.
Step 1: Prepare the Zucchini
First things first, we need to prepare our zucchinis. This step is crucial for achieving the perfect roll-up texture. Start by washing the zucchinis thoroughly to remove any dirt. Then, using a vegetable peeler or mandoline, slice the zucchinis lengthwise into thin strips, about 1/8 inch thick. Aim for even slices to ensure they cook uniformly.
Tips for Step 1
- To make slicing easier, you can chill the zucchinis in the fridge for about 30 minutes before cutting. This helps them firm up.
- If you find the slices are too watery, sprinkle a little salt on them and let them sit for 10 minutes. This will draw out excess moisture, making them easier to roll.
Step 2: Make the Filling
Next, let’s whip up the filling! In a mixing bowl, combine the ricotta cheese, shredded mozzarella, garlic powder, cumin, salt, and pepper. If you’re adding any optional ingredients like black beans or corn, now’s the time to mix them in. Stir everything together until well combined. The filling should be creamy and flavorful, ready to be tucked into our zucchini strips.
Tips for Step 2
- Taste the filling before assembling. Adjust the seasoning if needed; a little extra salt or cumin can make a big difference!
- If you prefer a smoother filling, you can blend the ingredients in a food processor for a few seconds.
Step 3: Assemble the Roll-Ups
Now comes the fun part—assembling the roll-ups! Preheat your oven to 375°F (190°C). Take a zucchini strip and place a generous spoonful of the filling at one end. Gently roll it up, tucking in the sides as you go to keep the filling secure. Place the roll-up seam-side down in a baking dish. Repeat this process until all the zucchini strips and filling are used up.
Tips for Step 3
- Don’t overfill the zucchini strips; a little goes a long way! This will help prevent any spills during baking.
- If you have leftover enchilada sauce, drizzle some at the bottom of the baking dish to prevent sticking.
Step 4: Bake the Roll-Ups
Once all the roll-ups are in the dish, pour the enchilada sauce over the top, ensuring each roll is generously coated. Sprinkle any remaining mozzarella cheese on top for that gooey, melty finish. Cover the dish with aluminum foil and bake for about 25 minutes. Then, remove the foil and bake for an additional 10 minutes, or until the cheese is bubbly and golden.
Tips for Step 4
- For an extra crispy top, you can broil the roll-ups for a couple of minutes at the end. Just keep a close eye on them!
- Let the roll-ups sit for a few minutes after baking. This helps them set and makes serving easier.
And there you have it! Your Zucchini Enchilada Roll-Ups are now ready to be enjoyed. The aroma wafting through your kitchen will have everyone eagerly waiting at the table. Let’s move on to the next section, where we’ll discuss the equipment needed for this delightful dish.
Equipment Needed for Zucchini Enchilada Roll-Ups
Before we dive into the kitchen, let’s gather the essential tools for making these Zucchini Enchilada Roll-Ups. Having the right equipment on hand can make the cooking process smoother and more enjoyable. Here’s what you’ll need:
- Vegetable Peeler or Mandoline: This is crucial for slicing the zucchinis into thin strips. If you don’t have a mandoline, a sharp knife will work just fine, but be careful with your fingers!
- Mixing Bowl: A medium-sized bowl is perfect for combining the filling ingredients. I love using a glass bowl so I can see the beautiful colors of the filling.
- Baking Dish: A 9×13 inch baking dish is ideal for holding all those delicious roll-ups. If you don’t have one, any oven-safe dish will do.
- Aluminum Foil: This will help cover the dish while baking, keeping the roll-ups moist. If you’re out of foil, a lid or another oven-safe dish can work as a substitute.
- Spatula: A spatula is handy for gently lifting the roll-ups out of the baking dish once they’re done. It helps keep them intact and looking beautiful!
With these tools at your side, you’re all set to create your Zucchini Enchilada Roll-Ups. Remember, cooking is all about improvisation, so feel free to adapt and use what you have on hand. Now, let’s move on to the exciting variations you can try with this recipe!
Variations of Zucchini Enchilada Roll-Ups
One of the things I adore about Zucchini Enchilada Roll-Ups is their flexibility. You can easily switch things up to suit your taste or to use what you have on hand. Here are a few fun variations that I’ve tried and loved:
- Mexican Quinoa Roll-Ups: Swap out the ricotta for cooked quinoa. This adds a nutty flavor and boosts the protein content. Mix in some diced tomatoes and black beans for a hearty filling.
- Spinach and Feta Roll-Ups: For a Mediterranean twist, use fresh spinach and crumbled feta cheese instead of ricotta. The salty feta pairs beautifully with the zucchini.
- Buffalo Chicken Roll-Ups: If you’re a fan of spicy flavors, mix shredded cooked chicken with buffalo sauce and cream cheese. This adds a kick that’s sure to please any heat lover!
- Vegan Roll-Ups: For a plant-based option, use cashew cream or tofu blended with nutritional yeast for a cheesy flavor. Add in your favorite veggies like bell peppers and mushrooms for extra texture.
- Breakfast Roll-Ups: Why not enjoy these for breakfast? Fill the zucchini with scrambled eggs, cheese, and diced bell peppers for a delightful morning treat.
These variations not only keep things exciting but also allow you to cater to different dietary preferences. I love experimenting with new flavors, and I encourage you to do the same! The possibilities are endless, and each version brings its own unique charm to the table. Now, let’s move on to some cooking notes to ensure your roll-ups turn out perfectly every time.
Cooking Notes for Zucchini Enchilada Roll-Ups
As I’ve learned through my culinary adventures, a few cooking notes can make all the difference in achieving the perfect Zucchini Enchilada Roll-Ups. Here are some tips that I always keep in mind when preparing this dish:
- Choose the Right Zucchini: Opt for medium-sized zucchinis. They’re easier to slice and roll. Larger zucchinis can be watery and may not hold their shape as well.
- Don’t Skip the Salting: If your zucchini slices seem too watery, salting them is a game-changer. It helps draw out moisture, making them easier to roll and preventing sogginess in the final dish.
- Experiment with Cheese: While I love ricotta and mozzarella, feel free to mix in other cheeses like pepper jack for a spicy kick or goat cheese for a tangy twist. Cheese is a great way to personalize your roll-ups!
- Make Ahead: You can prepare the roll-ups a day in advance. Just cover them with foil and store them in the fridge. When you’re ready to bake, simply add a few extra minutes to the cooking time.
- Garnish for Flavor: Don’t forget to top your roll-ups with fresh herbs or a squeeze of lime before serving. It adds a burst of freshness that elevates the dish!
These cooking notes have helped me refine my Zucchini Enchilada Roll-Ups over time. Each tip is a little nugget of wisdom that enhances the overall experience. Now that we’ve covered the cooking notes, let’s explore some serving suggestions to make your meal even more delightful!
Serving Suggestions for Zucchini Enchilada Roll-Ups
Once your Zucchini Enchilada Roll-Ups are out of the oven, it’s time to think about how to serve them for maximum enjoyment. I love to make the presentation as delightful as the dish itself! Here are some of my favorite serving suggestions that add a little extra flair:
- Fresh Salsa: A vibrant salsa made with diced tomatoes, onions, and cilantro adds a refreshing contrast to the warm roll-ups. The burst of flavor is simply irresistible!
- Guacamole: Creamy guacamole is a perfect companion. Its rich texture complements the roll-ups beautifully, making each bite a heavenly experience.
- Greek Yogurt or Sour Cream: A dollop of Greek yogurt or sour cream on top adds a tangy creaminess that balances the flavors. You can even mix in some lime juice for an extra zing!
- Chopped Green Onions: Sprinkling some chopped green onions on top not only adds a pop of color but also a mild onion flavor that enhances the dish.
- Side Salad: Pair your roll-ups with a light side salad. A mix of greens, avocado, and a simple vinaigrette can brighten up the meal and add a refreshing crunch.
These serving suggestions not only elevate the dish but also create a beautiful spread that’s sure to impress your family and friends. I always find that a little extra effort in presentation goes a long way in making a meal feel special. Now that we’ve covered how to serve these delightful roll-ups, let’s move on to some tips for perfecting your Zucchini Enchilada Roll-Ups!
Tips for Perfect Zucchini Enchilada Roll-Ups
As I’ve spent countless hours perfecting my Zucchini Enchilada Roll-Ups, I’ve gathered a treasure trove of tips that can help you achieve the best results. Here are some of my favorite nuggets of wisdom to ensure your roll-ups turn out perfectly every time:
- Slice Evenly: Aim for uniform zucchini slices. This ensures they cook evenly and makes rolling them up a breeze. A mandoline is a great tool for this!
- Don’t Overstuff: It’s tempting to pile on the filling, but a little goes a long way. Overstuffed roll-ups can burst during baking, so keep it modest!
- Use Fresh Ingredients: Fresh herbs and high-quality cheese can elevate the flavors significantly. I always notice a difference when I use fresh over dried.
- Let Them Rest: After baking, allow the roll-ups to sit for a few minutes. This helps them firm up and makes serving easier without falling apart.
- Experiment with Sauces: While enchilada sauce is classic, don’t hesitate to try different sauces like a creamy avocado sauce or a spicy salsa verde for a twist!
These tips have transformed my Zucchini Enchilada Roll-Ups into a dish that I’m proud to serve. Each little detail contributes to the overall experience, making every bite a delightful adventure. Now that you’re armed with these tips, let’s break down the time it takes to create this delicious dish!
Breakdown of Time for Zucchini Enchilada Roll-Ups
As a home cook, I know that time management in the kitchen is essential. When I’m preparing my Zucchini Enchilada Roll-Ups, I like to keep track of how long each step takes. This way, I can plan my cooking sessions more efficiently. Here’s a quick breakdown of the time involved:
- Prep Time: Approximately 30 minutes. This includes washing, slicing the zucchinis, and preparing the filling. I find that having everything prepped and organized makes the cooking process much smoother.
- Cooking Time: About 35 minutes. This covers the baking time for the roll-ups, allowing them to become bubbly and golden. The aroma that fills the kitchen during this time is simply delightful!
- Total Time: Roughly 1 hour and 5 minutes. This is the total time from start to finish, including both prep and cooking. It’s a small investment for a dish that brings so much joy to the table!
Knowing the time commitment helps me plan my meals better, especially when I’m entertaining guests or just enjoying a cozy night in. Plus, the anticipation of those delicious Zucchini Enchilada Roll-Ups makes the wait worthwhile! Now that we’ve covered the timing, let’s move on to the nutritional information to see how these roll-ups fit into a healthy diet.
Nutritional Information for Zucchini Enchilada Roll-Ups
As a passionate home cook, I always pay attention to the nutritional value of the dishes I prepare. Zucchini Enchilada Roll-Ups are not only delicious but also packed with wholesome ingredients that contribute to a balanced meal. Here’s a quick overview of the nutritional information for a serving of these delightful roll-ups:
- Calories: Approximately 250 calories per serving (2 roll-ups)
- Protein: About 15 grams, thanks to the ricotta and mozzarella cheese, along with any optional beans you might add.
- Carbohydrates: Roughly 20 grams, primarily from the zucchini and any additional veggies.
- Fat: Around 12 grams, mostly from the cheese, providing a creamy texture that enhances the dish.
- Fiber: Approximately 4 grams, especially if you include black beans or corn, making these roll-ups a great source of dietary fiber.
- Vitamins and Minerals: Rich in vitamins A and C from the zucchini and any added vegetables, along with calcium from the cheese.
These nutritional benefits make Zucchini Enchilada Roll-Ups a fantastic option for a healthy meal. They’re not only satisfying but also a great way to sneak in some extra veggies into your diet. I love knowing that I’m serving a dish that’s both nourishing and delicious! Now that we’ve covered the nutritional aspect, let’s move on to some frequently asked questions about these delightful roll-ups.
Frequently Asked Questions about Zucchini Enchilada Roll-Ups
As I’ve shared my Zucchini Enchilada Roll-Ups with friends and family, I’ve received quite a few questions about this delightful dish. I love answering these queries because it shows how much interest there is in creating delicious, healthy meals! Here are some of the most frequently asked questions I encounter, along with my answers:
Can I make Zucchini Enchilada Roll-Ups ahead of time?
Absolutely! You can prepare the roll-ups a day in advance. Just assemble them, cover with foil, and store them in the fridge. When you’re ready to bake, simply add a few extra minutes to the cooking time. This makes them perfect for meal prep or entertaining!
What can I use instead of ricotta cheese?
If you’re not a fan of ricotta, you can substitute it with cottage cheese for a lighter option. Cream cheese or even a vegan cashew cream can work well too. Each alternative brings its own unique flavor and texture, so feel free to experiment!
How do I store leftovers?
Leftover Zucchini Enchilada Roll-Ups can be stored in an airtight container in the fridge for up to 3 days. When reheating, I recommend using the oven to maintain their texture. Just cover them with foil to prevent drying out!
Can I freeze Zucchini Enchilada Roll-Ups?
Yes, you can freeze them! I suggest freezing them before baking. Just assemble the roll-ups, place them in a freezer-safe container, and they’ll keep for up to 3 months. When you’re ready to enjoy them, thaw in the fridge overnight and bake as usual.
What can I serve with Zucchini Enchilada Roll-Ups?
These roll-ups pair wonderfully with a variety of sides! I love serving them with fresh salsa, guacamole, or a light side salad. You can also add some rice or quinoa for a heartier meal. The options are endless!
These FAQs reflect the curiosity and excitement surrounding Zucchini Enchilada Roll-Ups. I hope my answers help you feel more confident in making this delicious dish. Now, let’s wrap things up with a conclusion that highlights the appeal of these delightful roll-ups!
Conclusion on Zucchini Enchilada Roll-Ups
As I reflect on my culinary journey with Zucchini Enchilada Roll-Ups, I can’t help but feel a sense of pride and joy. This dish is more than just a recipe; it’s a celebration of fresh ingredients, creativity, and the joy of cooking. The tender zucchini wraps around a flavorful filling, creating a delightful bite that’s both satisfying and nourishing.
What truly makes these roll-ups special is their versatility. Whether you’re looking for a healthy weeknight dinner or a fun dish to impress guests, Zucchini Enchilada Roll-Ups fit the bill perfectly. They’re easy to customize, allowing you to experiment with different fillings and flavors, making each batch a unique culinary adventure.
Moreover, they’re a fantastic way to sneak in those essential veggies, making them a hit with both kids and adults alike. The smiles and compliments I receive when serving these roll-ups are the ultimate reward for any home cook. So, if you’re ready to embark on a delicious journey filled with flavor and creativity, I encourage you to try making Zucchini Enchilada Roll-Ups. You won’t be disappointed!