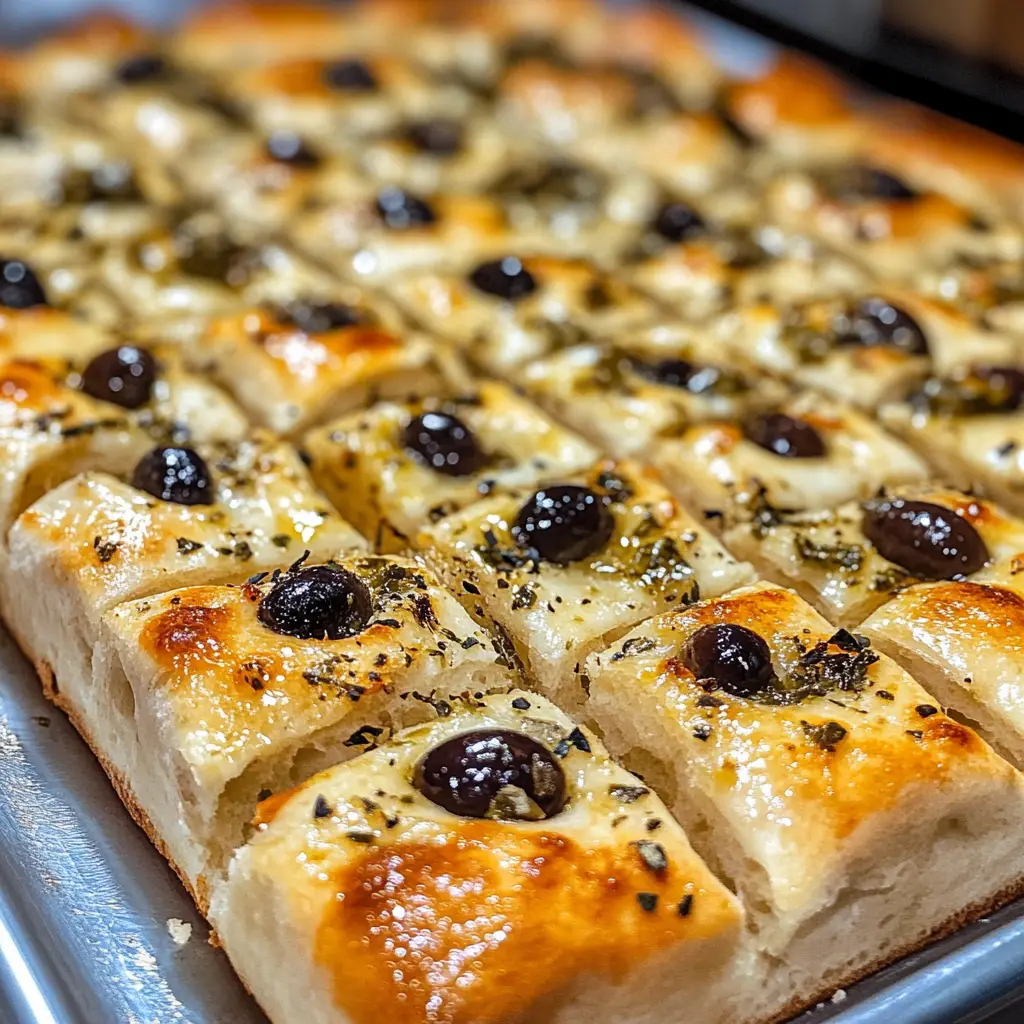
Introduction to Roasted Garlic Olive Focaccia
Ah, the aroma of freshly baked bread wafting through the kitchen! It’s like a warm hug on a chilly day. I remember the first time I made Roasted Garlic Olive Focaccia. It was a rainy afternoon, and I was looking for something to lift my spirits. I had some garlic and olives lying around, and the idea struck me like a bolt of lightning. Why not combine them into a delicious focaccia?
As I mixed the dough, I could already envision the golden crust and the soft, pillowy inside. The thought of biting into that warm bread, with the rich flavor of roasted garlic and the briny goodness of olives, made my heart race with excitement. It was a culinary adventure waiting to unfold!
Focaccia is not just any bread; it’s a canvas for creativity. You can top it with herbs, cheese, or even sun-dried tomatoes. But for me, the classic combination of roasted garlic and olives is simply unbeatable. It’s a dish that brings people together, whether it’s for a cozy family dinner or a gathering with friends. I love serving it warm, drizzled with a bit of olive oil, and watching everyone’s faces light up with joy.
In this article, I’ll share my favorite recipe for Roasted Garlic Olive Focaccia. I’ll guide you through each step, sprinkle in some tips, and share a few personal anecdotes along the way. So, grab your apron, and let’s embark on this delicious journey together!
Ingredients for Roasted Garlic Olive Focaccia
Before we dive into the magic of making Roasted Garlic Olive Focaccia, let’s gather our ingredients. Having everything ready is like setting the stage for a beautiful performance. Each ingredient plays its part in creating that delightful symphony of flavors. Here’s what you’ll need:
Main Ingredients
- 4 cups all-purpose flour
- 1 ½ cups warm water (about 110°F or 43°C)
- 2 teaspoons active dry yeast
- 2 teaspoons salt
- ¼ cup olive oil (plus more for drizzling)
- 1 head of garlic
- 1 cup pitted olives (green or black, your choice)
- Fresh rosemary (optional, for garnish)
When choosing your ingredients, I always recommend going for high-quality olive oil. It makes a world of difference! The flavor of the oil will shine through in the focaccia, so don’t skimp on this one. As for the olives, I love using a mix of green and black for a pop of color and flavor, but feel free to use your favorites!
Optional Add-ons
- 1 teaspoon dried oregano or thyme
- Parmesan cheese (for sprinkling on top)
- Cherry tomatoes (halved, for a burst of sweetness)
- Sun-dried tomatoes (for a tangy twist)
These optional add-ons can elevate your focaccia to new heights. I once added sun-dried tomatoes, and it was like a flavor explosion! You can mix and match based on what you have on hand or what you’re in the mood for. The beauty of focaccia is its versatility!
How to Prepare Roasted Garlic Olive Focaccia
Now that we have our ingredients ready, it’s time to roll up our sleeves and get our hands doughy! Making Roasted Garlic Olive Focaccia is a delightful process that fills your kitchen with warmth and delicious aromas. Let’s dive into the steps!
Step 1: Prepare the Dough
First things first, we need to create the dough. In a large mixing bowl, combine the warm water and yeast. Let it sit for about 5 minutes until it becomes frothy. This is like waking up the yeast, and it’s a crucial step for fluffy focaccia!
Tips for Step 1
- Make sure your water is warm, not hot. Too hot can kill the yeast!
- Use a wooden spoon or your hands to mix the flour and salt into the yeast mixture. It’s a great way to feel connected to your food.
Step 2: Roast the Garlic
While the dough is coming together, let’s roast the garlic. Preheat your oven to 400°F (200°C). Cut the top off the head of garlic, drizzle it with olive oil, and wrap it in foil. Roast it for about 30-35 minutes until it’s soft and golden. The smell will be heavenly!
Tips for Step 2
- Don’t rush this step! Roasting garlic transforms its flavor, making it sweet and mellow.
- Once it’s cool, squeeze the cloves out of their skins. You’ll want to mash them into a paste for easy incorporation into the dough.
Step 3: Incorporate Olives
Now, let’s add those delicious olives! Once your dough has risen (about 1 hour), gently fold in the roasted garlic paste and chopped olives. This is where the magic happens! The flavors meld together beautifully.
Tips for Step 3
- Don’t overwork the dough. You want to keep it light and airy!
- Feel free to adjust the amount of olives based on your taste. More olives mean more flavor!
Step 4: Shape the Focaccia
Next, it’s time to shape our focaccia. Grease a baking sheet with olive oil and transfer the dough onto it. Gently stretch it out to fit the pan. Use your fingers to create dimples all over the surface. This is not just for looks; it helps the focaccia hold onto the olive oil and toppings!
Tips for Step 4
- Don’t worry if it doesn’t look perfect. Focaccia is meant to be rustic!
- Let the dough rest for another 20-30 minutes before baking. This helps it rise a bit more.
Step 5: Bake the Focaccia
Finally, it’s time to bake! Preheat your oven to 425°F (220°C). Drizzle the top of the focaccia with olive oil and sprinkle with salt. Bake for about 20-25 minutes until it’s golden brown and crispy. Your kitchen will smell like a little slice of heaven!
Tips for Step 5
- Keep an eye on it towards the end of baking. Ovens can vary, and you want it perfectly golden.
- Let it cool for a few minutes before slicing. This helps the texture set!
Equipment Needed for Roasted Garlic Olive Focaccia
Before we dive into the delicious world of Roasted Garlic Olive Focaccia, let’s make sure we have the right tools at our disposal. Having the right equipment can make the process smoother and more enjoyable. Here’s what you’ll need:
- Mixing Bowl: A large mixing bowl is essential for combining your ingredients. If you don’t have one, any large bowl will do!
- Measuring Cups and Spoons: Accurate measurements are key to baking success. If you don’t have these, you can use a kitchen scale for precision.
- Wooden Spoon or Dough Scraper: These tools are great for mixing and folding the dough. A spatula can also work in a pinch!
- Baking Sheet: A rimmed baking sheet is perfect for shaping and baking your focaccia. If you don’t have one, a large cast-iron skillet can be a fantastic alternative.
- Aluminum Foil: This is used for wrapping the garlic while it roasts. If you’re out of foil, a small oven-safe dish can work too.
- Oven Mitts: Safety first! Protect your hands when handling hot pans.
With these tools in hand, you’re all set to create a beautiful focaccia that will impress your family and friends. Remember, cooking is about creativity and resourcefulness, so don’t hesitate to adapt based on what you have available!
Variations of Roasted Garlic Olive Focaccia
One of the things I adore about Roasted Garlic Olive Focaccia is its versatility. It’s like a blank canvas, waiting for your creative touch! Over the years, I’ve experimented with different flavors and toppings, and each variation has brought its own unique charm. Here are a few delightful twists you might want to try:
- Herb-Infused Focaccia: Add fresh herbs like thyme or basil into the dough for an aromatic experience. The fragrance will transport you to an Italian herb garden!
- Cheesy Delight: Sprinkle shredded mozzarella or Parmesan cheese on top before baking. The melted cheese creates a gooey, savory layer that’s simply irresistible.
- Sun-Dried Tomato and Feta: Mix in chopped sun-dried tomatoes and crumbled feta cheese for a Mediterranean flair. The tangy feta pairs beautifully with the roasted garlic.
- Spicy Kick: If you love a bit of heat, add sliced jalapeños or crushed red pepper flakes to the dough. It’s a fiery twist that will awaken your taste buds!
These variations not only keep things exciting but also allow you to tailor the focaccia to your mood or the season. I once made a sun-dried tomato version for a summer picnic, and it was a hit! So, don’t hesitate to get creative and make this focaccia your own. The possibilities are endless!
Cooking Notes for Roasted Garlic Olive Focaccia
As I’ve journeyed through the world of baking, I’ve learned a few essential cooking notes that can elevate your Roasted Garlic Olive Focaccia experience. These little nuggets of wisdom can make a big difference in your final product!
- Room Temperature Ingredients: If possible, let your ingredients, especially the water and olive oil, come to room temperature. This helps the dough rise better and creates a fluffier texture.
- Don’t Rush the Rising: Patience is key! Allow the dough to rise until it doubles in size. This can take longer in cooler kitchens, but it’s worth the wait for that airy crumb.
- Experiment with Toppings: Feel free to get creative with toppings! A sprinkle of flaky sea salt or a drizzle of balsamic glaze just before serving can add a delightful finishing touch.
- Storage Tips: If you have leftovers (which is rare in my house!), store the focaccia in an airtight container at room temperature for up to two days. You can also freeze it for longer storage; just wrap it tightly in plastic wrap.
These cooking notes are like little breadcrumbs of wisdom I’ve picked up along the way. They help ensure that your focaccia turns out as delicious as possible. So, keep them in mind as you embark on your baking adventure!
Serving Suggestions for Roasted Garlic Olive Focaccia
Ah, the moment of truth! After all the mixing, kneading, and baking, it’s time to enjoy your Roasted Garlic Olive Focaccia. The way you serve it can elevate the experience even more. Here are some of my favorite serving suggestions that will make your focaccia shine:
- Warm and Simple: Serve the focaccia warm, straight from the oven, with a drizzle of high-quality olive oil. The oil pools in the dimples, creating a delightful bite that’s simply irresistible.
- With Dips: Pair it with a bowl of balsamic vinegar mixed with olive oil for dipping. The tangy sweetness of the balsamic complements the savory focaccia beautifully.
- As a Sandwich: Slice the focaccia in half and fill it with your favorite sandwich ingredients. I love using fresh mozzarella, tomatoes, and basil for a Caprese-style delight!
- With Soup or Salad: Serve it alongside a hearty soup or a fresh salad. The focaccia is perfect for soaking up all those delicious flavors.
- For a Snack: Cut it into small squares for a delightful snack. It’s great for gatherings or as a tasty treat during movie night!
Each of these serving suggestions adds a unique twist to your focaccia experience. I often find myself experimenting with different pairings, and it’s always a hit! So, gather your loved ones, and enjoy this warm, flavorful bread together. Trust me, it’s a moment you won’t forget!
Tips for Perfect Roasted Garlic Olive Focaccia
Creating the perfect Roasted Garlic Olive Focaccia is a delightful journey, and I’ve gathered some tips along the way that can help you achieve that golden, fluffy masterpiece. These little nuggets of wisdom can make all the difference in your baking adventure!
- Use Fresh Ingredients: Fresh garlic and high-quality olives will elevate the flavor of your focaccia. I always choose the best ingredients I can find, and it truly shines through in the final product.
- Don’t Skip the Kneading: Kneading the dough is essential for developing gluten, which gives the focaccia its lovely texture. I like to knead for about 8-10 minutes until the dough is smooth and elastic.
- Experiment with Hydration: If you want a softer focaccia, consider adding a bit more water to the dough. A wetter dough can lead to a fluffier crumb, so don’t be afraid to play around with the ratios!
- Let It Rest: After shaping the focaccia, let it rest for at least 20-30 minutes before baking. This extra rise helps create that airy texture we all love.
- Brush with Olive Oil: Before baking, generously brush the top with olive oil. This not only adds flavor but also helps achieve that beautiful golden crust.
These tips are like little secrets I’ve learned from my own kitchen experiments. They help ensure that every batch of focaccia turns out perfectly delicious. So, keep them in mind as you embark on your own focaccia-making journey!
Breakdown of Time for Roasted Garlic Olive Focaccia
As a passionate home cook, I know that timing is everything in the kitchen. When it comes to making Roasted Garlic Olive Focaccia, understanding the time commitment can help you plan your baking adventure. Here’s a quick breakdown of the time involved:
- Prep Time: Approximately 20 minutes. This includes gathering your ingredients, preparing the dough, and roasting the garlic. It’s a great time to let your excitement build!
- Rising Time: About 1 hour. This is when the dough works its magic, rising and becoming fluffy. Use this time to clean up or sip on a cup of tea.
- Baking Time: 20-25 minutes. The moment you’ve been waiting for! Your kitchen will fill with the delightful aroma of freshly baked focaccia.
- Total Time: Roughly 1 hour and 45 minutes. This includes all the prep, rising, and baking time. It’s a small investment for a delicious reward!
Knowing this timeline helps me stay organized and makes the process feel less overwhelming. Plus, it builds anticipation for that first warm slice of focaccia! So, gather your ingredients, and let’s get baking!
Nutritional Information for Roasted Garlic Olive Focaccia
As a passionate home cook, I believe that enjoying delicious food should also come with a bit of awareness about what we’re eating. While Roasted Garlic Olive Focaccia is a treat, it’s good to know its nutritional profile. Here’s a general breakdown per serving (based on a 1/12 slice of the focaccia):
- Calories: Approximately 200
- Protein: 5g
- Carbohydrates: 30g
- Fat: 8g
- Saturated Fat: 1g
- Sodium: 300mg
- Fiber: 1g
- Sugar: 0g
These values can vary based on the specific ingredients you use, especially the type of olives and the amount of olive oil. I often find that using high-quality ingredients not only enhances the flavor but can also contribute to a more nutritious loaf. Plus, the addition of olives and garlic brings in healthy fats and antioxidants!
So, while you indulge in this delightful focaccia, remember that it can be part of a balanced diet. Enjoy it as a side with a salad or as a base for a hearty sandwich. It’s all about balance and savoring every bite!
Frequently Asked Questions about Roasted Garlic Olive Focaccia
As I’ve shared my love for Roasted Garlic Olive Focaccia, I’ve often encountered questions from fellow home cooks eager to try their hand at this delightful bread. Here are some of the most frequently asked questions, along with my personal insights to help you on your baking journey!
Can I use whole wheat flour instead of all-purpose flour?
Absolutely! Whole wheat flour can add a nutty flavor and a bit more fiber to your focaccia. However, it may result in a denser texture. I recommend using a mix of all-purpose and whole wheat flour for the best of both worlds!
How do I store leftover focaccia?
If you have any leftovers (which is rare in my kitchen!), store the focaccia in an airtight container at room temperature for up to two days. You can also freeze it for longer storage. Just wrap it tightly in plastic wrap and place it in a freezer bag. When you’re ready to enjoy it again, simply thaw and reheat in the oven!
Can I make the dough ahead of time?
Yes, you can! If you want to prepare the dough in advance, let it rise as usual, then punch it down and refrigerate it. When you’re ready to bake, take it out, let it come to room temperature, and proceed with the shaping and baking steps. It’s a great way to save time!
What type of olives should I use?
I love using a mix of green and black olives for a pop of color and flavor. However, you can use any type of pitted olives you prefer! Kalamata olives add a rich taste, while Castelvetrano olives are sweet and buttery. Choose what you love!
Can I add other toppings to my focaccia?
Definitely! The beauty of focaccia is its versatility. You can add toppings like cherry tomatoes, fresh herbs, or even cheese. I once topped a batch with caramelized onions, and it was a game-changer! Feel free to get creative and make it your own.
These questions reflect the curiosity and excitement that comes with baking Roasted Garlic Olive Focaccia. I hope my answers inspire you to dive into this delicious adventure with confidence. Remember, every loaf is a chance to learn and enjoy the process!
Conclusion on Roasted Garlic Olive Focaccia
As I wrap up this delightful journey into the world of Roasted Garlic Olive Focaccia, I can’t help but feel a sense of warmth and satisfaction. This bread is more than just a recipe; it’s a celebration of flavors, a canvas for creativity, and a way to bring loved ones together around the table. The combination of roasted garlic and olives creates a symphony of taste that dances on your palate, while the soft, airy texture invites you to savor each bite.
Whether you’re a seasoned baker or a curious beginner, making focaccia is an adventure worth embarking on. It’s forgiving, versatile, and oh-so-rewarding. Plus, the aroma that fills your kitchen while it bakes is simply irresistible! I encourage you to try this recipe, experiment with your favorite toppings, and share it with those you cherish. After all, food is best enjoyed when shared, and this focaccia is sure to create lasting memories.
So, roll up your sleeves, gather your ingredients, and let the magic of baking unfold. I can’t wait for you to experience the joy of Roasted Garlic Olive Focaccia in your own home. Happy baking!


