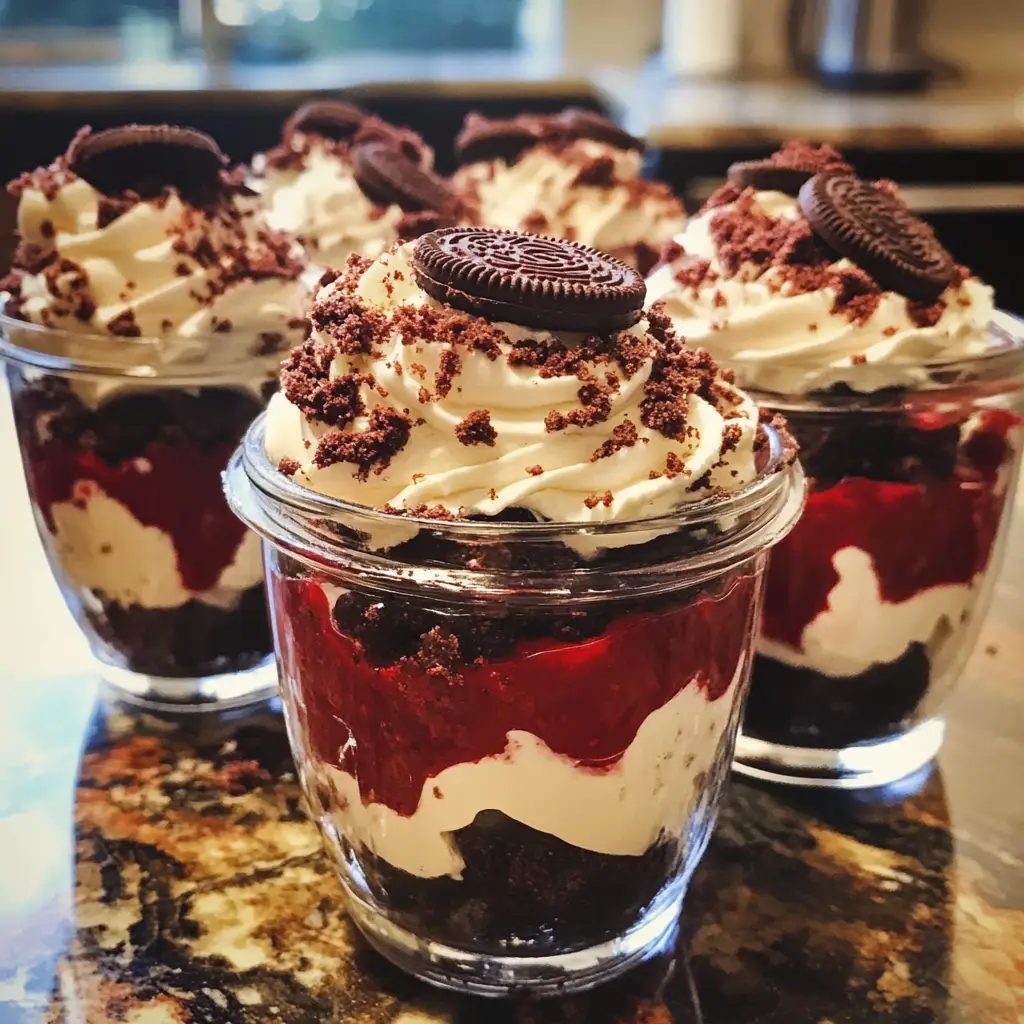
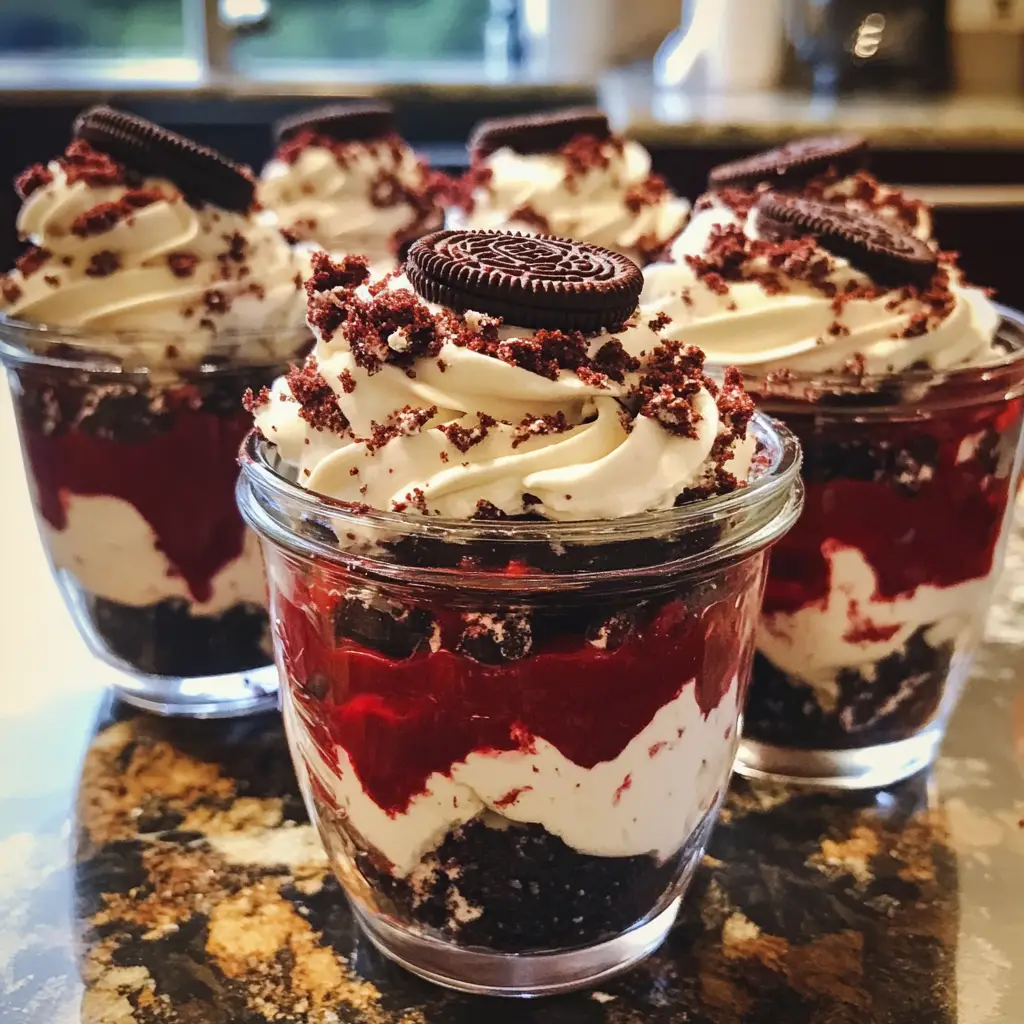
Introduction to Red Velvet Oreo Trifle Jars
As a busy mom, I know how precious time can be, especially when it comes to whipping up something special for my family. That’s why I absolutely adore these Red Velvet Oreo Trifle Jars! They’re not just a feast for the eyes; they’re a delightful combination of flavors that will make your loved ones swoon. Imagine layers of moist red velvet cake, creamy cheesecake filling, and crunchy Oreo cookies, all beautifully presented in individual jars. It’s the perfect dessert to impress guests or simply treat yourself after a long day!
Why You’ll Love This Red Velvet Oreo Trifle Jars
These Red Velvet Oreo Trifle Jars are a game-changer for busy days! They come together quickly, making them perfect for last-minute gatherings or a sweet surprise for your family. The layers of rich flavors and textures create a dessert that feels indulgent yet is surprisingly easy to prepare. Plus, who can resist the charm of individual jars? They’re not just delicious; they’re a treat for the eyes, too!
Ingredients for Red Velvet Oreo Trifle Jars
Gathering the right ingredients is the first step to creating these delightful Red Velvet Oreo Trifle Jars. Here’s what you’ll need:
- Red Velvet Cake Mix: The star of the show! This mix provides that signature color and flavor.
- Large Eggs: Essential for binding the cake together and adding moisture.
- Vegetable Oil: This keeps the cake moist and tender. You can also use melted butter for a richer taste.
- Water: Helps to activate the cake mix and create the perfect batter consistency.
- Cream Cheese: The base for our luscious cheesecake filling. Make sure it’s softened for easy mixing.
- Powdered Sugar: Adds sweetness and helps achieve that smooth texture in the filling.
- Heavy Cream: Whipped to perfection, it lightens the cheesecake filling and adds a dreamy texture.
- Vanilla Extract: A splash of this elevates the flavor of the cheesecake filling.
- Oreo Cookies: Crushed to create a delightful crunch and rich chocolate flavor in every bite.
For those looking to switch things up, consider adding a splash of buttermilk to the cake mix for a richer flavor. If you need a gluten-free option, simply substitute the cake mix with a gluten-free variety. You can find all the exact measurements at the bottom of the article, ready for printing!
How to Make Red Velvet Oreo Trifle Jars
Now that we have our ingredients ready, let’s dive into the fun part—making these scrumptious Red Velvet Oreo Trifle Jars! Follow these simple steps, and you’ll have a dessert that’s sure to impress.
Step 1: Prepare the Red Velvet Cake
First things first, preheat your oven to 350°F (175°C). This ensures your cake bakes evenly. Next, grab your red velvet cake mix and follow the package instructions. Usually, this means mixing the cake mix with eggs, vegetable oil, and water. Stir until everything is well combined, and you’re ready to bake!
Step 2: Bake and Cool the Cake
Pour the batter into a greased cake pan and pop it in the oven. Bake for about 30 minutes or until a toothpick inserted in the center comes out clean. Once baked, let the cake cool completely in the pan. This step is crucial! If you skip it, your layers might turn into a gooey mess.
Step 3: Make the Cheesecake Filling
While the cake cools, let’s whip up that creamy cheesecake filling. In a mixing bowl, beat the softened cream cheese and powdered sugar together until smooth. You want it to be creamy and free of lumps. This filling is what makes your trifle jars so decadent!
Step 4: Whip the Cream
In another bowl, pour in the heavy cream and add a splash of vanilla extract. Using a hand mixer or stand mixer, whip the cream until stiff peaks form. This means when you lift the beaters, the cream holds its shape. It’s like magic watching it transform!
Step 5: Combine Mixtures
Now, gently fold the whipped cream into the cream cheese mixture. Use a spatula and be careful not to deflate the whipped cream. This step is key to achieving that light and airy cheesecake filling that pairs perfectly with the rich red velvet cake.
Step 6: Crumble the Cake
Once the cake is completely cool, it’s time to crumble it. Break the cake into small pieces using your hands. You want them to be bite-sized, so they layer nicely in the jars. The texture of the cake adds a delightful contrast to the creamy filling and crunchy Oreos.
Step 7: Layer the Ingredients in Jars
Grab your jars and start layering! Begin with a layer of crumbled red velvet cake, followed by a generous scoop of cheesecake filling, and then a sprinkle of crushed Oreos. Repeat these layers until the jars are filled, finishing with a layer of crushed Oreos on top. It’s like building a delicious tower!
Step 8: Chill Before Serving
Finally, cover the jars and place them in the refrigerator for at least 2 hours. This chilling time allows the flavors to meld together beautifully. Plus, it makes the dessert even more refreshing when served. Trust me, the wait will be worth it!
Tips for Success
- Make sure your cream cheese is at room temperature for easy mixing.
- Use a serrated knife to cut the cooled cake into even pieces.
- Chill your mixing bowl and beaters before whipping the cream for better results.
- Don’t rush the chilling process; it enhances the flavors.
- Feel free to get creative with toppings like chocolate shavings or fresh berries!
Equipment Needed
- Mixing Bowls: Use any size you have; glass or stainless steel works best.
- Hand Mixer or Stand Mixer: A whisk can work, but a mixer saves time.
- Measuring Cups and Spoons: Essential for accuracy; use a kitchen scale if preferred.
- Jars: Mason jars are perfect, but any small glass or plastic containers will do.
Variations
- Chocolate Red Velvet: Swap out the red velvet cake mix for a chocolate cake mix for a rich twist.
- Nutty Delight: Add chopped walnuts or pecans between the layers for a crunchy texture.
- Fruit Fusion: Layer in fresh raspberries or strawberries for a fruity burst of flavor.
- Vegan Option: Use a vegan cake mix and substitute cream cheese with a dairy-free alternative.
- Mini Jars: Create bite-sized versions in smaller jars for a fun party treat!
Serving Suggestions
- Pair with a scoop of vanilla ice cream for an extra indulgent treat.
- Serve alongside a hot cup of coffee or a refreshing iced tea.
- Garnish with fresh mint leaves for a pop of color.
- Present in a decorative tray for a stunning dessert display.
FAQs about Red Velvet Oreo Trifle Jars
Can I make Red Velvet Oreo Trifle Jars in advance?
Absolutely! These trifle jars can be made a day in advance. Just layer them up, cover, and refrigerate. This allows the flavors to meld beautifully, making them even more delicious!
What can I substitute for cream cheese in the filling?
If you’re looking for a dairy-free option, you can use a vegan cream cheese alternative. It will still give you that creamy texture without the dairy!
How long do these trifle jars last in the fridge?
These Red Velvet Oreo Trifle Jars can last up to 3 days in the refrigerator. Just make sure they are covered to keep them fresh!
Can I use a different cake flavor?
Of course! Feel free to experiment with different cake mixes. A chocolate or vanilla cake mix would work wonderfully, giving you a new twist on this classic dessert.
What’s the best way to serve these trifle jars?
Serve them chilled straight from the fridge. You can also add a dollop of whipped cream or a sprinkle of chocolate shavings on top for an extra touch of elegance!
Final Thoughts
Creating these Red Velvet Oreo Trifle Jars is more than just making a dessert; it’s about crafting sweet memories with your loved ones. Each layer tells a story, from the rich red velvet cake to the creamy cheesecake filling and the delightful crunch of Oreos. It’s a treat that brings smiles and sparks joy, whether it’s a family gathering or a quiet evening at home. Plus, the individual jars make serving a breeze! So, roll up your sleeves, embrace the fun of layering, and enjoy every delicious bite of this delightful dessert adventure!
Print
Red Velvet Oreo Trifle Jars: A Decadent Dessert Delight
- Total Time: 1 hour
- Yield: 6 servings 1x
- Diet: Vegetarian
Description
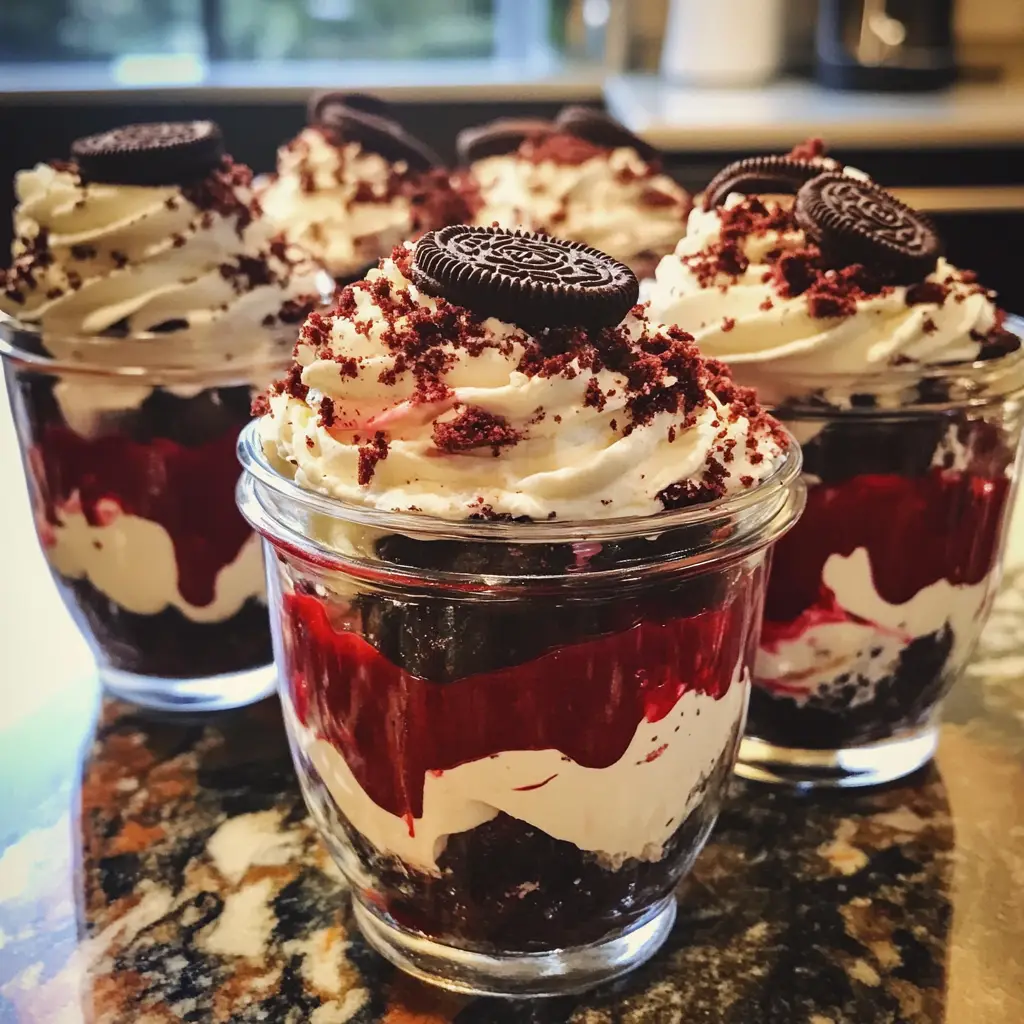
Red Velvet Oreo Trifle Jars are a delightful dessert combining layers of red velvet cake, creamy cheesecake filling, and crushed Oreo cookies, all beautifully presented in individual jars.
Ingredients
- 1 box red velvet cake mix
- 3 large eggs
- 1 cup vegetable oil
- 1 cup water
- 8 oz cream cheese, softened
- 1 cup powdered sugar
- 1 cup heavy cream
- 1 tsp vanilla extract
- 1 package Oreo cookies, crushed
Instructions
- Preheat the oven and prepare the red velvet cake mix according to package instructions.
- Bake the cake and let it cool completely.
- In a bowl, beat the cream cheese and powdered sugar until smooth.
- In another bowl, whip the heavy cream and vanilla extract until stiff peaks form.
- Fold the whipped cream into the cream cheese mixture until well combined.
- Crumble the cooled red velvet cake into small pieces.
- In jars, layer the crumbled cake, cheesecake filling, and crushed Oreos.
- Repeat the layers until the jars are filled, finishing with a layer of crushed Oreos on top.
- Chill in the refrigerator for at least 2 hours before serving.
Notes
- For a richer flavor, add a splash of buttermilk to the cake mix.
- Feel free to substitute with gluten-free cake mix for a gluten-free version.
- These trifle jars can be made a day in advance for convenience.
- Prep Time: 30 minutes
- Cook Time: 30 minutes
- Category: Dessert
- Method: Baking and Layering
- Cuisine: American
Nutrition
- Serving Size: 1 jar
- Calories: 450
- Sugar: 30g
- Sodium: 300mg
- Fat: 25g
- Saturated Fat: 15g
- Unsaturated Fat: 5g
- Trans Fat: 0g
- Carbohydrates: 50g
- Fiber: 2g
- Protein: 6g
- Cholesterol: 70mg
Keywords: Red Velvet, Oreo, Trifle, Dessert, Jars