Introduction to Raspberry Chocolate Mousse Recipe
Ah, the delightful dance of flavors! When I think of dessert, my mind often wanders to the luscious combination of rich chocolate and tangy raspberries. It’s like a sweet symphony playing on my taste buds. I remember the first time I made raspberry chocolate mousse; it was a rainy afternoon, and the world outside felt gray and dreary. But inside my cozy kitchen, the air was filled with the warm aroma of melting chocolate, and I felt a spark of joy as I whisked together the ingredients.
This raspberry chocolate mousse recipe is not just a treat; it’s an experience. The creamy texture of the mousse, paired with the vibrant burst of raspberry, creates a dessert that feels both indulgent and refreshing. It’s perfect for special occasions or simply to brighten up a regular day. I often find myself making this dessert when I want to impress friends or family, and it never fails to elicit smiles and compliments.
What I love most about this recipe is its simplicity. With just a handful of ingredients, you can create something that looks and tastes like it came straight from a fancy restaurant. Plus, it’s a great way to showcase fresh raspberries when they’re in season. So, grab your apron, and let’s dive into the world of raspberry chocolate mousse. I promise you, it will be a culinary adventure you won’t forget!
Ingredients for Raspberry Chocolate Mousse Recipe
Before we embark on our delicious journey, let’s gather our ingredients. This raspberry chocolate mousse recipe is all about quality and freshness. I always believe that the best desserts start with the best ingredients. So, let’s take a look at what we need!
Main Ingredients
- 200g dark chocolate (at least 70% cocoa) – I prefer using high-quality chocolate for a richer flavor.
- 300ml heavy cream – This gives the mousse its luxurious texture. Make sure it’s cold for the best results!
- 2 tablespoons sugar – Adjust this based on your sweetness preference. I often use less if the raspberries are particularly sweet.
- 1 teaspoon vanilla extract – A splash of vanilla adds depth to the chocolate flavor.
- 250g fresh raspberries – Look for plump, juicy berries. They’re the star of this dessert!
Optional Add-ons
- 1 tablespoon raspberry liqueur – For an adult twist, this adds a lovely depth of flavor.
- Mint leaves – A few fresh mint leaves can brighten up the presentation and add a refreshing note.
- Chocolate shavings or cocoa powder – For garnishing, these add a touch of elegance to your mousse.
- Whipped cream – A dollop on top can make it even more indulgent!
When sourcing your ingredients, I recommend visiting local farmers’ markets for the freshest raspberries. The flavor of fresh berries is unbeatable! And for the chocolate, don’t hesitate to splurge a little; it truly makes a difference in the final taste. Now that we have everything ready, let’s move on to the fun part—preparing our raspberry chocolate mousse!
How to Prepare Raspberry Chocolate Mousse Recipe
Now that we have our ingredients ready, it’s time to roll up our sleeves and dive into the preparation of this delightful raspberry chocolate mousse. I find that the process is just as enjoyable as the final product. Each step brings its own little thrill, and I can’t wait to share my tips with you!
Step 1: Melt the Chocolate
First things first, we need to melt our dark chocolate. I usually break it into small pieces to help it melt evenly. You can use a microwave or a double boiler for this step. If you’re using a microwave, heat it in short bursts of 20 seconds, stirring in between. This way, you avoid burning the chocolate, which can be a real bummer!
Tips for Melting Chocolate
- Always use a dry bowl; any moisture can cause the chocolate to seize.
- Stir gently to keep the chocolate smooth and glossy.
- If you have a little leftover chocolate, don’t worry! It’s perfect for drizzling on top later.
Step 2: Prepare the Raspberry Puree
Next, let’s make the raspberry puree. I love this part because the vibrant color is just so inviting! Simply blend the fresh raspberries in a food processor until smooth. If you prefer a seedless puree, you can strain it through a fine mesh sieve. This step is optional, but it does give a lovely silky texture to the mousse.
Tips for Making Raspberry Puree
- Use ripe raspberries for the best flavor. They should be sweet and fragrant!
- Add a teaspoon of sugar if your raspberries are a bit tart.
- Save a few whole raspberries for garnishing later; they add a beautiful touch!
Step 3: Whip the Cream
Now, let’s whip the heavy cream! This is where the mousse gets its light and airy texture. I always use a chilled bowl and beaters for this step. It helps the cream whip up faster and fluffier. Beat until soft peaks form, and be careful not to over-whip, or you’ll end up with butter!
Tips for Whipping Cream
- Start at a low speed and gradually increase to medium-high.
- Keep an eye on the cream; it can go from perfect to over-whipped in seconds!
- If you want a sweeter mousse, you can add a bit of sugar while whipping.
Step 4: Combine Ingredients
Now comes the fun part—combining everything! In a large bowl, gently fold the melted chocolate into the whipped cream. I like to do this in batches to keep the mixture light and airy. Then, add the raspberry puree and vanilla extract, folding until everything is just combined. The colors swirl together beautifully, and it’s hard not to sneak a taste!
Tips for Combining
- Use a spatula for folding; it’s gentler on the mixture.
- Be careful not to deflate the whipped cream; we want that airy texture!
- Don’t worry if it looks a bit marbled; it adds to the charm!
Step 5: Chill the Mousse
Finally, it’s time to chill our mousse. Spoon the mixture into serving dishes or glasses, and cover them with plastic wrap. Place them in the fridge for at least two hours. This step is crucial as it allows the mousse to set and develop its flavors. I often use this time to clean up the kitchen and daydream about how delicious it will be!
Tips for Chilling
- Make sure the mousse is well-covered to prevent it from absorbing any fridge odors.
- If you’re in a hurry, you can chill them in the freezer for about 30 minutes, but keep an eye on them!
- Garnish just before serving for the freshest look!
Equipment Needed for Raspberry Chocolate Mousse Recipe
Before we dive into the delicious world of raspberry chocolate mousse, let’s make sure we have the right tools at our fingertips. Having the right equipment can make the process smoother and more enjoyable. Here’s what you’ll need:
- Mixing Bowls: A couple of medium to large mixing bowls will be essential for combining ingredients. I love using glass bowls because they’re easy to clean and you can see the beautiful colors of the mousse!
- Whisk or Electric Mixer: A whisk is perfect for whipping cream by hand, but if you want to save some elbow grease, an electric mixer is a fantastic alternative. Just be careful not to over-whip!
- Double Boiler or Microwave-Safe Bowl: For melting chocolate, you can use a double boiler or a microwave-safe bowl. If you don’t have a double boiler, a heatproof bowl set over a pot of simmering water works just as well.
- Food Processor or Blender: This is key for making that luscious raspberry puree. If you don’t have one, a hand blender can also do the trick!
- Spatula: A rubber spatula is perfect for folding the ingredients together gently. It helps keep the mousse light and airy.
- Serving Dishes or Glasses: Choose your favorite dessert cups or glasses to showcase your beautiful mousse. I love using clear glasses so everyone can admire the layers!
And there you have it! With these tools in hand, you’re all set to create a stunning raspberry chocolate mousse. If you find yourself missing any of these items, don’t fret! You can often improvise with what you have at home. For example, a regular bowl can substitute for a mixing bowl, and a fork can work in place of a whisk in a pinch. Now, let’s get ready to whip up some magic!
Variations of Raspberry Chocolate Mousse Recipe
While the classic raspberry chocolate mousse is a showstopper on its own, I love to experiment with variations that add a unique twist to this delightful dessert. Each variation brings its own charm, and I can’t wait to share a few of my favorites with you!
- White Chocolate Raspberry Mousse: If you’re a fan of sweeter desserts, try using white chocolate instead of dark chocolate. The creamy sweetness pairs beautifully with the tartness of the raspberries, creating a dreamy dessert that feels like a cloud on your palate.
- Vegan Raspberry Chocolate Mousse: For a plant-based option, substitute the heavy cream with coconut cream and use dairy-free chocolate. This version is just as rich and satisfying, and it’s perfect for those with dietary restrictions.
- Layered Mousse Cups: For a stunning presentation, layer the raspberry mousse with a layer of chocolate mousse. The contrast of colors and flavors makes for an eye-catching dessert that’s sure to impress your guests!
- Spicy Raspberry Chocolate Mousse: If you’re feeling adventurous, add a pinch of cayenne pepper or chili powder to the chocolate mixture. The heat adds an unexpected kick that complements the sweetness of the mousse beautifully.
These variations are just the tip of the iceberg! Feel free to get creative and make this raspberry chocolate mousse your own. After all, cooking is all about experimenting and having fun in the kitchen. I can’t wait to hear about your delicious creations!
Cooking Notes for Raspberry Chocolate Mousse Recipe
As I’ve journeyed through the delightful world of raspberry chocolate mousse, I’ve picked up a few cooking notes that can make your experience even smoother. These little nuggets of wisdom can help you avoid common pitfalls and elevate your dessert game!
- Room Temperature Ingredients: Make sure your eggs and cream are at room temperature before you start. This helps them blend together more easily, creating a smoother mousse.
- Quality Matters: Don’t skimp on the chocolate! A high-quality dark chocolate will make a world of difference in flavor. Trust me, your taste buds will thank you!
- Chill Your Tools: For the best whipped cream, chill your mixing bowl and beaters in the fridge for about 15 minutes before whipping. This helps the cream whip up faster and stay fluffy.
- Be Patient: Allow the mousse to chill for the full two hours. I know it’s tempting to dig in early, but patience is key to achieving that perfect texture!
- Experiment with Flavors: Don’t hesitate to add your own twist! A splash of orange zest or a hint of almond extract can take your mousse to new heights.
These cooking notes are like little treasures I’ve gathered over time. They help me create a raspberry chocolate mousse that’s not just good, but truly unforgettable. I hope they inspire you to whip up your own batch and enjoy the process as much as the delicious outcome!
Serving Suggestions for Raspberry Chocolate Mousse Recipe
Now that our raspberry chocolate mousse is beautifully chilled and ready to go, it’s time to think about how to serve it! Presentation can elevate any dessert, and I love to get a little creative when it comes to serving this delightful treat. Here are some of my favorite serving suggestions that will make your mousse shine:
- Elegant Glassware: Serve the mousse in clear dessert glasses or small jars. This way, everyone can admire the luscious layers of chocolate and raspberry. It adds a touch of sophistication to your dessert table!
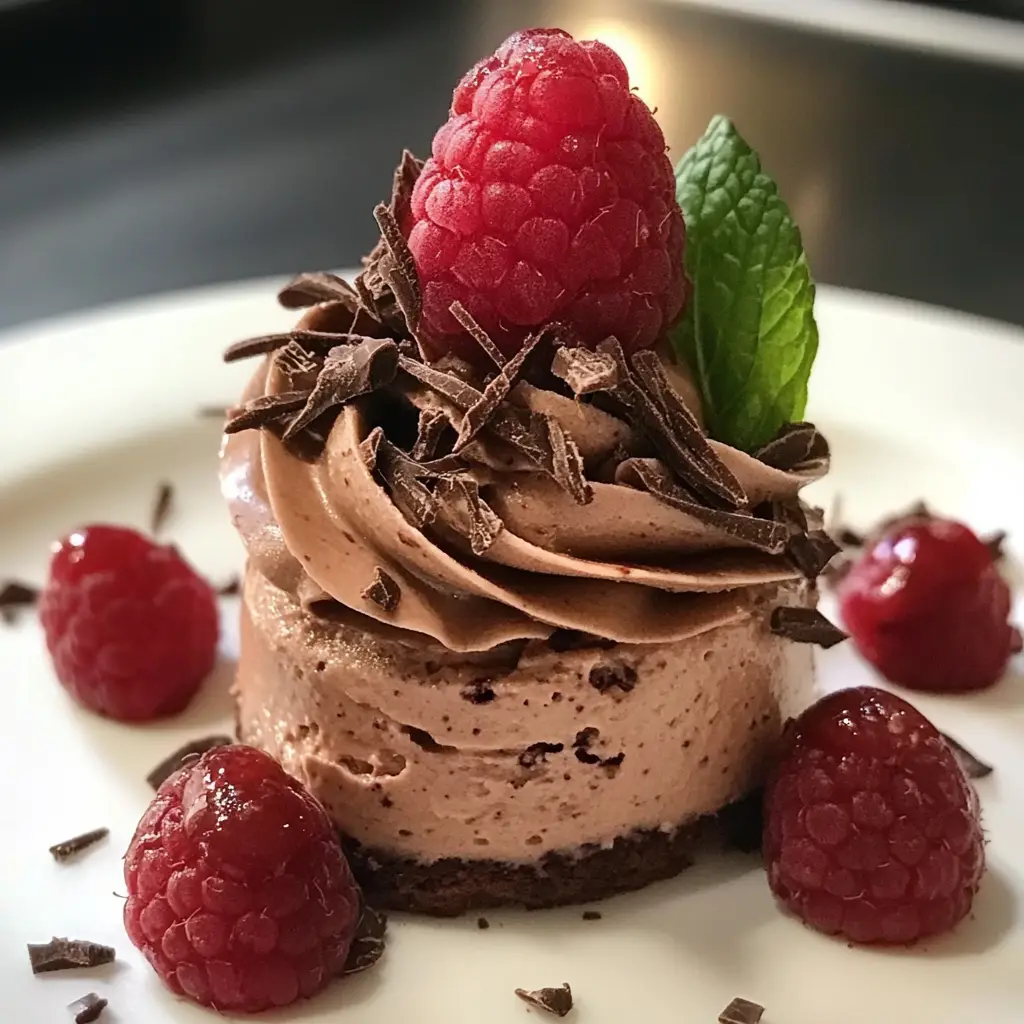
- Garnish with Fresh Berries: Top each serving with a few whole raspberries and a sprig of mint. The vibrant colors pop against the rich mousse, making it visually stunning.
- Chocolate Shavings: For an extra touch of elegance, sprinkle some chocolate shavings on top. It adds a delightful crunch and enhances the chocolate flavor.
- Serve with Whipped Cream: A dollop of freshly whipped cream on top can make the mousse even more indulgent. It’s like a cherry on top of a sundae!
- Pair with Biscotti or Cookies: Serve the mousse alongside some crunchy biscotti or chocolate cookies. The contrast in textures makes for a delightful experience!
These serving suggestions not only enhance the visual appeal but also add layers of flavor and texture to your raspberry chocolate mousse. I love to see the smiles on my friends’ faces when I present this dessert, and I’m sure you will too! So, gather your loved ones, serve up this delightful treat, and enjoy every spoonful together!
Tips for Perfecting Raspberry Chocolate Mousse Recipe
As I’ve whipped up countless batches of raspberry chocolate mousse, I’ve gathered a treasure trove of tips that can help you achieve mousse perfection. These little nuggets of wisdom can make all the difference in your dessert game, ensuring that each spoonful is as delightful as the last. Here are my top tips for perfecting your raspberry chocolate mousse:
- Use Quality Ingredients: The better the ingredients, the better the mousse! Opt for high-quality dark chocolate and fresh, ripe raspberries. Trust me, it’s worth the splurge!
- Don’t Rush the Chilling: Allow the mousse to chill for the full two hours. This step is crucial for achieving that light, airy texture. Patience is key!
- Fold Gently: When combining the whipped cream and chocolate, use a gentle folding motion. This helps maintain the airy texture that makes mousse so delightful.
- Experiment with Flavors: Feel free to add your own twist! A splash of orange juice or a hint of espresso can elevate the flavor profile and make it uniquely yours.
- Garnish Creatively: Don’t forget the finishing touches! A sprinkle of cocoa powder, a few fresh berries, or a mint leaf can transform your mousse from simple to stunning.
With these tips in your back pocket, you’re well on your way to creating a raspberry chocolate mousse that will impress everyone at the table. I can’t wait for you to experience the joy of sharing this delightful dessert with your loved ones!
Breakdown of Time for Raspberry Chocolate Mousse Recipe
As a passionate home cook, I know that timing is everything in the kitchen. When it comes to making raspberry chocolate mousse, understanding the time commitment can help you plan your culinary adventure. Here’s a quick breakdown of the time you’ll need:
- Prep Time: 30 minutes – This includes gathering your ingredients, melting the chocolate, preparing the raspberry puree, and whipping the cream. It’s a fun and engaging process that sets the stage for the deliciousness to come!
- Chilling Time: 2 hours – This is the most crucial part! Allowing the mousse to chill helps it set and develop those rich flavors. I often use this time to tidy up the kitchen or enjoy a cup of tea while I wait.
- Total Time: 2 hours and 30 minutes – In just a little over two and a half hours, you’ll have a stunning dessert ready to impress your family and friends!
With this time breakdown, you can easily fit raspberry chocolate mousse into your day. Whether it’s for a special occasion or just a sweet treat for yourself, knowing how long each step takes makes the process even more enjoyable. Happy cooking!
Nutritional Information for Raspberry Chocolate Mousse Recipe
As I whip up my raspberry chocolate mousse, I often think about the balance between indulgence and nutrition. While this dessert is a treat, it’s nice to know what we’re enjoying. Here’s a quick look at the nutritional information for a typical serving of raspberry chocolate mousse:
- Calories: Approximately 300 calories per serving
- Protein: 4g
- Fat: 22g (mostly from the heavy cream and chocolate)
- Carbohydrates: 25g
- Sugar: 15g (natural sugars from raspberries and added sugar)
- Fiber: 2g (thanks to those lovely raspberries!)
Keep in mind that these values can vary based on the specific ingredients you use. For instance, opting for a lower-fat cream or using less sugar can help lighten things up a bit. I love to enjoy this mousse in moderation, savoring each rich bite while knowing I’m treating myself to something special. After all, life is all about balance, right?
Frequently Asked Questions about Raspberry Chocolate Mousse Recipe
As I’ve shared my raspberry chocolate mousse recipe with friends and family, I’ve noticed a few common questions pop up. It’s always great to clarify any doubts, especially when it comes to creating such a delightful dessert. Here are some of the most frequently asked questions I encounter, along with my answers to help you on your culinary journey!
Can I use frozen raspberries instead of fresh ones?
Absolutely! While fresh raspberries are my go-to for their vibrant flavor, frozen raspberries can work just as well. Just make sure to thaw them and drain any excess liquid before blending them into a puree. This way, you’ll still get that delicious raspberry flavor without compromising the texture of your mousse.
How long can I store the raspberry chocolate mousse?
If you have any leftovers (which is rare in my house!), you can store the mousse in the fridge for up to three days. Just make sure to cover it well to prevent it from absorbing any fridge odors. I recommend enjoying it fresh, though, as the texture is best right after chilling!
Can I make this mousse ahead of time?
Yes, you can! In fact, making the mousse a day in advance is a great idea. It allows the flavors to meld beautifully, and you’ll have one less thing to worry about on the day of your gathering. Just remember to cover it well and keep it chilled until you’re ready to serve.
What can I substitute for heavy cream?
If you’re looking for a lighter option, you can use whipped coconut cream or a dairy-free alternative. Just keep in mind that the texture and flavor may vary slightly. For a vegan version, coconut cream is a fantastic choice that still delivers that rich, creamy mouthfeel!
Can I add other flavors to the mousse?
Definitely! This recipe is quite versatile. You can experiment with flavors like orange zest, espresso, or even a splash of liqueur for an adult twist. Just remember to balance the flavors so that the raspberry and chocolate still shine through!
These FAQs should help clear up any uncertainties you might have as you embark on your raspberry chocolate mousse adventure. Cooking is all about exploration and learning, so don’t hesitate to ask questions and make this recipe your own. Happy cooking!
Conclusion on Raspberry Chocolate Mousse Recipe
As I reflect on my journey with raspberry chocolate mousse, I can’t help but smile at the joy it brings. This dessert is more than just a sweet treat; it’s a celebration of flavors and textures that dance together in perfect harmony. The rich, velvety chocolate combined with the bright, tangy raspberries creates a delightful contrast that leaves a lasting impression on anyone lucky enough to indulge.
What I love most about this recipe is its versatility. Whether you’re hosting a fancy dinner party or simply treating yourself after a long day, raspberry chocolate mousse fits the bill. It’s easy to prepare, yet it feels luxurious and special. Plus, with the option to customize it to your taste, you can make it uniquely yours!
So, whether you’re a seasoned home cook or just starting your culinary adventure, I encourage you to give this raspberry chocolate mousse a try. It’s a delightful experience that will not only satisfy your sweet tooth but also create cherished memories with loved ones. Grab your ingredients, roll up your sleeves, and let the magic unfold in your kitchen. Happy cooking!


