Introduction to Mexican Coleslaw Recipe
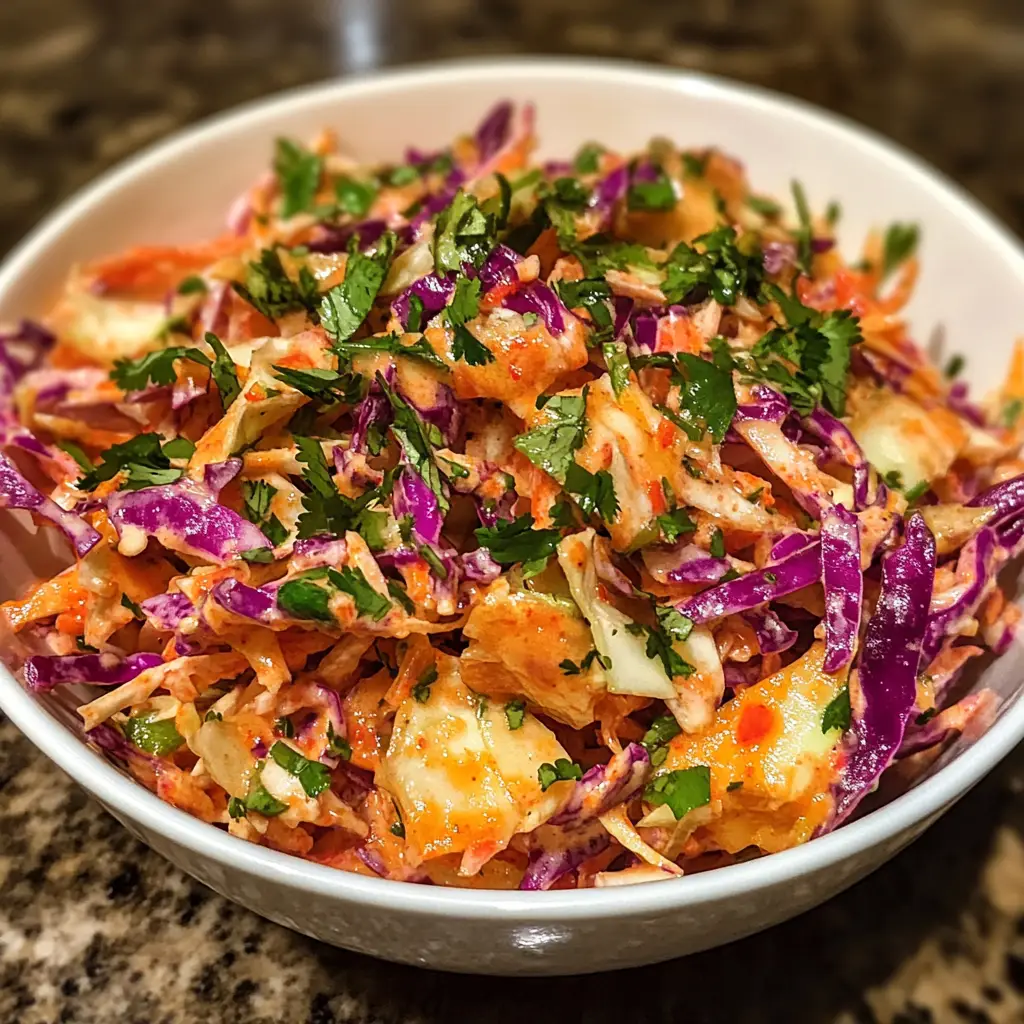
As a passionate home cook, I find joy in exploring flavors from around the world. One dish that has captured my heart is the vibrant and zesty Mexican coleslaw. This recipe is not just a side dish; it’s a celebration of fresh ingredients and bold flavors that can elevate any meal. I remember the first time I tasted this delightful coleslaw at a local taco stand. The crunch of the cabbage, the tang of lime, and the kick of jalapeño danced on my palate, leaving me craving more.
What I love most about this Mexican coleslaw recipe is its versatility. It pairs beautifully with grilled meats, tacos, or even as a topping for sandwiches. Plus, it’s a fantastic way to sneak in some extra veggies into your diet. I often whip it up for family gatherings or summer barbecues, and it never fails to impress. The best part? It’s incredibly easy to make, and you can customize it to suit your taste.
In this article, I’ll share my go-to Mexican coleslaw recipe, complete with tips and tricks that I’ve learned along the way. Whether you’re a seasoned chef or a kitchen novice, I promise you’ll find joy in creating this colorful dish. So, let’s dive into the ingredients and get started on this culinary adventure!
Ingredients for Mexican Coleslaw Recipe
Before we dive into the preparation, let’s gather our ingredients. I believe that using fresh, high-quality ingredients makes all the difference in any recipe. For this Mexican coleslaw, you’ll need a colorful array of veggies and a zesty dressing that brings everything together. Here’s what you’ll need:
Main Ingredients
- 4 cups green cabbage, finely shredded
- 1 cup red cabbage, finely shredded
- 1 cup carrots, grated (about 2 medium carrots)
- 1/2 cup red onion, thinly sliced
- 1/2 cup fresh cilantro, chopped
- 1-2 jalapeños, finely chopped (adjust based on your spice preference)
- 1/4 cup lime juice (freshly squeezed is best)
- 1/4 cup mayonnaise (or Greek yogurt for a lighter option)
- 1 tablespoon honey or agave syrup (to balance the acidity)
- Salt and pepper to taste
When selecting your vegetables, I recommend choosing firm, vibrant cabbages and fresh carrots. The colors not only make the dish visually appealing but also indicate freshness. I often visit my local farmer’s market to find the best produce, and it’s always worth the trip!
Optional Add-ons
- 1/2 cup corn (fresh or canned, drained)
- 1/2 cup black beans (rinsed and drained)
- 1 avocado, diced (for creaminess)
- 1/4 cup diced bell peppers (for extra crunch and color)
- 1 teaspoon cumin (for a smoky flavor)
Feel free to mix and match these optional ingredients based on what you have on hand or your personal preferences. I love adding black beans for extra protein or corn for a touch of sweetness. The beauty of this Mexican coleslaw recipe is that it can be tailored to suit your taste buds!
How to Prepare Mexican Coleslaw Recipe
Now that we have our ingredients ready, it’s time to roll up our sleeves and get cooking! Preparing this Mexican coleslaw is a breeze, and I promise you’ll enjoy every step of the process. Let’s dive into the preparation!
Step 1: Prepare the Vegetables
First things first, we need to get our veggies prepped. Start by washing all your vegetables thoroughly. I like to use a salad spinner to dry them off quickly. Then, finely shred the green and red cabbage, grate the carrots, and slice the red onion. Don’t forget to chop the jalapeños and cilantro!
Tips for Choosing Fresh Vegetables
When selecting your vegetables, look for vibrant colors and firm textures. The cabbage should feel crisp, and the carrots should be smooth without any blemishes. I often find that visiting a local farmer’s market yields the freshest produce. Plus, it’s a fun outing!
Step 2: Make the Dressing
Next up is the dressing, which is the heart of this Mexican coleslaw. In a medium bowl, combine the lime juice, mayonnaise (or Greek yogurt), and honey or agave syrup. Whisk everything together until it’s smooth and creamy. This dressing is what brings all those fresh flavors to life!
Tips for Balancing Flavors
To achieve the perfect balance, taste your dressing as you go. If it’s too tangy, add a bit more honey. If it’s too sweet, a splash of lime juice can brighten it up. I love to add a pinch of salt to enhance the flavors, too. Remember, the dressing should complement the veggies, not overpower them!
Step 3: Combine Ingredients
Now it’s time for the fun part! In a large mixing bowl, combine all your prepared vegetables. Pour the dressing over the top and gently toss everything together until the veggies are well coated. I like to use my hands for this step; it’s a great way to ensure everything is mixed evenly!
Tips for Mixing
Be gentle when mixing to avoid bruising the vegetables. If you’re adding any optional ingredients, like corn or black beans, fold them in at this stage. This is also a great time to adjust the seasoning with salt and pepper. A little taste test never hurts!
Step 4: Chill and Serve
Once everything is combined, cover the bowl with plastic wrap or a lid and let it chill in the refrigerator for at least 30 minutes. This allows the flavors to meld together beautifully. When you’re ready to serve, give it a quick toss to refresh the ingredients.
Tips for Best Results
For the best flavor, I recommend letting the coleslaw chill for a few hours or even overnight. The longer it sits, the more delicious it becomes! Just remember to give it a good stir before serving to redistribute the dressing.
Equipment Needed for Mexican Coleslaw Recipe
Before we dive into the kitchen, let’s gather the essential tools for making this delightful Mexican coleslaw. Having the right equipment can make the process smoother and more enjoyable. Here’s what you’ll need:
- Cutting Board: A sturdy cutting board is essential for chopping and slicing your vegetables. I prefer a wooden one for its durability and ease of cleaning.
- Sharp Knife: A sharp knife is crucial for finely shredding the cabbage and slicing the onions. It makes the task quicker and safer!
- Grater: A box grater or a food processor with a grating attachment works wonders for grating carrots. If you don’t have either, a simple knife can do the trick, though it may take a bit longer.
- Mixing Bowl: A large mixing bowl is necessary for combining all the ingredients. I like to use a glass or stainless steel bowl, as they’re easy to clean and won’t retain odors.
- Whisk: A whisk is perfect for mixing the dressing until it’s smooth and creamy. If you don’t have one, a fork can work in a pinch!
- Salad Spinner (optional): If you want to dry your washed vegetables quickly, a salad spinner is a handy tool. However, you can also pat them dry with a clean kitchen towel.
These tools are quite common, so you might already have them in your kitchen. If not, don’t worry! You can always improvise with what you have on hand. The key is to enjoy the process and have fun while creating this delicious Mexican coleslaw!
Variations of Mexican Coleslaw Recipe
One of the things I adore about this Mexican coleslaw recipe is its flexibility. You can easily switch things up to suit your taste or what you have in your pantry. Here are a few variations that I’ve tried and loved:
- Spicy Mango Coleslaw: Add diced ripe mango for a sweet twist. The sweetness pairs beautifully with the heat of jalapeños, creating a delightful contrast.
- Chipotle Coleslaw: For a smoky flavor, mix in some chipotle in adobo sauce. Just a teaspoon can add a whole new depth to the dressing!
- Asian-Inspired Coleslaw: Swap out the lime juice for rice vinegar and add sesame oil. Toss in some chopped peanuts or sesame seeds for crunch.
- Fruit-Infused Coleslaw: Incorporate diced apples or pears for a refreshing crunch. The natural sweetness of the fruit complements the tangy dressing perfectly.
These variations not only keep things exciting but also allow you to experiment with flavors. I often find myself trying new combinations based on seasonal ingredients or what I have on hand. The possibilities are endless, and that’s what makes cooking so much fun!
Cooking Notes for Mexican Coleslaw Recipe
As I’ve whipped up this Mexican coleslaw recipe countless times, I’ve gathered a few cooking notes that can help you achieve the best results. These little tips can make a big difference in flavor and texture!
First, always taste as you go. Adjusting the seasoning is key to making sure your coleslaw is just right. If you find it too tangy, a touch more honey can balance it out. On the flip side, if it’s too sweet, a splash of lime juice can brighten it up.
Next, consider the timing of your preparation. If you can, make the coleslaw a few hours ahead of serving. This allows the flavors to meld beautifully, creating a more harmonious dish. I often prepare it the night before for gatherings, and it’s always a hit!
Lastly, don’t be afraid to get creative! If you have leftover veggies in your fridge, toss them in. I’ve added radishes, green onions, and even shredded Brussels sprouts for a unique twist. Cooking is all about experimenting, and that’s where the magic happens!
Serving Suggestions for Mexican Coleslaw Recipe
Now that we have our vibrant Mexican coleslaw ready, it’s time to think about how to serve it! This dish is incredibly versatile and can complement a variety of meals. Here are some of my favorite serving suggestions that I’ve enjoyed over the years:
- Taco Night: Serve the coleslaw as a crunchy topping for tacos. It adds a refreshing contrast to the savory fillings, whether you’re using beef, chicken, or veggies.
- Grilled Meats: Pair the coleslaw with grilled chicken, steak, or fish. The zesty flavors cut through the richness of the meat, making each bite a delight.
- Sandwiches and Wraps: Use the coleslaw as a filling for sandwiches or wraps. It adds a burst of flavor and texture that elevates even the simplest of lunches.
- Picnics and Barbecues: This coleslaw is a perfect side dish for summer gatherings. It’s easy to transport and can be made ahead of time, allowing you to enjoy the day with friends and family.
- As a Standalone Salad: If you’re looking for a light meal, enjoy the coleslaw on its own. Add some grilled shrimp or chicken on top for a satisfying dish that’s both healthy and delicious.
Each of these serving suggestions brings out the best in the Mexican coleslaw, making it a delightful addition to any meal. I love how it can transform a simple dish into something special, and I’m sure you’ll find your own favorite ways to enjoy it!
Tips for Perfecting Mexican Coleslaw Recipe
As I’ve made this Mexican coleslaw recipe time and time again, I’ve picked up a few tips that can truly elevate your dish. These little nuggets of wisdom can make a world of difference in flavor and presentation!
- Use Fresh Ingredients: Freshness is key! Always opt for the crispest vegetables you can find. The crunch of fresh cabbage and carrots makes all the difference in texture.
- Chill Before Serving: Allowing the coleslaw to chill for at least 30 minutes helps the flavors meld together beautifully. If you can, let it sit for a few hours or overnight for the best taste.
- Adjust the Spice Level: If you’re sensitive to heat, start with just one jalapeño and taste as you go. You can always add more if you want that extra kick!
- Experiment with Herbs: While cilantro is a classic, don’t hesitate to try other herbs like parsley or mint for a different flavor profile. Each herb brings its own unique twist!
- Presentation Matters: Serve your coleslaw in a colorful bowl or platter. A sprinkle of extra cilantro or a few lime wedges on top can make it look even more inviting!
These tips have helped me create a coleslaw that’s not only delicious but also visually appealing. I hope they inspire you to put your own spin on this delightful dish!
Breakdown of Time for Mexican Coleslaw Recipe
When it comes to whipping up this delicious Mexican coleslaw, timing is everything! I love how quick and easy it is to prepare, making it perfect for busy weeknights or last-minute gatherings. Here’s a simple breakdown of the time you’ll need:
- Prep Time: 15 minutes – This includes washing, chopping, and grating all your fresh vegetables. I find that having everything prepped and ready makes the process smooth and enjoyable.
- Cooking Time: 0 minutes – Since this is a no-cook recipe, you can skip the stove entirely! Just mix and chill.
- Total Time: 30 minutes (or longer if you choose to chill it) – While you can serve it right after mixing, I recommend letting it chill for at least 30 minutes to allow the flavors to meld. If you have the time, letting it sit for a few hours or overnight is even better!
With just a little bit of prep and no cooking required, you’ll have a vibrant and tasty Mexican coleslaw ready to impress your family and friends in no time. I often find myself making it ahead of time, so it’s ready to go when I need it. It’s a real time-saver!
Nutritional Information for Mexican Coleslaw Recipe
As a home cook, I always pay attention to the nutritional value of the dishes I prepare. This Mexican coleslaw recipe is not only delicious but also packed with nutrients! Here’s a quick overview of the nutritional information per serving, assuming the recipe serves about six people:
- Calories: Approximately 150 calories
- Protein: 3 grams
- Fat: 8 grams (mostly from the mayonnaise or Greek yogurt)
- Carbohydrates: 18 grams
- Fiber: 4 grams
- Sugar: 3 grams (natural sugars from vegetables)
- Sodium: 200 mg (can vary based on added salt)
This coleslaw is a great source of vitamins A and C, thanks to the fresh veggies. The fiber content helps with digestion, making it a healthy addition to any meal. Plus, with the option to use Greek yogurt instead of mayonnaise, you can reduce the calories and fat while still enjoying a creamy texture.
As I often say, eating healthy doesn’t have to be boring! This Mexican coleslaw is a colorful and nutritious way to add some crunch to your plate. Enjoy it guilt-free, knowing you’re nourishing your body while delighting your taste buds!
Frequently Asked Questions about Mexican Coleslaw Recipe
As I’ve shared my love for this Mexican coleslaw recipe, I often get questions from friends and family eager to try it out. I love answering these queries because it shows how excited everyone is to dive into this delicious dish! Here are some of the most common questions I receive, along with my answers:
Can I make Mexican coleslaw ahead of time?
Absolutely! In fact, I recommend making it a few hours or even a day in advance. The flavors meld beautifully as it sits in the fridge, making it even tastier. Just remember to give it a good stir before serving!
How long does Mexican coleslaw last in the fridge?
When stored in an airtight container, this coleslaw can last for about 3 to 5 days in the refrigerator. However, I find that it’s best enjoyed within the first couple of days for optimal freshness and crunch.
Can I use a different dressing for the coleslaw?
Of course! While I love the zesty lime dressing, you can experiment with different dressings. A vinaigrette or even a creamy ranch dressing can work well. Just keep in mind that the flavors will change, but that’s part of the fun of cooking!
Is this coleslaw spicy?
The spice level really depends on how many jalapeños you add. If you’re sensitive to heat, start with just one and taste as you go. You can always add more if you want that extra kick! Alternatively, you can omit the jalapeños altogether for a milder version.
Can I add other vegetables to the coleslaw?
Absolutely! This recipe is very flexible. I’ve added radishes, bell peppers, and even shredded Brussels sprouts for a unique twist. Feel free to get creative with whatever veggies you have on hand!
Is this recipe suitable for vegans?
Yes! You can easily make this coleslaw vegan by substituting the mayonnaise with a plant-based alternative or using a simple vinaigrette. Just make sure to check the labels on any store-bought ingredients to ensure they meet your dietary needs.
These questions reflect the curiosity and enthusiasm that surrounds this delightful Mexican coleslaw recipe. I hope my answers inspire you to try making it yourself and to enjoy the process as much as I do! If you have any other questions, feel free to reach out. Happy cooking!
Conclusion on Mexican Coleslaw Recipe
In conclusion, this Mexican coleslaw recipe is more than just a side dish; it’s a vibrant celebration of flavors and textures that can elevate any meal. With its crunchy vegetables, zesty dressing, and endless customization options, it’s a dish that brings joy to the table. I love how it can be made ahead of time, allowing the flavors to meld beautifully, making it perfect for gatherings or busy weeknights.
Whether you’re serving it alongside tacos, grilled meats, or enjoying it on its own, this coleslaw is sure to impress. Plus, it’s a fantastic way to sneak in those essential veggies while keeping things delicious and fun. I encourage you to try this recipe and make it your own, experimenting with different ingredients and flavors. Cooking is all about creativity, and I hope this Mexican coleslaw inspires you to explore the culinary world with enthusiasm!
So, gather your ingredients, roll up your sleeves, and let the magic happen in your kitchen. I can’t wait for you to experience the joy of making and sharing this delightful dish with your loved ones. Happy cooking!


