Introduction to Lemon Raspberry Cheesecake Bars
Ah, the sweet and tangy dance of flavors that is Lemon Raspberry Cheesecake Bars! Every time I make these delightful treats, I’m reminded of sunny afternoons spent in my grandmother’s kitchen. The air would be filled with the scent of fresh lemons and ripe raspberries, creating a symphony of aromas that made my heart sing. It’s funny how food can transport you back in time, isn’t it?
These bars are not just a dessert; they are a celebration of summer! The creamy cheesecake filling, paired with the zesty lemon and the tartness of raspberries, creates a perfect balance that leaves you wanting more. I remember the first time I served these at a family gathering. The moment I took them out of the oven, my family gathered around, their eyes wide with anticipation. The first bite was met with smiles and happy sighs, and I knew I had struck gold!
What I love most about these Lemon Raspberry Cheesecake Bars is their versatility. They are perfect for any occasion, whether it’s a picnic in the park, a birthday party, or just a cozy night in. Plus, they are surprisingly easy to make! With just a handful of ingredients, you can whip up a batch that will impress your friends and family. Trust me, they’ll be asking for the recipe!
So, grab your apron and let’s dive into the world of Lemon Raspberry Cheesecake Bars. I promise you, this recipe will become a staple in your kitchen, just like it has in mine. Let’s create some delicious memories together!
Ingredients for Lemon Raspberry Cheesecake Bars
Before we embark on this delicious journey, let’s gather our ingredients! I always believe that the quality of ingredients can make or break a recipe. So, I recommend using fresh, organic produce whenever possible. Trust me, it makes a world of difference in flavor!
Main Ingredients
- 1 ½ cups graham cracker crumbs
- ½ cup unsalted butter, melted
- 2 cups cream cheese, softened
- 1 cup granulated sugar
- 3 large eggs
- 1/4 cup fresh lemon juice (about 2 lemons)
- 1 tablespoon lemon zest (from about 1 lemon)
- 1 cup fresh raspberries (or frozen, thawed and drained)
When I make these bars, I always opt for fresh lemons. The zest adds a vibrant flavor that bottled lemon juice just can’t replicate. And those raspberries? They should be plump and juicy, bursting with flavor!
Optional Add-ons
- 1 teaspoon vanilla extract for added depth
- Powdered sugar for dusting on top
- Extra lemon zest for garnish
- Chocolate drizzle for a fun twist
Sometimes, I like to add a splash of vanilla extract to the cheesecake filling. It gives it a lovely warmth that complements the tartness of the lemon and raspberries. And if you’re feeling adventurous, a drizzle of melted chocolate on top can elevate these bars to a whole new level!
Now that we have our ingredients ready, let’s move on to the fun part—preparing these delightful Lemon Raspberry Cheesecake Bars!
How to Prepare Lemon Raspberry Cheesecake Bars
Now that we have our ingredients ready, it’s time to roll up our sleeves and get cooking! Making Lemon Raspberry Cheesecake Bars is a delightful process that fills your kitchen with mouthwatering aromas. I can’t wait to share the steps with you. Let’s dive in!
Step 1: Prepare the Crust
First things first, we need to create a delicious crust that will hold all that creamy goodness. In a mixing bowl, combine the graham cracker crumbs and melted butter. Stir until the crumbs are evenly coated. Then, press this mixture firmly into the bottom of a greased baking dish. I like to use the back of a measuring cup to get an even layer.
Tips for Step 1
Make sure to pack the crust tightly. This will help it hold together when you slice the bars later. If you want a little extra flavor, consider adding a pinch of salt to the crust mixture. It really enhances the sweetness!
Step 2: Make the Cheesecake Filling
Next up, let’s whip up that creamy cheesecake filling! In a large bowl, beat the softened cream cheese until it’s smooth and fluffy. Gradually add in the granulated sugar, mixing until well combined. Then, add the eggs one at a time, mixing after each addition. Finally, stir in the fresh lemon juice and lemon zest. The mixture should be silky and luscious!
Tips for Step 2
To avoid lumps, make sure your cream cheese is at room temperature. If you’re short on time, you can microwave it for about 10 seconds to soften it. Just be careful not to melt it!
Step 3: Swirl in the Raspberry Mixture
Now comes the fun part—adding the raspberries! In a separate bowl, gently mash the raspberries with a fork. You want to break them down a bit, but leave some whole for texture. Then, fold the mashed raspberries into the cheesecake filling. Don’t overmix; we want those beautiful swirls to show!
Tips for Step 3
If you’re using frozen raspberries, make sure to thaw and drain them well. You don’t want excess moisture in your filling. And remember, a little bit of raspberry goes a long way in flavor!
Step 4: Bake the Bars
It’s time to bake! Pour the cheesecake mixture over the prepared crust, spreading it evenly. Pop it into a preheated oven at 325°F (160°C) and bake for about 30-35 minutes. The edges should be set, but the center will still have a slight jiggle.
Tips for Step 4
Keep an eye on the bars as they bake. Every oven is different, and you don’t want to overbake them. If you notice the edges browning too quickly, you can cover them with foil to prevent burning.
Step 5: Cool and Slice
Once baked, remove the bars from the oven and let them cool in the pan for about an hour. Then, transfer them to the fridge to chill for at least 2 hours. This step is crucial for achieving that perfect slice! When you’re ready to serve, use a sharp knife to cut them into squares.
Tips for Step 5
For clean cuts, dip your knife in hot water and wipe it dry before slicing. This will help you get those beautiful, neat edges. And don’t forget to dust them with powdered sugar for a lovely finishing touch!
Equipment Needed for Lemon Raspberry Cheesecake Bars
Before we dive into the baking process, let’s gather the essential tools you’ll need to create these scrumptious Lemon Raspberry Cheesecake Bars. Having the right equipment makes everything smoother and more enjoyable. Here’s what I recommend:
- 9×9-inch baking dish: This is perfect for the bars. If you don’t have one, an 8×8-inch dish will work too; just keep an eye on the baking time.
- Mixing bowls: You’ll need a couple of these—one for the crust and another for the cheesecake filling. I love using glass bowls because they’re easy to clean!
- Electric mixer: A hand mixer or stand mixer will make whipping the cream cheese a breeze. If you don’t have one, a whisk will do, but it’ll take a bit more elbow grease!
- Measuring cups and spoons: Accurate measurements are key to baking success. I always keep a set handy for both dry and liquid ingredients.
- Rubber spatula: This is great for scraping down the sides of the bowl and folding in the raspberries without losing any of that delicious filling.
- Sharp knife: For slicing the bars into perfect squares. A hot knife, dipped in water, will give you those clean cuts!
With these tools in hand, you’re all set to create a masterpiece in your kitchen. Remember, the joy of cooking comes not just from the ingredients, but also from the process. So, let’s get started on making those Lemon Raspberry Cheesecake Bars!
Variations of Lemon Raspberry Cheesecake Bars
While I absolutely adore the classic Lemon Raspberry Cheesecake Bars, there’s something thrilling about experimenting with flavors! Each variation brings a new twist to this beloved recipe, and I can’t wait to share a few of my favorites with you.
One delightful option is to swap out the raspberries for strawberries. The sweet, juicy strawberries create a lovely contrast with the tangy lemon, making for a refreshing treat. You can even mix in some crushed graham crackers into the filling for added texture!
If you’re a chocolate lover like me, consider adding a layer of chocolate ganache on top. Just melt some chocolate with a bit of cream, pour it over the cooled cheesecake bars, and let it set. The rich chocolate pairs beautifully with the zesty lemon.
For a tropical twist, try adding coconut! You can mix shredded coconut into the crust or sprinkle it on top before serving. The coconut adds a delightful chewiness that complements the creamy filling.
Lastly, if you want to make these bars a bit more decadent, consider adding a swirl of lemon curd on top before baking. It adds an extra burst of lemon flavor that’s simply irresistible!
These variations are just the tip of the iceberg. Feel free to get creative and make these Lemon Raspberry Cheesecake Bars your own. After all, cooking is all about having fun and exploring new flavors!
Cooking Notes for Lemon Raspberry Cheesecake Bars
As I’ve learned through my culinary adventures, a few cooking notes can make all the difference when preparing Lemon Raspberry Cheesecake Bars. Here are some tips that I’ve gathered over the years to ensure your bars turn out perfectly every time!
First, always remember to preheat your oven. This step is crucial for even baking. I like to set my oven to 325°F (160°C) while I prepare the crust and filling. That way, it’s ready to go when I’m done mixing!
Next, be patient when cooling the bars. I know it’s tempting to dive right in, but letting them chill in the fridge for at least two hours is essential. This helps the filling set properly, making slicing much easier.
Also, consider using a parchment paper liner in your baking dish. This little trick makes it a breeze to lift the bars out once they’re cooled. Just grab the edges of the parchment, and voilà—perfectly intact bars!
Lastly, don’t be afraid to taste as you go! Sampling the filling before baking is a great way to adjust the sweetness or tartness to your liking. After all, cooking is about personalizing flavors to suit your palate.
With these cooking notes in mind, you’re well on your way to creating a batch of Lemon Raspberry Cheesecake Bars that will impress everyone. Happy baking!
Serving Suggestions for Lemon Raspberry Cheesecake Bars
When it comes to serving my Lemon Raspberry Cheesecake Bars, I like to get a little creative! Presentation can elevate the experience, and trust me, your guests will appreciate the extra touch. Here are some of my favorite serving suggestions that add a sprinkle of joy to each bite.
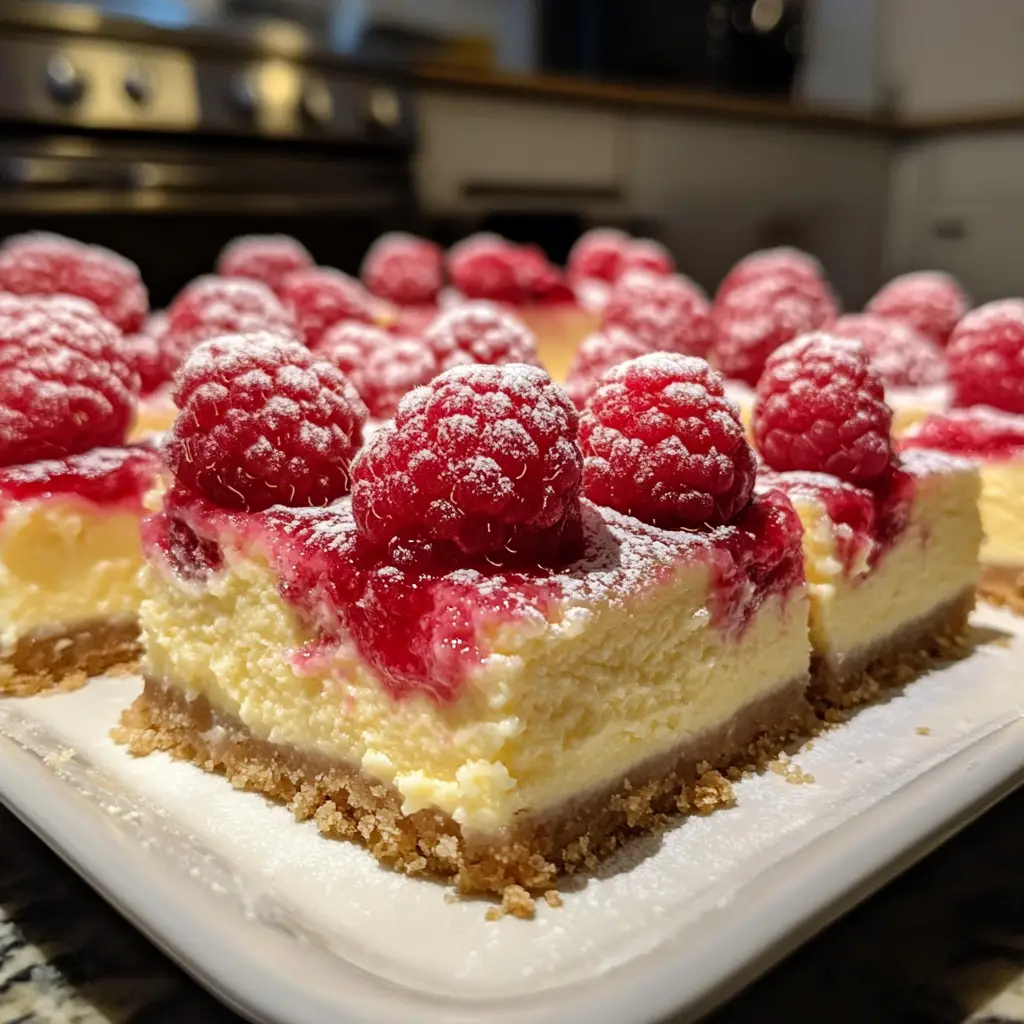
First, I love to serve these bars chilled, straight from the fridge. The coolness enhances the creamy texture and makes each bite refreshing, especially on a warm day. A simple dusting of powdered sugar on top adds a touch of elegance and sweetness that’s hard to resist!
For a fun twist, I often pair these bars with a dollop of whipped cream. The light, airy cream complements the rich cheesecake beautifully. You can even add a hint of vanilla or lemon zest to the whipped cream for an extra flavor boost!
If you’re feeling adventurous, consider serving them with a scoop of vanilla ice cream or a scoop of lemon sorbet. The contrast of temperatures and textures creates a delightful experience that will have everyone coming back for seconds.
Lastly, I love to garnish the bars with fresh raspberries and lemon slices. Not only does it make for a stunning presentation, but it also adds a burst of color and freshness that’s simply irresistible. Plus, it’s a great way to showcase the star ingredients!
With these serving suggestions, your Lemon Raspberry Cheesecake Bars will not only taste amazing but also look like a work of art. Enjoy sharing these delightful treats with family and friends, and watch as they disappear in no time!
Tips for Perfect Lemon Raspberry Cheesecake Bars
As a passionate home cook, I’ve learned that a few simple tips can elevate your Lemon Raspberry Cheesecake Bars from good to absolutely spectacular! Here are my top secrets to ensure your bars turn out perfectly every time.
First, always use room temperature ingredients. This is especially important for the cream cheese and eggs. When they’re at room temperature, they blend together more smoothly, creating that luscious filling we all crave. I usually take them out of the fridge about 30 minutes before I start baking.
Next, don’t skip the chilling time! After baking, let your bars cool in the pan for an hour, then refrigerate them for at least two hours. This step is crucial for achieving that perfect, clean slice. Trust me, the wait is worth it!
Another tip is to avoid overmixing the filling. When you fold in the raspberries, do it gently. You want those beautiful swirls to remain visible, adding a lovely visual appeal to your bars. Overmixing can also lead to a denser texture, which we want to avoid.
Lastly, consider using a sharp knife dipped in hot water for slicing. This little trick helps create clean edges, making your bars look as good as they taste. Plus, it’s a great way to impress your friends and family with your baking skills!
With these tips in your back pocket, you’re all set to create Lemon Raspberry Cheesecake Bars that will wow everyone. Happy baking, and enjoy every delicious bite!
Breakdown of Time for Lemon Raspberry Cheesecake Bars
When it comes to baking, timing is everything! I’ve found that knowing how long each step takes can help you plan your day better. Here’s a quick breakdown of the time you’ll need to whip up these delightful Lemon Raspberry Cheesecake Bars.
- Prep Time: 20 minutes
- Cooking Time: 30-35 minutes
- Cooling Time: 1 hour (plus at least 2 hours in the fridge)
- Total Time: Approximately 3 hours (including cooling)
While the active prep and cooking time is relatively short, don’t forget about the cooling time! It’s essential for achieving that perfect texture. I often use this time to clean up my kitchen or prepare a nice cup of tea to enjoy with the bars later. Trust me, the wait will be worth it when you take that first delicious bite!
Nutritional Information for Lemon Raspberry Cheesecake Bars
As a passionate home cook, I always find it helpful to know the nutritional content of the treats I whip up. It allows me to enjoy them mindfully while sharing them with family and friends. Here’s a general breakdown of the nutritional information for one Lemon Raspberry Cheesecake Bar, assuming you cut the batch into 12 squares:
- Calories: Approximately 200
- Protein: 3g
- Fat: 12g
- Carbohydrates: 22g
- Fiber: 1g
- Sugar: 10g
Keep in mind that these values can vary based on the specific ingredients you use and any optional add-ons you might include. For instance, if you decide to add chocolate drizzle or extra toppings, the calorie count will increase. I always encourage balance, so enjoy these bars as a delightful treat in moderation!
Whether you’re indulging in a slice after dinner or sharing them at a gathering, knowing the nutritional information can help you savor each bite even more. Happy baking and enjoy your delicious Lemon Raspberry Cheesecake Bars!
Frequently Asked Questions about Lemon Raspberry Cheesecake Bars
As I’ve shared my love for Lemon Raspberry Cheesecake Bars, I often get questions from fellow home cooks eager to try this delightful recipe. I love connecting with others through cooking, so I’ve compiled some of the most frequently asked questions to help you on your baking journey!
Can I use frozen raspberries instead of fresh?
Absolutely! Frozen raspberries work just fine. Just make sure to thaw and drain them well before adding them to the filling. This helps prevent excess moisture, ensuring your bars maintain that perfect texture.
How do I store leftover cheesecake bars?
To keep your Lemon Raspberry Cheesecake Bars fresh, store them in an airtight container in the refrigerator. They’ll last for about 4-5 days. If you want to keep them longer, you can freeze them! Just wrap them tightly in plastic wrap and then in aluminum foil. They can be frozen for up to 2 months.
Can I make these bars gluten-free?
Yes, you can! Simply substitute the graham cracker crumbs with gluten-free crumbs or crushed nuts. There are many gluten-free options available that will work beautifully in this recipe.
What can I use instead of cream cheese?
If you’re looking for a lighter option, you can use Greek yogurt or a dairy-free cream cheese alternative. Just keep in mind that the flavor and texture may vary slightly, but they can still create a delicious treat!
Can I make these bars ahead of time?
Definitely! In fact, making them a day in advance can enhance the flavors as they chill. Just be sure to store them properly in the fridge, and they’ll be ready to impress your guests when you serve them!
These questions reflect the curiosity and excitement that come with baking Lemon Raspberry Cheesecake Bars. I hope my answers help you feel more confident in your culinary adventure. Remember, cooking is all about experimenting and having fun, so don’t hesitate to make this recipe your own!
Conclusion on Lemon Raspberry Cheesecake Bars
As I wrap up my journey through the delightful world of Lemon Raspberry Cheesecake Bars, I can’t help but feel a sense of joy. These bars are more than just a dessert; they are a celebration of flavors, memories, and the simple pleasure of cooking. The creamy cheesecake, zesty lemon, and tart raspberries come together in a harmonious blend that dances on your taste buds.
What I love most about this recipe is its versatility. Whether you’re hosting a summer picnic, celebrating a birthday, or simply treating yourself after a long day, these bars fit the bill perfectly. They are easy to make, and the process is filled with joy and anticipation. Plus, they look stunning on any dessert table!
So, if you’re looking to impress your friends and family or simply indulge in a sweet treat, I wholeheartedly encourage you to give these Lemon Raspberry Cheesecake Bars a try. I promise they will become a cherished recipe in your kitchen, just as they have in mine. Happy baking, and may your kitchen be filled with love and laughter!


