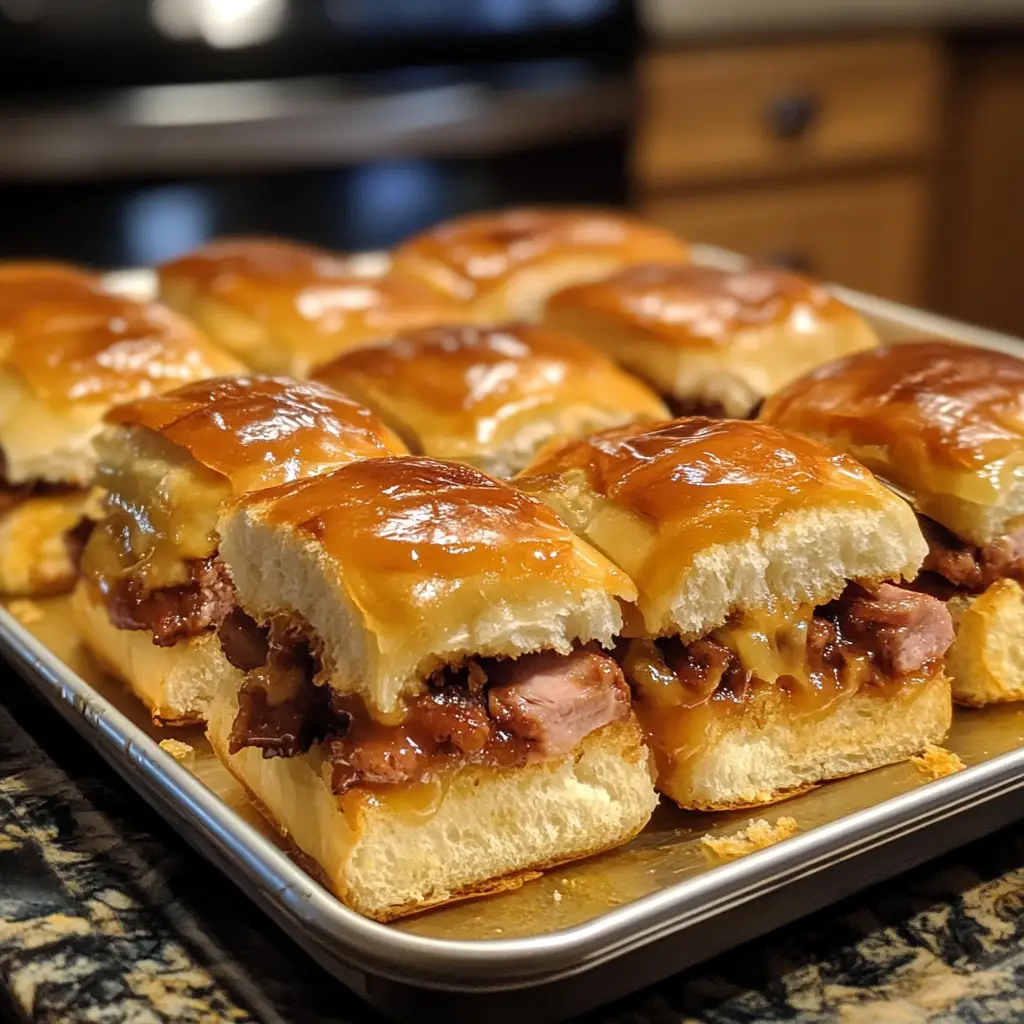
Introduction to King’s Hawaiian Roll Sliders
As a busy mom, I know how challenging it can be to whip up something delicious that everyone will love. That’s where King’s Hawaiian Roll Sliders come in! These little gems are not just sandwiches; they’re a sweet and savory hug in every bite. Perfect for game day or a family gathering, they’re quick to prepare and even quicker to disappear. Trust me, your loved ones will be asking for seconds! With just a few simple ingredients, you can create a dish that feels special without spending hours in the kitchen.
Why You’ll Love This King’s Hawaiian Roll Sliders
These King’s Hawaiian Roll Sliders are a game-changer for busy days! They come together in just 30 minutes, making them a lifesaver for hectic weeknights or last-minute gatherings. The sweet rolls perfectly complement the savory fillings, creating a flavor explosion that everyone will adore. Plus, they’re incredibly versatile! You can customize them to suit any taste, ensuring that even the pickiest eaters will be satisfied.
Ingredients for King’s Hawaiian Roll Sliders
Let’s gather our ingredients for these delightful King’s Hawaiian Roll Sliders! Each component plays a vital role in creating that perfect balance of sweet and savory. Here’s what you’ll need:
- King’s Hawaiian rolls: These sweet, fluffy rolls are the star of the show. Their unique flavor adds a delightful twist to any filling.
- Deli meat: Choose from ham, turkey, or roast beef. Each option brings its own flavor profile, so pick your family’s favorite!
- Cheese: Swiss or cheddar works beautifully here. The melty goodness binds everything together and adds richness.
- Butter: Melted butter is essential for brushing on top. It adds a golden, crispy finish and enhances the overall flavor.
- Dijon mustard: This adds a tangy kick that complements the sweetness of the rolls. Feel free to adjust the amount to your taste!
- Poppy seeds: These tiny seeds add a lovely crunch and a hint of nuttiness. They also make the sliders look extra appealing.
- Garlic powder: A sprinkle of garlic powder elevates the flavor, giving the sliders a savory depth that’s hard to resist.
For those who like to experiment, consider adding jalapeños for a spicy kick or swapping out the cheese for a dairy-free alternative. You can find the exact quantities for each ingredient at the bottom of the article, ready for printing!
How to Make King’s Hawaiian Roll Sliders
Now that we have our ingredients ready, let’s dive into the fun part—making these King’s Hawaiian Roll Sliders! Follow these simple steps, and you’ll have a delicious dish that’s sure to impress.
Step 1: Preheat the Oven
First things first, preheat your oven to 350°F (175°C). Preheating is crucial because it ensures that your sliders bake evenly. A hot oven helps the rolls rise beautifully and gives them that golden-brown finish we all love.
Step 2: Prepare the Rolls
Next, take your King’s Hawaiian rolls and slice them in half horizontally. Be careful not to separate them completely; you want them to stay connected at the bottom. This makes layering the fillings easier and keeps everything together when serving.
Step 3: Layer the Fillings
Now it’s time to layer the fillings! Start with your choice of deli meat, spreading it evenly across the bottom half of the rolls. Then, add a generous layer of cheese on top. Make sure to distribute everything evenly so that every slider is packed with flavor. No one likes a sad, cheese-less bite!
Step 4: Mix the Butter Sauce
In a small bowl, mix together the melted butter, Dijon mustard, poppy seeds, and garlic powder. This butter sauce is the secret to elevating your sliders. It adds richness and a burst of flavor that complements the sweet rolls perfectly. Give it a good stir until everything is well combined.
Step 5: Brush the Rolls
Using a pastry brush, generously brush the butter sauce over the top of the rolls. Make sure to cover every inch for maximum flavor. This step is key to achieving that crispy, golden crust that makes these sliders irresistible!
Step 6: Bake the Sliders
Cover the sliders with aluminum foil and pop them in the preheated oven. Bake for about 15 minutes. After that, remove the foil and bake for an additional 5-10 minutes until the tops are golden brown and deliciously crispy. Keep an eye on them; you want that perfect color!
Step 7: Serve and Enjoy
Once they’re out of the oven, let the sliders cool for a minute. Then, slice them apart and serve warm. These King’s Hawaiian Roll Sliders are best enjoyed fresh, so gather your loved ones and dig in while they’re still gooey and melty!
Tips for Success
- Use a sharp knife to slice the rolls for clean cuts.
- Don’t skip the foil cover while baking; it keeps the sliders moist.
- Experiment with different meats and cheeses for unique flavors.
- Make the butter sauce ahead of time for quicker assembly.
- Serve with a side of pickles or chips for a complete meal.
Equipment Needed
- Baking dish: A 9×13 inch dish works perfectly, but any oven-safe dish will do.
- Aluminum foil: Essential for covering the sliders while baking; parchment paper can be a substitute.
- Pastry brush: Great for applying the butter sauce; a spoon can work in a pinch.
- Sharp knife: For slicing the rolls; a serrated knife is ideal.
Variations
- Vegetarian sliders: Swap the deli meat for roasted vegetables or hummus for a delicious meat-free option.
- BBQ sliders: Use pulled pork or chicken with BBQ sauce for a smoky twist that’s perfect for summer gatherings.
- Spicy sliders: Add jalapeños or a drizzle of hot sauce to the filling for those who love a little heat.
- Breakfast sliders: Fill with scrambled eggs, cheese, and cooked bacon or sausage for a hearty breakfast treat.
- Caprese sliders: Layer fresh mozzarella, tomatoes, and basil with a drizzle of balsamic glaze for a fresh, Italian-inspired version.
Serving Suggestions for King’s Hawaiian Roll Sliders
- Pair with crispy potato chips or sweet potato fries for a satisfying crunch.
- Serve alongside a fresh garden salad for a light and refreshing contrast.
- Offer a variety of dipping sauces, like ranch or honey mustard, for added flavor.
- For drinks, consider iced tea or a light beer to complement the sliders.
- Present on a colorful platter, garnished with fresh herbs for a festive touch.
FAQs about King’s Hawaiian Roll Sliders
As I’ve shared my love for King’s Hawaiian Roll Sliders, I often get questions from fellow home cooks. Here are some of the most common queries, along with my answers to help you make the most of this delightful recipe!
Can I make King’s Hawaiian Roll Sliders ahead of time?
Absolutely! You can assemble the sliders a day in advance and store them in the fridge. Just bake them right before serving for that fresh-out-of-the-oven taste.
What other fillings can I use for these sliders?
The beauty of King’s Hawaiian Roll Sliders is their versatility! You can use any deli meat, cheese, or even veggies. Think turkey and Swiss, or roasted peppers with mozzarella for a vegetarian option.
How do I store leftovers?
If you have any sliders left, store them in an airtight container in the fridge. They’re best enjoyed within a couple of days, but you can reheat them in the oven for a quick snack!
Can I freeze King’s Hawaiian Roll Sliders?
Yes, you can freeze them! Just assemble the sliders without baking, wrap them tightly, and freeze. When you’re ready to enjoy, bake them straight from the freezer, adding a few extra minutes to the cooking time.
What drinks pair well with King’s Hawaiian Roll Sliders?
These sliders are perfect with a variety of drinks! I recommend iced tea, lemonade, or even a light beer. They complement the sweet and savory flavors beautifully.
Final Thoughts
Making King’s Hawaiian Roll Sliders is more than just cooking; it’s about creating moments. The joy of pulling a tray of warm, gooey sliders from the oven fills the kitchen with love and laughter. Whether it’s game day or a cozy family dinner, these sliders bring everyone together. They’re easy to prepare, customizable, and oh-so-delicious! I can’t help but smile when I see my loved ones enjoying them. So, roll up your sleeves, gather your ingredients, and let the magic happen. Trust me, these sliders will become a cherished favorite in your home!
PrintKing’s Hawaiian Roll Sliders: A Tasty Game-Changer!
- Total Time: 30 minutes
- Yield: 12 sliders 1x
- Diet: Vegetarian
Description
King’s Hawaiian Roll Sliders are delicious, sweet, and savory sandwiches perfect for any gathering or game day.
Ingredients
- 12 King’s Hawaiian rolls
- 1 pound deli meat (ham, turkey, or roast beef)
- 1 cup cheese (Swiss or cheddar)
- 1/2 cup butter, melted
- 2 tablespoons Dijon mustard
- 1 tablespoon poppy seeds
- 1 tablespoon garlic powder
Instructions
- Preheat the oven to 350°F (175°C).
- Slice the King’s Hawaiian rolls in half horizontally without separating them.
- Layer the deli meat and cheese evenly on the bottom half of the rolls.
- In a bowl, mix the melted butter, Dijon mustard, poppy seeds, and garlic powder.
- Brush the butter mixture generously over the top of the rolls.
- Cover the sliders with aluminum foil and bake for 15 minutes.
- Remove the foil and bake for an additional 5-10 minutes until the tops are golden brown.
- Slice and serve warm.
Notes
- Feel free to customize the fillings based on your preference.
- These sliders can be made ahead of time and baked just before serving.
- For a spicy kick, add jalapeños or hot sauce to the filling.
- Prep Time: 10 minutes
- Cook Time: 20 minutes
- Category: Appetizer
- Method: Baking
- Cuisine: American
Nutrition
- Serving Size: 1 slider
- Calories: 200
- Sugar: 3g
- Sodium: 400mg
- Fat: 10g
- Saturated Fat: 5g
- Unsaturated Fat: 3g
- Trans Fat: 0g
- Carbohydrates: 20g
- Fiber: 1g
- Protein: 8g
- Cholesterol: 30mg
Keywords: King’s Hawaiian Roll Sliders, sliders, game day food, party food


