Introduction to Homemade Sourdough Rolls Recipe
There’s something magical about the aroma of freshly baked bread wafting through the kitchen. It’s like a warm hug on a chilly day, inviting and comforting. I remember the first time I made homemade sourdough rolls. It was a rainy afternoon, and I was looking for a way to brighten up the gloomy day. I had my trusty sourdough starter bubbling away in the fridge, and I thought, why not? The idea of creating something from scratch filled me with excitement.
As I mixed the ingredients, I felt a connection to generations of home cooks who have kneaded dough and shaped rolls in their own kitchens. Each fold and turn of the dough felt like a dance, a rhythm that brought joy to my heart. The best part? Watching those little rolls puff up in the oven, transforming into golden-brown delights that would soon grace my dinner table.
Homemade sourdough rolls are not just a recipe; they are an experience. They are perfect for any occasion, whether it’s a cozy family dinner or a festive gathering with friends. The tangy flavor of sourdough, combined with a soft, fluffy texture, makes these rolls irresistible. Plus, they are a fantastic way to use up that sourdough starter you’ve been nurturing.
In this article, I’ll share my favorite homemade sourdough rolls recipe with you. I’ll guide you through each step, sharing tips and tricks I’ve learned along the way. So, grab your apron, and let’s embark on this delicious journey together. Trust me, your kitchen will thank you!
Ingredients for Homemade Sourdough Rolls Recipe
Before we dive into the delightful process of making homemade sourdough rolls, let’s gather our ingredients. Having everything ready is like setting the stage for a beautiful performance. Each ingredient plays a vital role in creating those fluffy, golden rolls that will soon fill your home with warmth and joy.
Main Ingredients
- 2 cups (240g) all-purpose flour: I prefer using unbleached flour for a richer flavor. It’s the backbone of our rolls.
- 1 cup (240g) active sourdough starter: Make sure your starter is bubbly and ready to go! This is what gives our rolls that signature tang.
- 1 teaspoon salt: Salt enhances the flavor and strengthens the dough. I always opt for sea salt for its natural goodness.
- 1/2 cup (120ml) warm water: This helps to activate the starter and bring everything together. Aim for a temperature around 100°F (38°C).
- 1 tablespoon honey or sugar: A touch of sweetness balances the tanginess of the sourdough. Honey adds a lovely flavor, but sugar works just as well!
Optional Add-ons
- Herbs: Fresh or dried herbs like rosemary or thyme can add a delightful twist. Just a teaspoon mixed into the dough can elevate the flavor.
- Cheese: Shredded cheese, such as cheddar or parmesan, can be folded into the dough for a cheesy surprise.
- Seeds: Sprinkle sesame or poppy seeds on top before baking for a crunchy texture and added flavor.
- Garlic: Minced garlic can be mixed into the dough for a savory kick. It’s like a flavor explosion in every bite!
When sourcing your ingredients, I always recommend choosing high-quality flour and fresh herbs. They make a world of difference in the final product. Now that we have our ingredients ready, let’s move on to the fun part—preparing our homemade sourdough rolls!
How to Prepare Homemade Sourdough Rolls Recipe
Now that we have our ingredients ready, it’s time to roll up our sleeves and dive into the delightful process of making homemade sourdough rolls. Each step is like a little adventure, and I can’t wait to share it with you! Let’s get started.
Step 1: Create the Dough
First things first, we need to bring our ingredients together to form a beautiful dough. In a large mixing bowl, combine the active sourdough starter, warm water, honey (or sugar), and salt. Stir until everything is well mixed. Then, gradually add the all-purpose flour, mixing with a wooden spoon or your hands until a shaggy dough forms.
Tips for Step 1
- Don’t rush! Take your time mixing the ingredients. It’s like a dance, and you want to enjoy every moment.
- If the dough feels too sticky, sprinkle a little more flour. But be careful not to add too much; we want a soft dough!
Step 2: Bulk Fermentation
Once your dough is formed, it’s time for the magic to happen! Cover the bowl with a damp cloth or plastic wrap and let it rest at room temperature for about 4 to 6 hours. This is when the dough will rise and develop flavor. You’ll notice it becoming puffy and airy.
Tips for Step 2
- Check on your dough every hour. It’s like watching a flower bloom! You’ll see it grow and change.
- If your kitchen is cool, consider placing the bowl in a warm spot, like near the oven or on a sunny windowsill.
Step 3: Shaping the Rolls
After the dough has risen, it’s time to shape those rolls! Lightly flour your work surface and turn the dough out onto it. Gently flatten the dough into a rectangle, then cut it into equal pieces. Roll each piece into a ball, tucking the edges underneath to create a smooth top.
Tips for Step 3
- Don’t overwork the dough! Be gentle to keep all that lovely air inside.
- Use a bench scraper to help cut the dough evenly. It’s a handy tool that makes the process easier!
Step 4: Final Proofing
Now that our rolls are shaped, we need to let them rise again. Place the rolls on a baking sheet lined with parchment paper, leaving space between them. Cover them with a cloth and let them proof for about 1 to 2 hours, or until they’ve doubled in size.
Tips for Step 4
- Patience is key! This step is crucial for achieving that fluffy texture.
- If you want to speed up the proofing, you can preheat your oven to the lowest setting for a few minutes, then turn it off and place the rolls inside.
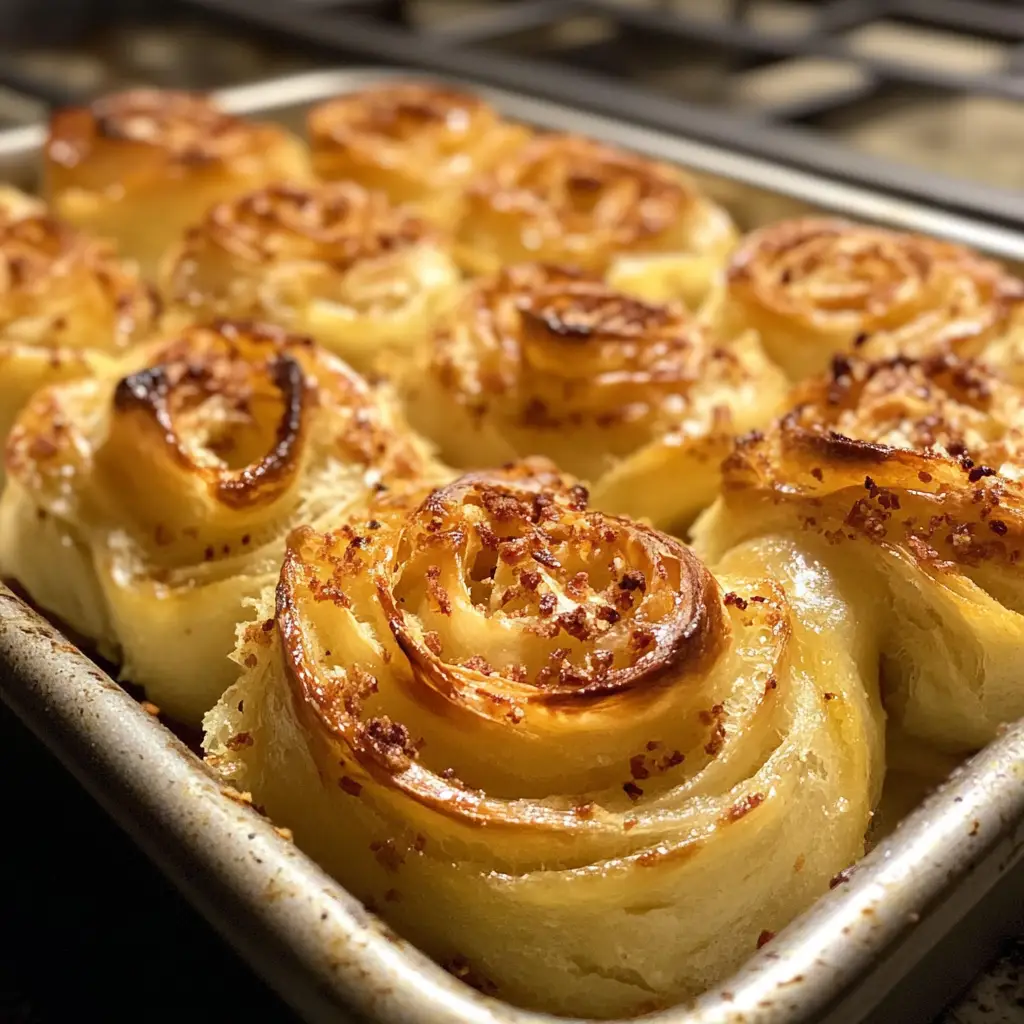
Step 5: Baking the Rolls
Finally, it’s time to bake! Preheat your oven to 375°F (190°C). Once the rolls have risen, pop them in the oven and bake for about 20 to 25 minutes, or until they are golden brown and sound hollow when tapped on the bottom.
Tips for Step 5
- For an extra crispy crust, place a small pan of water in the oven while baking. The steam helps create that perfect crust!
- Keep an eye on the rolls during the last few minutes of baking. Ovens can vary, and you want them just right!
And there you have it! Each step brings us closer to those warm, fluffy homemade sourdough rolls. I can almost smell them baking now! Let’s move on to the equipment we’ll need for this delightful journey.
Equipment Needed for Homemade Sourdough Rolls Recipe
Before we embark on our sourdough adventure, let’s gather the essential tools that will help us create those delightful rolls. Having the right equipment makes the process smoother and more enjoyable. Here’s what you’ll need:
- Mixing Bowl: A large mixing bowl is essential for combining your ingredients. I love using a glass or ceramic bowl because they’re easy to clean and look pretty on the counter.
- Wooden Spoon or Dough Scraper: A sturdy wooden spoon is perfect for mixing the dough. If you have a dough scraper, it’s a fantastic tool for cutting and shaping the rolls.
- Kitchen Scale: While measuring cups work fine, a kitchen scale ensures accuracy, especially for the flour. It’s like having a secret weapon for perfect baking!
- Plastic Wrap or Damp Cloth: You’ll need this to cover your dough during fermentation and proofing. It keeps the moisture in, helping the dough rise beautifully.
- Baking Sheet: A standard baking sheet lined with parchment paper is ideal for placing your rolls before baking. If you don’t have parchment paper, greasing the sheet works too!
- Oven Thermometer: Ovens can be tricky! An oven thermometer helps ensure your baking temperature is just right, so your rolls come out perfectly golden.
With these tools in hand, you’re all set to create your homemade sourdough rolls. If you don’t have a specific item, don’t worry! Many kitchen tools can serve multiple purposes. Just get creative, and let’s get baking!
Variations of Homemade Sourdough Rolls Recipe
As a passionate home cook, I love experimenting with flavors and textures. The beauty of homemade sourdough rolls is that they are incredibly versatile! You can easily customize them to suit your taste or the occasion. Here are a few delightful variations that I’ve tried and absolutely adore:
- Herbed Sourdough Rolls: Add a tablespoon of your favorite fresh herbs, like rosemary or basil, to the dough. The aroma while baking is simply heavenly!
- Cheesy Sourdough Rolls: Fold in shredded cheese, such as mozzarella or cheddar, before shaping the rolls. The gooey, melted cheese inside is a delightful surprise.
- Garlic and Parmesan Rolls: Mix minced garlic into the dough and sprinkle grated Parmesan on top before baking. It’s like a savory treat that pairs perfectly with soups and salads.
- Sweet Cinnamon Rolls: For a sweet twist, add cinnamon and sugar to the dough. After shaping, roll them up with a sprinkle of brown sugar and cinnamon for a delightful breakfast treat.
These variations not only add a unique touch to your rolls but also allow you to showcase your creativity in the kitchen. I encourage you to try them out and make them your own! The possibilities are endless, and each batch can tell a different story. Happy baking!
Cooking Notes for Homemade Sourdough Rolls Recipe
As I’ve journeyed through the world of baking, I’ve learned a few cooking notes that can make a big difference in your homemade sourdough rolls. These little tips are like secret ingredients that can elevate your baking game. Here are some insights I’d love to share:
- Temperature Matters: The temperature of your ingredients can affect the dough’s rise. Make sure your water is warm, but not too hot, to keep your sourdough starter happy and active.
- Patience is Key: Don’t rush the fermentation and proofing stages. Allowing the dough to rise fully is crucial for achieving that light and airy texture. It’s worth the wait!
- Use Fresh Ingredients: Fresh flour and an active sourdough starter are essential for the best flavor and rise. If your starter has been sitting in the fridge for a while, give it a feeding a day before you start baking.
- Experiment with Hydration: If you want a softer roll, consider adding a bit more water to the dough. Just remember to adjust the flour accordingly. It’s all about finding the right balance!
- Cool Before Serving: Let the rolls cool on a wire rack for at least 10 minutes before serving. This helps set the texture and makes them easier to slice.
These cooking notes are like little nuggets of wisdom I’ve gathered over time. They can help you navigate the baking process with confidence and ensure your homemade sourdough rolls turn out perfectly every time. Happy baking, and may your kitchen be filled with the delightful aroma of fresh bread!
Serving Suggestions for Homemade Sourdough Rolls Recipe
Ah, the moment of truth! After all the mixing, kneading, and baking, it’s time to enjoy those beautiful homemade sourdough rolls. The way you serve them can elevate the experience even more. Here are some of my favorite serving suggestions that will make your rolls shine:
- Warm with Butter: There’s nothing quite like tearing into a warm roll and slathering it with creamy butter. The butter melts into the soft bread, creating a heavenly bite that’s hard to resist.
- With Soups and Stews: These rolls are perfect for dipping! Serve them alongside a hearty soup or stew. The rolls soak up the flavors beautifully, making each bite a comforting delight.
- As Sandwiches: Use the rolls to create delicious sandwiches. Whether it’s a classic turkey and cheese or a veggie delight, the tangy flavor of the sourdough adds a unique twist.
- With Jam or Honey: For a sweet treat, serve the rolls with your favorite jam or a drizzle of honey. It’s a delightful contrast to the tangy sourdough, perfect for breakfast or brunch.
- As a Side for Salads: Pair these rolls with a fresh salad. The crunchy greens and the soft, fluffy rolls create a wonderful balance on your plate.
These serving suggestions are just the tip of the iceberg! Feel free to get creative and find what works best for you. Each roll is a canvas, ready to be paired with your favorite flavors. Enjoy every bite, and don’t forget to share with loved ones—after all, good food is meant to be shared!
Tips for Perfecting Homemade Sourdough Rolls Recipe
As I’ve baked countless batches of homemade sourdough rolls, I’ve gathered a treasure trove of tips that can help you achieve perfection in your own kitchen. These little nuggets of wisdom are like secret spices that can elevate your rolls from good to absolutely amazing. Here are my top tips for perfecting your sourdough rolls:
- Feed Your Starter: Always use an active and bubbly sourdough starter. If it’s been sitting in the fridge, give it a good feeding the night before. A happy starter means happy rolls!
- Measure Accurately: Baking is a science! Use a kitchen scale for precise measurements, especially for flour. This ensures consistency in your rolls every time you bake.
- Don’t Skip the Kneading: Kneading helps develop gluten, which gives your rolls structure. Aim for about 5 to 10 minutes of gentle kneading until the dough is smooth and elastic.
- Watch the Temperature: Keep an eye on the temperature of your kitchen. If it’s too cold, your dough may take longer to rise. A warm environment helps the fermentation process.
- Experiment with Flour: While all-purpose flour works beautifully, try mixing in whole wheat or bread flour for added flavor and texture. Each type of flour brings its own unique character to the rolls.
These tips are like little guiding stars on your baking journey. They can help you navigate the process with confidence and ensure that your homemade sourdough rolls turn out fluffy, flavorful, and utterly irresistible. Happy baking, and may your kitchen be filled with the delightful aroma of fresh bread!
Breakdown of Time for Homemade Sourdough Rolls Recipe
As a passionate home cook, I know that time management is key when it comes to baking. Understanding the time commitment for making homemade sourdough rolls can help you plan your day better. Here’s a simple breakdown of the time involved in this delightful process:
- Prep Time: Approximately 15 minutes. This includes gathering your ingredients, mixing the dough, and getting everything ready for fermentation.
- Bulk Fermentation: 4 to 6 hours. This is when the dough rises and develops its wonderful flavor. It’s a great time to relax or tackle other tasks around the house!
- Shaping and Final Proofing: About 2 hours. After shaping the rolls, they need time to rise again. This step is crucial for achieving that fluffy texture.
- Cooking Time: 20 to 25 minutes. The moment you’ve been waiting for! Baking the rolls until they are golden brown and delicious.
Total Time: Roughly 6 to 8 hours, including all the rising and baking time. While it may seem like a long process, most of it is hands-off, allowing you to enjoy the anticipation of those warm, homemade sourdough rolls.
So, grab a cup of tea, put on your favorite music, and let the magic of sourdough unfold in your kitchen. Trust me, the wait will be worth it when you take that first bite of your freshly baked rolls!
Nutritional Information for Homemade Sourdough Rolls Recipe
As a passionate home cook, I believe that enjoying delicious food should also come with a sense of balance. Understanding the nutritional content of our homemade sourdough rolls can help us appreciate them even more. Here’s a general breakdown of the nutritional information for one roll, based on the ingredients listed:
- Calories: Approximately 150 calories
- Protein: 4g
- Carbohydrates: 30g
- Fat: 1g
- Fiber: 1g
- Sugar: 1g (if using honey or sugar)
- Sodium: 200mg (depending on the salt used)
These rolls are a delightful source of carbohydrates, providing energy for your day. The sourdough fermentation process also enhances the digestibility of the bread, making it easier on the stomach. Plus, the addition of optional ingredients like herbs or cheese can boost the nutritional profile even further!
Remember, these values can vary based on the specific ingredients and portion sizes you use. I always encourage you to enjoy these rolls in moderation and pair them with nutritious sides, like salads or soups, for a well-rounded meal. Happy baking and eating!
Frequently Asked Questions about Homemade Sourdough Rolls Recipe
As I’ve shared my homemade sourdough rolls recipe with friends and family, I’ve noticed a few common questions pop up. It’s always great to clarify any doubts, especially when it comes to baking. Here are some frequently asked questions that I hope will help you on your sourdough journey:
Can I use a different type of flour?
Absolutely! While all-purpose flour is my go-to, you can experiment with whole wheat flour or bread flour for different textures and flavors. Just remember that each type of flour absorbs water differently, so you may need to adjust the liquid in your recipe.
What if my sourdough starter isn’t bubbly?
If your starter isn’t bubbly, it might need a feeding. Give it a good meal of flour and water and let it sit at room temperature for a few hours. A healthy, active starter is key to achieving those fluffy rolls!
How do I store leftover rolls?
To keep your rolls fresh, store them in an airtight container at room temperature for up to 2 days. If you have leftovers beyond that, consider freezing them. Just wrap them tightly in plastic wrap and place them in a freezer bag. They’ll be ready to enjoy later!
Can I make these rolls ahead of time?
Yes! You can prepare the dough and shape the rolls, then place them in the fridge for the final proofing. Just cover them well and let them rise in the fridge overnight. In the morning, take them out, let them come to room temperature, and bake as usual!
Why are my rolls dense?
Dense rolls can be a result of under-proofing or using a weak starter. Make sure your dough has risen adequately during both the bulk fermentation and final proofing stages. Patience is key! Also, ensure your starter is active and bubbly before using it.
These questions are just a few of the many that can arise while baking homemade sourdough rolls. I encourage you to embrace the process, learn from each batch, and enjoy the delicious results. Happy baking, and may your kitchen be filled with the delightful aroma of fresh bread!
Conclusion on Homemade Sourdough Rolls Recipe
As I reflect on my journey of making homemade sourdough rolls, I can’t help but feel a sense of accomplishment and joy. This recipe is more than just a collection of ingredients and steps; it’s a celebration of creativity, patience, and the simple pleasure of baking. Each roll is a testament to the love and care that goes into the process, transforming basic ingredients into something truly special.
Homemade sourdough rolls are not only delicious but also versatile. Whether you enjoy them warm with butter, as a side to your favorite soup, or transformed into a delightful sandwich, they bring a unique flavor and texture that store-bought options simply can’t match. Plus, the satisfaction of pulling a batch of golden-brown rolls from the oven is an experience that warms the heart.
So, I encourage you to embrace this recipe and make it your own. Experiment with flavors, share them with loved ones, and savor the moments spent in the kitchen. With each batch, you’ll not only hone your baking skills but also create memories that will last a lifetime. Happy baking, and may your homemade sourdough rolls always bring a smile to your face!