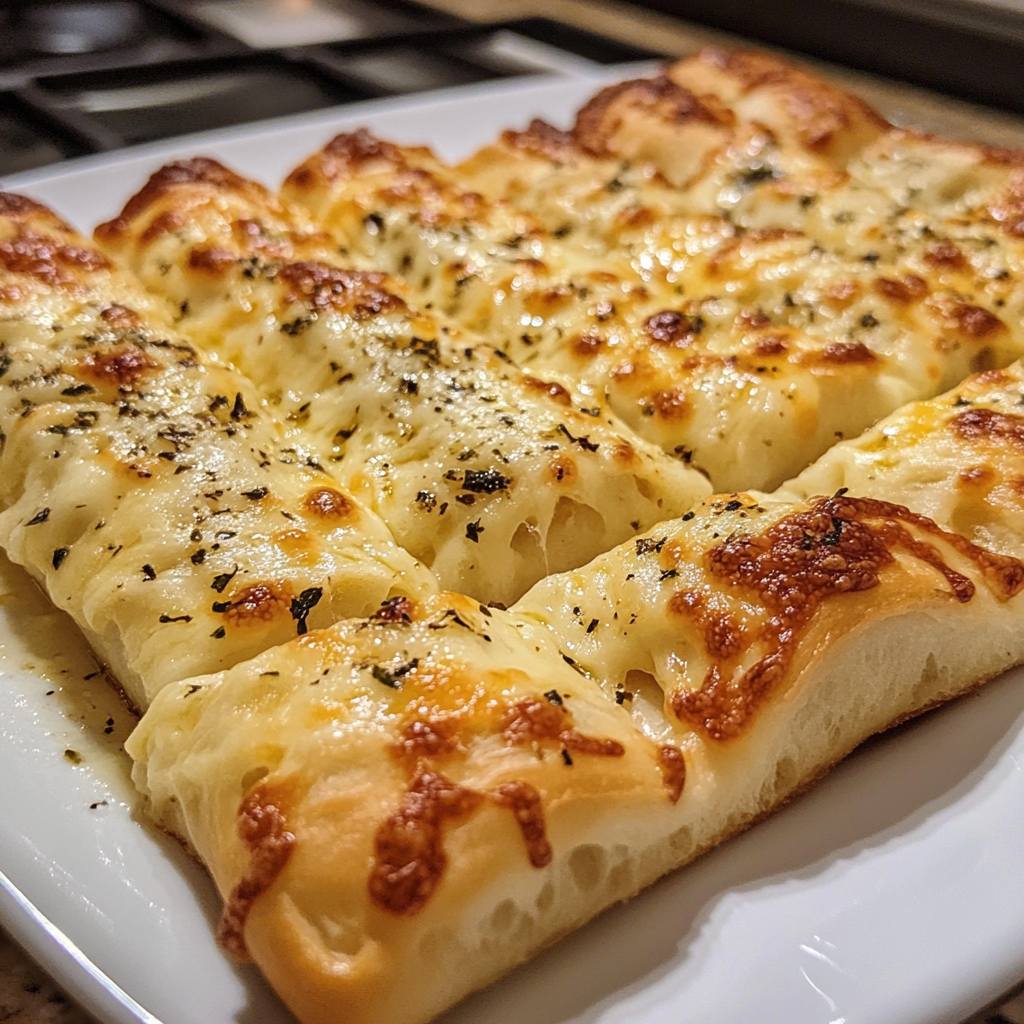
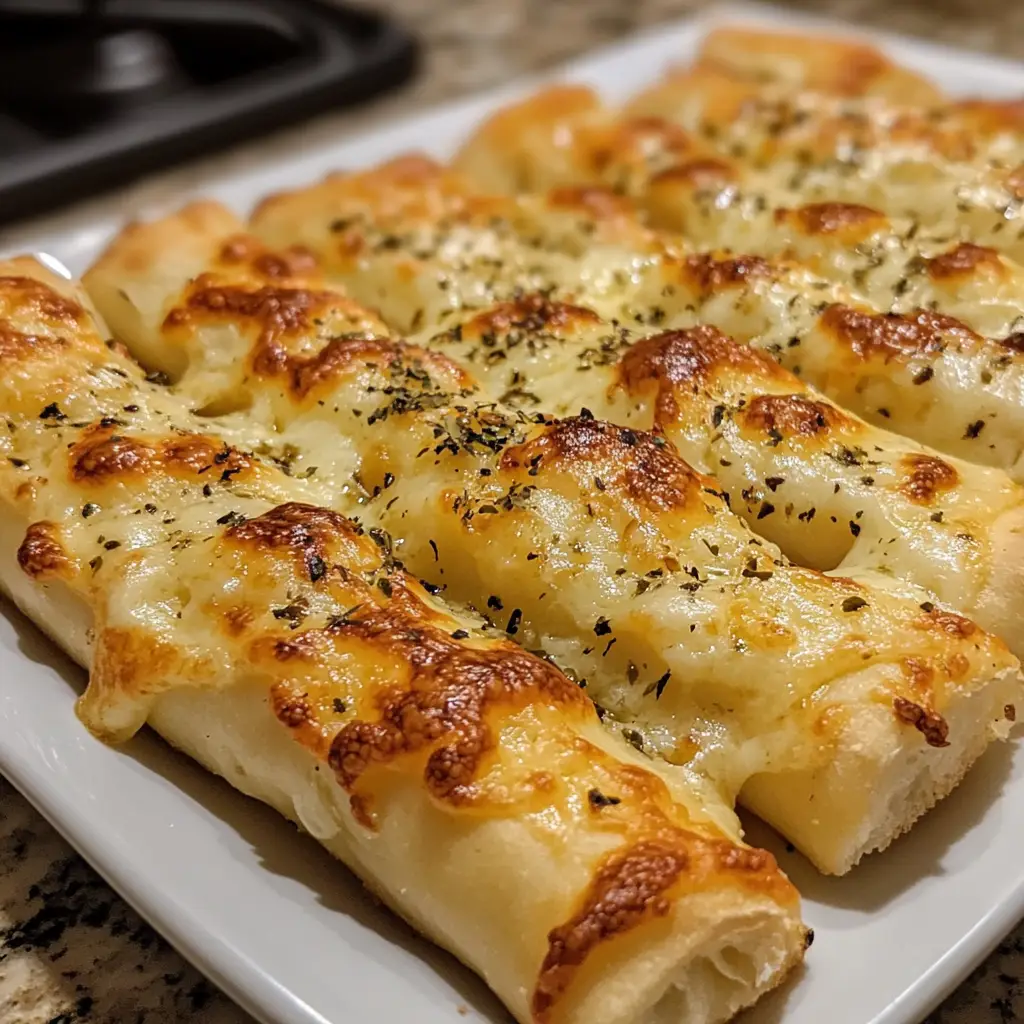
Introduction to Homemade Cheesy Garlic Breadsticks
There’s something magical about the aroma of freshly baked breadsticks wafting through the kitchen. Homemade cheesy garlic breadsticks are not just a treat; they’re a warm hug on a plate. Whether you’re juggling a busy day or planning a cozy family dinner, this recipe is your go-to solution. It’s quick, easy, and oh-so-delicious! Plus, who can resist that gooey cheese and buttery garlic goodness? Trust me, these breadsticks will impress your loved ones and make any meal feel special. Let’s dive into this delightful culinary adventure together!
Why You’ll Love This Homemade Cheesy Garlic Breadsticks
These homemade cheesy garlic breadsticks are a lifesaver for busy moms and professionals alike. They come together in no time, making them perfect for a quick weeknight dinner or a last-minute gathering. The taste? Absolutely irresistible! With a crispy exterior and a gooey, cheesy center, they’re sure to please even the pickiest eaters. Plus, they’re versatile enough to pair with any meal, making them a staple in my kitchen!
Ingredients for Homemade Cheesy Garlic Breadsticks
Gathering the right ingredients is the first step to creating these delightful homemade cheesy garlic breadsticks. Here’s what you’ll need:
- All-purpose flour: This is the backbone of your breadsticks, giving them structure and chewiness.
- Sugar: Just a touch to help activate the yeast and add a hint of sweetness.
- Salt: Essential for flavor, it enhances the overall taste of your breadsticks.
- Active dry yeast: This little powerhouse makes your dough rise, creating that fluffy texture we all love.
- Warm water: Helps activate the yeast. Make sure it’s not too hot, or you’ll kill the yeast!
- Olive oil: Adds richness and moisture to the dough, making it tender and flavorful.
- Shredded mozzarella cheese: The star of the show! It melts beautifully, creating that gooey, cheesy goodness.
- Grated Parmesan cheese: Adds a sharp, nutty flavor that complements the mozzarella perfectly.
- Garlic butter: A heavenly blend of butter and garlic that gives your breadsticks that irresistible aroma and taste.
- Dried oregano: A sprinkle of this herb adds a lovely Italian flair to your breadsticks.
For those looking to elevate the flavor, consider adding fresh herbs like basil or parsley. They can bring a burst of freshness to your cheesy garlic breadsticks. You can find all the exact measurements for these ingredients at the bottom of the article, ready for printing!
How to Make Homemade Cheesy Garlic Breadsticks
Now that we have our ingredients ready, let’s roll up our sleeves and get started on making these delicious homemade cheesy garlic breadsticks! Follow these simple steps, and you’ll have a warm, cheesy treat in no time.
Step 1: Prepare the Yeast Mixture
Start by combining warm water, sugar, and active dry yeast in a bowl. Give it a gentle stir and let it sit for about 5 minutes. You’ll know it’s ready when it becomes frothy and bubbly. This step is crucial; it’s like waking up the yeast from its slumber!
Step 2: Make the Dough
Once your yeast mixture is frothy, it’s time to add the all-purpose flour, salt, and olive oil. Mix everything together until a dough starts to form. Don’t worry if it looks a bit messy at first; that’s part of the fun! Just keep mixing until it all comes together.
Step 3: Knead the Dough
Now, sprinkle some flour on your countertop and turn the dough out onto it. Knead the dough for about 5 minutes until it’s smooth and elastic. Think of it as giving your dough a little workout! This step helps develop the gluten, which gives your breadsticks that perfect chewy texture.
Step 4: Let the Dough Rise
Place your kneaded dough in a greased bowl, cover it with a clean kitchen towel, and let it rise in a warm spot for about 1 hour. You want it to double in size. This is the dough’s time to shine, so be patient! It’s like watching a little miracle happen.
Step 5: Preheat the Oven
While the dough is rising, preheat your oven to 400°F (200°C). This step is essential for achieving that golden-brown crust we all love. A hot oven is your best friend when it comes to baking!
Step 6: Shape the Dough
Once the dough has risen, punch it down gently to release the air. Roll it out into a rectangle on a floured surface. Aim for about ½ inch thick. Then, transfer it to a baking sheet lined with parchment paper. This is where the magic begins!
Step 7: Add Toppings
Spread the garlic butter generously over the dough. Don’t be shy! Then, sprinkle the shredded mozzarella and grated Parmesan cheese on top. The more cheese, the better, right? Finally, add a sprinkle of dried oregano for that Italian flair.
Step 8: Bake the Breadsticks
Pop your baking sheet into the preheated oven and bake for 15-20 minutes. Keep an eye on them! You want them to be golden brown and bubbly. The aroma will fill your kitchen, making it hard to resist sneaking a taste!
Step 9: Slice and Serve
Once they’re out of the oven, let them cool for a minute. Then, slice the breadsticks into your desired size. Serve them warm, and watch as everyone dives in! These homemade cheesy garlic breadsticks are perfect for sharing, or you might just want to keep them all to yourself!
Tips for Success
- Make sure your water is warm, not hot, to keep the yeast alive.
- For extra fluffiness, let the dough rise in a warm, draft-free area.
- Don’t skip the kneading; it’s key for that perfect texture.
- Experiment with toppings like fresh herbs or different cheeses.
- Serve immediately for the best taste, but they can be reheated easily!

Equipment Needed
- Mixing bowl: A large bowl for combining ingredients. A sturdy pot works too!
- Rolling pin: For rolling out the dough. A wine bottle can do the trick in a pinch!
- Baking sheet: A flat tray for baking. Use a pizza stone for extra crispiness!
- Parchment paper: To prevent sticking. Aluminum foil can be a good substitute.
- Kitchen towel: For covering the dough while it rises. A clean cloth works just as well!
Variations of Homemade Cheesy Garlic Breadsticks
- Herb-Infused: Add fresh herbs like basil or rosemary to the dough for an aromatic twist.
- Spicy Kick: Mix in some red pepper flakes or jalapeños for a spicy version that packs a punch.
- Cheesy Delight: Experiment with different cheeses like cheddar, gouda, or feta for unique flavors.
- Gluten-Free: Substitute all-purpose flour with a gluten-free blend to cater to dietary needs.
- Stuffed Breadsticks: Fill the dough with pepperoni, spinach, or artichokes before rolling it out for a hearty treat.
Serving Suggestions for Homemade Cheesy Garlic Breadsticks
- Pair with marinara sauce for a classic dipping experience.
- Serve alongside a fresh garden salad for a balanced meal.
- Complement with a glass of red wine for a cozy dinner.
- Garnish with fresh parsley for a pop of color.
- Enjoy as a side with pasta dishes for a comforting feast.
FAQs about Homemade Cheesy Garlic Breadsticks
Can I make the dough ahead of time?
Absolutely! You can prepare the dough in advance and let it rise. Just cover it tightly and refrigerate. When you’re ready to bake, let it come to room temperature before shaping and baking.
What can I use instead of garlic butter?
If you don’t have garlic butter, you can easily make your own by mixing softened butter with minced garlic and a pinch of salt. It’s a simple swap that will still give you that delicious garlic flavor!
How do I store leftovers?
Store any leftover homemade cheesy garlic breadsticks in an airtight container at room temperature for up to 2 days. You can also freeze them for longer storage. Just reheat in the oven for that fresh-baked taste!
Can I use whole wheat flour instead of all-purpose flour?
Yes, you can! Whole wheat flour will give your breadsticks a nuttier flavor and a denser texture. Just keep in mind that you may need to adjust the liquid slightly for the best results.
What can I serve with these breadsticks?
These cheesy garlic breadsticks pair wonderfully with marinara sauce, a fresh salad, or even a hearty soup. They’re versatile enough to complement any meal!
Final Thoughts
Making homemade cheesy garlic breadsticks is more than just a cooking task; it’s a delightful experience that brings joy to your kitchen. The warm, cheesy aroma fills the air, creating a cozy atmosphere that invites everyone to gather around the table. Whether you’re sharing them with family or enjoying them solo, these breadsticks are sure to bring smiles and satisfaction. Plus, the simplicity of the recipe means you can whip them up anytime, making every meal feel special. So, roll up your sleeves and indulge in this cheesy goodness—you deserve it!
Print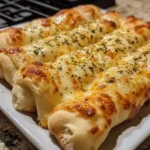
Homemade Cheesy Garlic Breadsticks You Can’t Resist!
- Total Time: 1 hour 35 minutes
- Yield: 12 breadsticks 1x
- Diet: Vegetarian
Description
Delicious homemade cheesy garlic breadsticks that are easy to make and perfect for any occasion.
Ingredients
- 2 cups all-purpose flour
- 1 tablespoon sugar
- 1 teaspoon salt
- 1 tablespoon active dry yeast
- 3/4 cup warm water
- 2 tablespoons olive oil
- 1/2 cup shredded mozzarella cheese
- 1/4 cup grated Parmesan cheese
- 2 tablespoons garlic butter
- 1 teaspoon dried oregano
Instructions
- In a bowl, combine warm water, sugar, and yeast. Let it sit for 5 minutes until frothy.
- Add flour, salt, and olive oil to the yeast mixture. Mix until a dough forms.
- Knead the dough on a floured surface for about 5 minutes until smooth.
- Place the dough in a greased bowl, cover, and let it rise for 1 hour.
- Preheat the oven to 400°F (200°C).
- Roll out the dough into a rectangle and place it on a baking sheet.
- Spread garlic butter over the dough and sprinkle with mozzarella and Parmesan cheese.
- Sprinkle dried oregano on top.
- Bake for 15-20 minutes until golden brown.
- Slice and serve warm.
Notes
- For extra flavor, add fresh herbs like basil or parsley.
- Serve with marinara sauce for dipping.
- Store leftovers in an airtight container for up to 2 days.
- Prep Time: 15 minutes
- Cook Time: 20 minutes
- Category: Appetizer
- Method: Baking
- Cuisine: Italian
Nutrition
- Serving Size: 1 breadstick
- Calories: 150
- Sugar: 1g
- Sodium: 200mg
- Fat: 6g
- Saturated Fat: 3g
- Unsaturated Fat: 2g
- Trans Fat: 0g
- Carbohydrates: 20g
- Fiber: 1g
- Protein: 5g
- Cholesterol: 15mg
Keywords: Homemade Cheesy Garlic Breadsticks, Garlic Breadsticks, Cheesy Breadsticks, Easy Appetizer