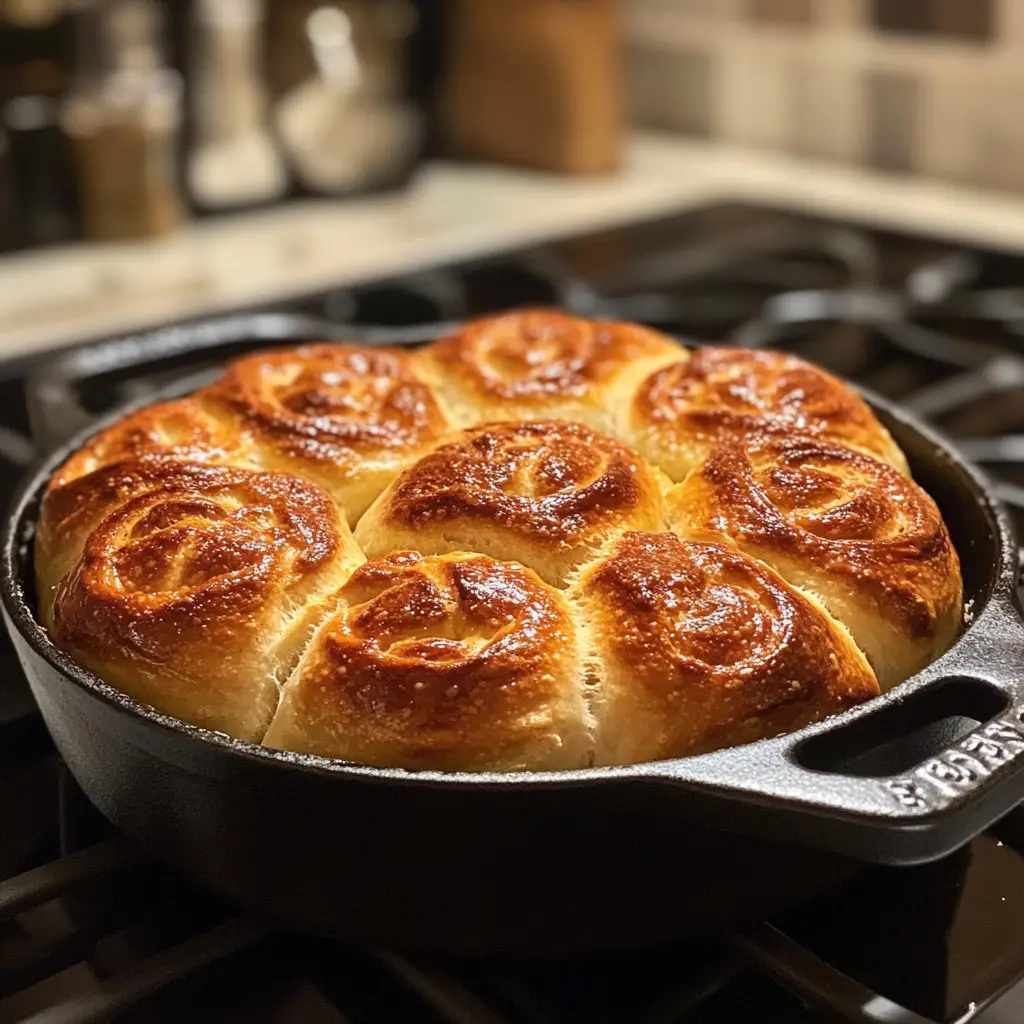
Introduction to Dutch Oven Crusty Bread Buns Recipe
There’s something magical about the aroma of freshly baked bread wafting through the kitchen. It’s like a warm hug on a chilly day, inviting and comforting. I remember the first time I made Dutch oven crusty bread buns. It was a rainy afternoon, and I was looking for a way to brighten up the day. I stumbled upon a recipe that promised golden, crusty buns with a soft, pillowy center. Intrigued, I gathered my ingredients and set to work, not knowing that I was about to embark on a delightful culinary adventure.
As I mixed the dough, I felt a sense of connection to generations of home cooks who have kneaded, shaped, and baked bread long before me. The process was simple yet satisfying, and I found joy in every step. When the buns finally emerged from the oven, their golden crust crackled as I tapped them gently. I couldn’t wait to share them with my family, who eagerly gathered around the table, their eyes sparkling with anticipation.
These Dutch oven crusty bread buns are not just a recipe; they are a celebration of home cooking. They are perfect for any occasion, whether you’re hosting a cozy dinner or simply enjoying a quiet evening at home. The best part? They are incredibly easy to make, even for beginners. With just a few simple ingredients and a little patience, you can create buns that rival those from your favorite bakery.
So, grab your apron and let’s dive into this delightful recipe together. I promise you’ll be rewarded with buns that are not only delicious but also filled with love and warmth. Let’s get started!
Ingredients for Dutch Oven Crusty Bread Buns Recipe
Before we roll up our sleeves and get our hands doughy, let’s gather all the ingredients we need for these delightful buns. I always believe that quality ingredients make a world of difference in baking. So, let’s make sure we have the best of the best!
Main Ingredients
- 3 cups all-purpose flour – I prefer using unbleached flour for a richer flavor.
- 1 ½ teaspoons salt – This enhances the flavor of the bread.
- 1 teaspoon instant yeast – Instant yeast is my go-to because it’s quick and reliable.
- 1 ½ cups warm water – Make sure it’s warm, not hot, to activate the yeast without killing it.
Optional Add-ons
While the main ingredients create a fantastic base, you can jazz up your buns with some optional add-ons. Here are a few of my favorites:
- 1 tablespoon honey or sugar – A touch of sweetness can elevate the flavor.
- Herbs (like rosemary or thyme) – Adding fresh or dried herbs gives a lovely aroma and taste.
- Cheese (like cheddar or parmesan) – For a cheesy twist, fold in some grated cheese before shaping the buns.
- Seeds (like sesame or poppy) – Sprinkle these on top before baking for added texture and flavor.
Feel free to get creative! I often experiment with different herbs and spices, and each time, I’m amazed at how a simple bun can transform into something extraordinary. Now that we have our ingredients ready, let’s move on to the fun part—preparing our dough!
How to Prepare Dutch Oven Crusty Bread Buns Recipe
Now that we have our ingredients ready, it’s time to roll up our sleeves and dive into the dough! The process of making these Dutch oven crusty bread buns is like a dance; each step flows into the next, creating a beautiful rhythm. Let’s take it one step at a time, shall we?
Step 1: Mixing the Dough
First things first, let’s mix our ingredients together. In a large mixing bowl, combine the flour, salt, and instant yeast. I like to whisk them together to ensure everything is evenly distributed. Then, slowly pour in the warm water while stirring with a wooden spoon or spatula. The dough will be sticky, and that’s perfectly okay!
Tips for Mixing
- Don’t be afraid to get your hands in there! Once the dough starts to come together, I often use my hands to knead it gently in the bowl.
- If the dough feels too dry, add a splash more water. If it’s too wet, sprinkle in a bit more flour.
Step 2: First Rise
Once the dough is mixed, it’s time for the first rise. Cover the bowl with a clean kitchen towel or plastic wrap. Let it sit in a warm, draft-free spot for about 1 to 2 hours, or until it doubles in size. This is where the magic happens!
Tips for the First Rise
- For a cozy rising spot, I often place my bowl in the oven (turned off) with the light on. The gentle warmth helps the dough rise beautifully.
- Patience is key! Don’t rush this step; a good rise leads to airy, fluffy buns.
Step 3: Shaping the Buns
After the dough has risen, it’s time to shape our buns. Lightly flour your work surface and turn the dough out onto it. Gently deflate the dough by pressing it down. Then, divide it into equal portions—about 8 to 10 pieces works well. Shape each piece into a round bun by tucking the edges under.
Tips for Shaping
- Keep your hands floured to prevent sticking. I find that a little flour goes a long way!
- Don’t worry about perfection; rustic shapes add charm to homemade bread.
Step 4: Second Rise
Now that our buns are shaped, it’s time for the second rise. Place them on a parchment-lined baking sheet, leaving space between each bun. Cover them again with a towel and let them rise for another 30 to 60 minutes. They should puff up nicely!
Tips for the Second Rise
- For an extra boost, I sometimes place a pan of hot water in the oven with the buns. The steam helps create a lovely crust.
- Keep an eye on them; they should look puffy and ready to bake!
Step 5: Preheating the Dutch Oven
While the buns are rising, it’s time to preheat our Dutch oven. Place it in the oven and set the temperature to 450°F (232°C). Preheating the Dutch oven is crucial for achieving that perfect crust.
Tips for Preheating
- Make sure your Dutch oven is empty and dry before placing it in the oven.
- Let it heat for at least 30 minutes to ensure it’s nice and hot when the buns go in.
Step 6: Baking the Buns
Once the Dutch oven is preheated and the buns have risen, it’s time to bake! Carefully remove the hot Dutch oven from the oven. Using parchment paper, lift the buns and place them inside. Cover with the lid and return to the oven.
Tips for Baking
- Bake the buns covered for the first 20 minutes to trap steam, then remove the lid and bake for an additional 10-15 minutes until golden brown.
- For a shiny crust, I like to brush the tops with a little melted butter right after they come out of the oven.
And there you have it! The steps to create your very own Dutch oven crusty bread buns. Each step is a chance to connect with the ingredients and the process, making the final product all the more rewarding. I can’t wait for you to experience the joy of pulling those warm, crusty buns from the oven!
Equipment Needed for Dutch Oven Crusty Bread Buns Recipe
Before we dive into the dough, let’s make sure we have the right tools at our fingertips. Having the right equipment can make the baking process smoother and more enjoyable. Here’s what you’ll need to whip up those delightful Dutch oven crusty bread buns:
- Large Mixing Bowl: A sturdy bowl is essential for mixing your dough. I love using a glass or ceramic bowl because they hold heat well.
- Wooden Spoon or Spatula: This is perfect for mixing the ingredients together. A sturdy wooden spoon can handle the sticky dough like a champ!
- Measuring Cups and Spoons: Accurate measurements are key in baking. I always keep a set handy to ensure my ingredients are just right.
- Kitchen Towel or Plastic Wrap: You’ll need this to cover the dough during its rises. It helps keep the dough warm and cozy.
- Parchment Paper: This is a lifesaver for transferring the buns into the Dutch oven. It prevents sticking and makes cleanup a breeze.
- Dutch Oven: The star of the show! A heavy, cast-iron Dutch oven is ideal for creating that perfect crust. If you don’t have one, a heavy pot with a lid can work too, but the results may vary.
With these tools in hand, you’re all set to embark on your baking adventure! Each piece of equipment plays a role in creating those golden, crusty buns that will fill your home with warmth and joy. Let’s get ready to bake!
Variations of Dutch Oven Crusty Bread Buns Recipe
While the classic Dutch oven crusty bread buns are simply delightful on their own, I love to experiment with different flavors and ingredients to keep things exciting. Here are a few variations that I’ve tried and absolutely adored:
- Garlic Herb Buns: Add minced garlic and a mix of your favorite herbs to the dough for a fragrant twist. These buns are perfect for serving with pasta or soups.
- Cheddar Jalapeño Buns: Fold in shredded cheddar cheese and diced jalapeños for a spicy kick. These buns are a hit at barbecues and gatherings!
- Sweet Cinnamon Buns: For a breakfast treat, mix in cinnamon and sugar, and shape the dough into rolls. Drizzle with icing after baking for a sweet finish.
- Olive and Feta Buns: Incorporate chopped olives and crumbled feta cheese into the dough for a Mediterranean flair. These are fantastic served with dips or as a side to salads.
Feel free to get creative! Each variation brings its own unique flavor and character to the table. I often find that trying new ingredients not only enhances the buns but also makes the baking experience even more enjoyable. So, don’t hesitate to let your imagination run wild in the kitchen!
Cooking Notes for Dutch Oven Crusty Bread Buns Recipe
As I’ve journeyed through the world of baking, I’ve learned a few essential cooking notes that can make a big difference in the outcome of your Dutch oven crusty bread buns. Here are some tips that I always keep in mind:
- Temperature Matters: The temperature of your ingredients can affect the dough. Make sure your water is warm, around 110°F (43°C), to activate the yeast without killing it. A kitchen thermometer can be a handy tool here!
- Humidity Levels: Baking can be influenced by the weather. On humid days, you might need a bit more flour, while on dry days, a splash more water can help. Trust your instincts and adjust as needed.
- Don’t Rush the Rises: Allowing the dough to rise properly is crucial for achieving that airy texture. If you’re in a hurry, consider finding a warm spot in your home to speed up the process, but don’t skip it!
- Experiment with Steam: If you want an even crustier exterior, you can add a few ice cubes to the bottom of the Dutch oven just before closing the lid. The steam created will enhance the crust.
- Cooling Time: Once the buns are out of the oven, let them cool on a wire rack. This helps maintain their crusty exterior and prevents them from becoming soggy.
These cooking notes have helped me refine my baking skills and achieve the perfect buns every time. Remember, baking is as much about the process as it is about the end result. Enjoy each moment in the kitchen, and your buns will turn out deliciously every time!
Serving Suggestions for Dutch Oven Crusty Bread Buns Recipe
Now that we’ve baked our Dutch oven crusty bread buns, it’s time to enjoy them! The beauty of these buns lies not only in their delightful texture but also in their versatility. I love to serve them in various ways, depending on the occasion and my mood. Here are some of my favorite serving suggestions:
- With Butter and Jam: There’s nothing quite like a warm bun slathered with creamy butter and your favorite jam. It’s a simple yet satisfying treat for breakfast or an afternoon snack.
- As a Side Dish: These buns pair wonderfully with soups, stews, or salads. I often serve them alongside a hearty vegetable soup, where they soak up all the delicious flavors.
- For Sliders: Slice the buns in half and fill them with your favorite meats, cheeses, or veggies for delightful sliders. They make for a fun and tasty party appetizer!
- With Dips: Serve the buns with a selection of dips, like hummus or spinach-artichoke dip. The crusty exterior holds up beautifully, making each bite a flavorful experience.
- As a Breakfast Sandwich: Toast the buns and fill them with eggs, cheese, and bacon for a hearty breakfast sandwich that will kickstart your day!
Each serving suggestion brings out a different aspect of these buns, making them a delightful addition to any meal. I love how they can be dressed up or down, depending on the occasion. So, gather your loved ones, and let the bun festivities begin!
Tips for Perfecting Dutch Oven Crusty Bread Buns Recipe
As I’ve baked these Dutch oven crusty bread buns time and time again, I’ve gathered a treasure trove of tips that can elevate your baking game. Each little nugget of wisdom can make a world of difference in achieving that perfect crust and soft interior. Here are my top tips for perfecting your buns:
- Use Fresh Ingredients: Always check the expiration dates on your yeast and flour. Fresh ingredients lead to better rises and flavors. I like to store my yeast in the fridge to keep it fresh longer.
- Don’t Skip the Steam: Steam is your best friend when it comes to crusty bread. If you want an even crunchier crust, consider adding a few ice cubes to the bottom of the Dutch oven just before closing the lid.
- Experiment with Flour: While all-purpose flour works beautifully, trying bread flour can give your buns a chewier texture. I love to mix it up depending on what I have on hand!
- Let Them Cool: After baking, resist the urge to dig in right away. Letting the buns cool on a wire rack allows the crust to set and prevents sogginess.
- Practice Makes Perfect: Don’t be discouraged if your first batch isn’t perfect. Baking is a journey, and each attempt teaches you something new. Enjoy the process!
With these tips in your back pocket, you’ll be well on your way to creating Dutch oven crusty bread buns that are not only delicious but also a source of pride. Happy baking!
Breakdown of Time for Dutch Oven Crusty Bread Buns Recipe
As a passionate home cook, I know that time management is key in the kitchen. When it comes to making these delightful Dutch oven crusty bread buns, it’s important to plan ahead. Here’s a quick breakdown of the time you’ll need to set aside for this delicious adventure:
- Prep Time: Approximately 20 minutes. This includes gathering your ingredients, mixing the dough, and shaping the buns. It’s a fun and hands-on process that flies by!
- First Rise: 1 to 2 hours. This is when the dough works its magic, doubling in size. Patience is key here, so take a moment to enjoy the aroma of the rising dough.
- Second Rise: 30 to 60 minutes. After shaping the buns, they’ll need a little more time to puff up. This is a great time to preheat your Dutch oven!
- Cooking Time: 30 to 35 minutes. The buns will bake to golden perfection in your preheated Dutch oven. The smell will be irresistible!
Total Time: Approximately 2 to 3 hours. While this may seem like a long time, most of it is hands-off, allowing you to enjoy the process and maybe even sip a cup of tea while you wait. Trust me, the end result is worth every minute spent!
Nutritional Information for Dutch Oven Crusty Bread Buns Recipe
As a home cook, I always find it helpful to know the nutritional value of what I’m baking. It allows me to enjoy my creations while being mindful of what I’m putting into my body. Here’s a general breakdown of the nutritional information for one Dutch oven crusty bread bun, based on the ingredients listed:
- Calories: Approximately 150 calories
- Protein: 4 grams
- Carbohydrates: 30 grams
- Fat: 0.5 grams
- Sugar: 0.5 grams (without optional add-ons)
- Sodium: 200 milligrams
Keep in mind that these values can vary based on the specific ingredients you use, especially if you decide to add cheese, herbs, or other flavorful ingredients. If you’re looking to make these buns a bit healthier, consider using whole wheat flour or adding seeds for extra fiber and nutrients. Regardless of the nutritional content, I can assure you that the joy of baking and sharing these buns far outweighs any numbers on a label!
Frequently Asked Questions about Dutch Oven Crusty Bread Buns Recipe
As I’ve shared my love for Dutch oven crusty bread buns, I’ve often received questions from fellow home cooks eager to try their hand at this delightful recipe. I love connecting with others through our shared passion for baking, so I’ve compiled some of the most frequently asked questions to help you on your baking journey!
Can I use active dry yeast instead of instant yeast?
Absolutely! You can use active dry yeast, but you’ll need to activate it first. Simply dissolve it in warm water (about 110°F or 43°C) with a pinch of sugar and let it sit for about 5-10 minutes until it becomes frothy. Then, mix it into your dry ingredients as you would with instant yeast.
What if my dough doesn’t rise?
If your dough doesn’t rise, it could be due to a few factors. First, check the freshness of your yeast. If it’s expired, it won’t work properly. Also, ensure that your water is warm, not hot, as too much heat can kill the yeast. Lastly, make sure your dough is in a warm, draft-free spot. If all else fails, don’t be discouraged! Sometimes, dough just needs a little extra time.
Can I make the dough ahead of time?
Yes, you can! If you want to prepare the dough in advance, mix it up and let it rise as usual. After the first rise, you can refrigerate the dough for up to 24 hours. Just remember to let it come to room temperature before shaping and proceeding with the second rise.
How do I store leftover buns?
To keep your buns fresh, store them in an airtight container at room temperature for up to 2 days. If you want to keep them longer, consider freezing them. Just wrap each bun tightly in plastic wrap and place them in a freezer bag. They can be frozen for up to 3 months. When you’re ready to enjoy them, simply thaw at room temperature and warm them in the oven for a few minutes.
Can I add other flavors to the dough?
Absolutely! The beauty of these buns is their versatility. Feel free to experiment with different herbs, spices, or even cheeses. I love adding garlic, herbs, or cheese to the dough for a unique twist. Just remember to adjust the quantities to your taste!
These questions reflect the curiosity and excitement that come with baking. I hope my answers help you feel more confident as you embark on your own baking adventure. Remember, every loaf is a learning experience, and the joy of creating something delicious is what truly matters. Happy baking!
Conclusion on Dutch Oven Crusty Bread Buns Recipe
As I reflect on my journey of baking Dutch oven crusty bread buns, I can’t help but feel a sense of accomplishment and joy. These buns are more than just a recipe; they are a testament to the beauty of home cooking. The process of mixing, rising, and baking is a delightful experience that connects us to our ingredients and to each other.
What I love most about these buns is their versatility. Whether you enjoy them fresh out of the oven with a pat of butter, as a side to your favorite soup, or transformed into sliders for a gathering, they never fail to impress. Plus, the satisfaction of pulling a golden, crusty bun from the oven is unmatched. It’s a moment that brings smiles and warmth to any table.
So, if you’re looking to fill your home with the comforting aroma of freshly baked bread, I encourage you to give this recipe a try. With just a few simple ingredients and a little patience, you can create something truly special. Happy baking, and may your kitchen always be filled with love and the delightful scent of crusty bread buns!