Introduction to Cheesy Herb Pull Apart Bread
Ah, the aroma of freshly baked bread wafting through the kitchen! It’s like a warm hug on a chilly day. I remember the first time I made Cheesy Herb Pull Apart Bread. It was a rainy afternoon, and I was looking for something comforting to lift my spirits. As I mixed the dough, I could already envision the golden, cheesy goodness that awaited me. Little did I know, this would become a staple in my home.
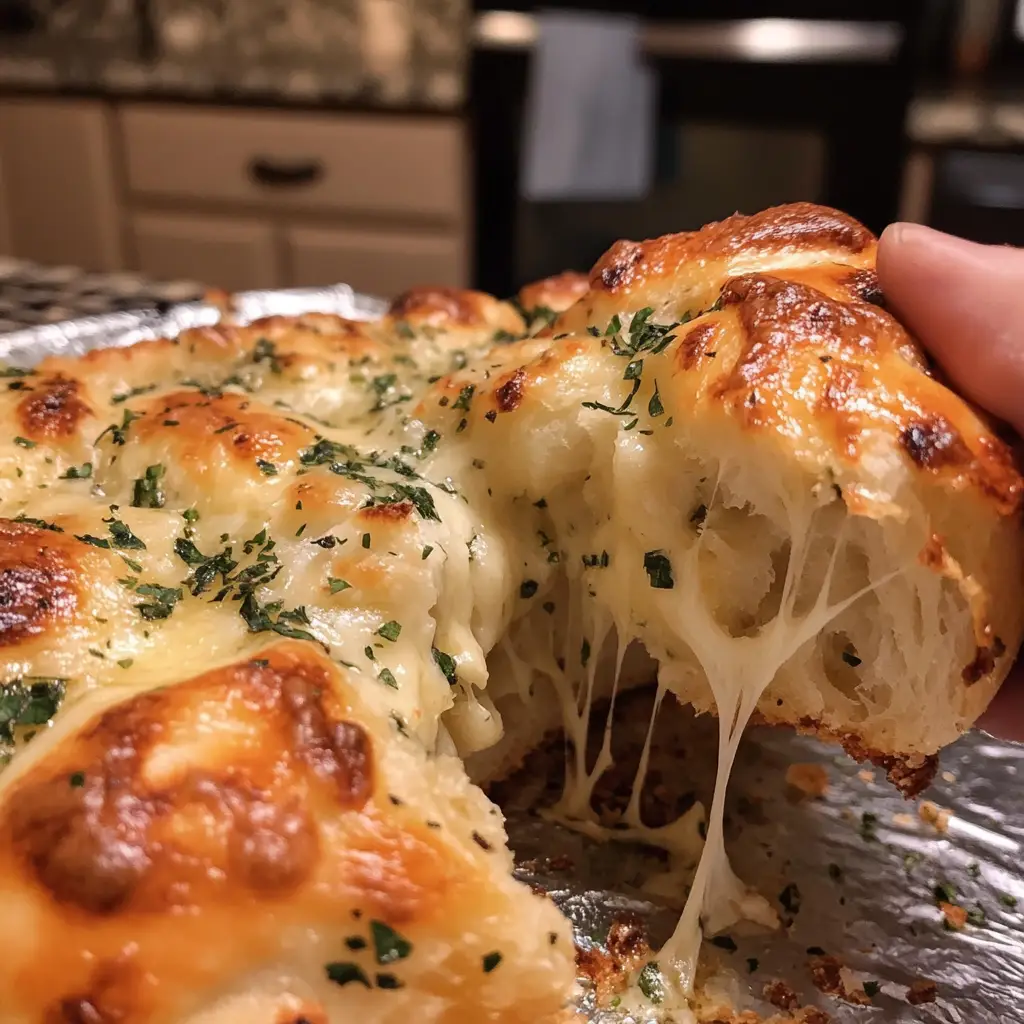
This delightful bread is not just a treat for the taste buds; it’s a feast for the senses. The way the cheese melts and mingles with the fragrant herbs creates a symphony of flavors that dances on your palate. Each pull apart reveals layers of cheesy goodness, making it perfect for sharing with family and friends. Whether it’s a cozy dinner, a festive gathering, or just a casual snack, this bread is sure to steal the show.
What I love most about Cheesy Herb Pull Apart Bread is its versatility. You can customize it with your favorite herbs or cheeses, making it uniquely yours. Plus, it’s surprisingly easy to make! With just a few simple ingredients and a little bit of love, you can create a masterpiece that will have everyone asking for seconds.
So, grab your apron and let’s embark on this culinary adventure together! I promise, once you try this recipe, it will become a cherished part of your cooking repertoire. Let’s dive into the ingredients and get started on this cheesy delight!
Ingredients for Cheesy Herb Pull Apart Bread
Before we dive into the delightful process of making Cheesy Herb Pull Apart Bread, let’s gather our ingredients. Having everything ready makes the cooking experience smoother and more enjoyable. I always find that when I have my ingredients prepped, it feels like I’m setting the stage for a delicious performance in the kitchen!
Main Ingredients
- 3 cups all-purpose flour
- 1 packet (2 ¼ teaspoons) active dry yeast
- 1 teaspoon sugar
- 1 teaspoon salt
- 1 cup warm water (about 110°F or 43°C)
- ¼ cup unsalted butter, melted
- 1 cup shredded mozzarella cheese
- ½ cup grated Parmesan cheese
- 2 tablespoons fresh parsley, chopped
- 1 tablespoon fresh rosemary, chopped
- 1 tablespoon fresh thyme, chopped
When it comes to the flour, I always opt for high-quality all-purpose flour. It makes a noticeable difference in the texture of the bread. And don’t skimp on the cheese! Using fresh mozzarella and Parmesan elevates the flavor to a whole new level.
Optional Add-ons
- 1 teaspoon garlic powder or 2 cloves of minced garlic for an extra kick
- 1 teaspoon red pepper flakes for a hint of spice
- Other herbs like basil or oregano to mix things up
- Different cheeses such as cheddar or gouda for a unique twist
Feel free to get creative with the optional add-ons! I once added some sun-dried tomatoes, and it was a game-changer. The beauty of Cheesy Herb Pull Apart Bread is that it can be tailored to your taste. So, let your imagination run wild!
How to Prepare Cheesy Herb Pull Apart Bread
Now that we have our ingredients ready, it’s time to roll up our sleeves and get to the fun part—preparing our Cheesy Herb Pull Apart Bread! I always find that the process of making bread is therapeutic. The kneading, the rising, and the anticipation of that first warm bite—it’s all part of the magic. Let’s break it down step by step!
Step 1: Prepare the Dough
First things first, let’s get our dough going. In a large mixing bowl, combine the warm water, sugar, and yeast. Let it sit for about 5-10 minutes until it becomes frothy. This is a sign that your yeast is alive and ready to work its magic!
Next, add the flour, salt, and melted butter to the yeast mixture. I like to use a wooden spoon to mix everything together until a shaggy dough forms. It’s okay if it looks a bit messy at this stage; that’s part of the charm!
Tips for Step 1
- Make sure your water is warm, not hot. Too hot can kill the yeast!
- Don’t rush the frothing process. It’s crucial for a good rise.
Step 2: Mix the Cheese and Herbs
While the dough is resting, let’s prepare the cheesy filling. In a separate bowl, combine the shredded mozzarella, grated Parmesan, and chopped herbs. The aroma of fresh herbs is simply intoxicating! I often find myself sneaking a taste of the cheese mixture—just to make sure it’s perfect, of course.
Tips for Step 2
- Feel free to adjust the amount of cheese based on your preference. More cheese equals more gooey goodness!
- Chop the herbs finely to ensure they distribute evenly throughout the bread.
Step 3: Shape the Bread
Once your dough has risen (about 1 hour or until doubled in size), it’s time to shape it. Punch down the dough gently to release the air. Then, on a floured surface, roll it out into a rectangle. Cut the dough into squares, about 2 inches each. Now, here comes the fun part—stuffing each square with the cheesy herb mixture!
Stack the squares in a greased loaf pan, layering them as you go. It’s like building a cheesy tower of joy!
Tips for Step 3
- Don’t worry about making perfect squares; a little imperfection adds character!
- Make sure to pack the cheese mixture well into each square for maximum flavor.
Step 4: Bake the Bread
Preheat your oven to 350°F (175°C). Cover the loaf pan with a clean kitchen towel and let it rise for another 30 minutes. This second rise is essential for that fluffy texture we all love. Once it’s puffed up, pop it in the oven and bake for about 30-35 minutes, or until golden brown. The smell will be heavenly!
Tips for Step 4
- Keep an eye on the bread towards the end of baking. If it’s browning too quickly, cover it loosely with foil.
- Let it cool for a few minutes before pulling it apart. This helps the cheese set a bit!
Equipment Needed for Cheesy Herb Pull Apart Bread
Before we dive into the kitchen, let’s gather the essential tools for making our Cheesy Herb Pull Apart Bread. Having the right equipment on hand makes the process smoother and more enjoyable. Here’s what you’ll need:
- Mixing Bowls: A large mixing bowl for the dough and a smaller one for the cheese and herbs. If you don’t have a mixing bowl, any large container will do!
- Wooden Spoon: Perfect for mixing the dough. If you don’t have one, a spatula or even your hands will work just fine.
- Rolling Pin: To roll out the dough. If you don’t have a rolling pin, a wine bottle or any smooth cylindrical object can serve as a great substitute.
- Loaf Pan: A standard 9×5 inch loaf pan is ideal for shaping the bread. If you don’t have one, you can use a round cake pan or even a baking sheet, just adjust the baking time accordingly.
- Kitchen Towel: To cover the dough while it rises. A clean dishcloth will work just as well!
- Oven Mitts: Safety first! Protect your hands when taking the hot bread out of the oven.
With these tools at your side, you’re all set to create a delicious loaf of Cheesy Herb Pull Apart Bread. Remember, it’s not about having fancy equipment; it’s about the love and joy you put into your cooking!
Variations of Cheesy Herb Pull Apart Bread
One of the things I adore about Cheesy Herb Pull Apart Bread is its flexibility. You can easily switch things up to suit your taste or the occasion. Here are a few delightful variations that I’ve tried and loved:
- Spicy Jalapeño Cheese: Add diced jalapeños to the cheese mixture for a zesty kick. The heat pairs beautifully with the gooey cheese!
- Sun-Dried Tomato and Basil: Mix in chopped sun-dried tomatoes and fresh basil for a Mediterranean twist. It’s like a mini vacation in every bite!
- Cheddar and Chive: Swap out mozzarella for sharp cheddar and add chopped chives. This combination is rich and savory, perfect for cheese lovers.
- Garlic and Herb: Incorporate roasted garlic into the cheese mixture for a deep, rich flavor. It’s a game-changer that elevates the bread to new heights!
Feel free to experiment with your favorite ingredients! The beauty of this bread is that it welcomes creativity. Each variation tells a different story, and I can’t wait for you to discover your own delicious combinations!
Cooking Notes for Cheesy Herb Pull Apart Bread
As I’ve journeyed through the delightful world of baking Cheesy Herb Pull Apart Bread, I’ve gathered a few cooking notes that can help you achieve the best results. These little nuggets of wisdom can make a big difference in your baking adventure!
- Room Temperature Ingredients: If possible, let your butter and any other dairy ingredients come to room temperature before mixing. This helps them blend more smoothly into the dough.
- Don’t Rush the Rising: Patience is key! Allow the dough to rise until it has doubled in size. This ensures a light and fluffy texture.
- Check for Doneness: To know if your bread is done, tap the bottom of the loaf. If it sounds hollow, it’s ready! If not, give it a few more minutes in the oven.
- Storing Leftovers: If you have any leftovers (which is rare in my house!), store them in an airtight container at room temperature for up to two days. You can also freeze the bread for up to a month—just reheat it in the oven for that fresh-baked taste!
- Experiment with Herbs: Don’t hesitate to try different herbs based on what you have on hand. Fresh or dried, they can add unique flavors to your bread.
These cooking notes are like little breadcrumbs of experience that I’ve picked up along the way. I hope they guide you as you create your own delicious Cheesy Herb Pull Apart Bread. Happy baking!
Serving Suggestions for Cheesy Herb Pull Apart Bread
Now that your Cheesy Herb Pull Apart Bread is golden and fragrant, it’s time to think about how to serve it! This bread is incredibly versatile and can be enjoyed in various ways. Here are some of my favorite serving suggestions that will make your bread shine even brighter:
- As an Appetizer: Serve warm, straight from the oven, with a side of marinara sauce or garlic butter for dipping. It’s a crowd-pleaser at parties!
- With Soups and Salads: Pair it with a hearty soup or a fresh salad. The cheesy goodness complements the flavors beautifully, making for a comforting meal.
- For Breakfast: Enjoy it toasted with a smear of cream cheese or butter. It’s a delightful way to start your day!
- As a Snack: Cut it into smaller pieces for a quick snack. It’s perfect for those moments when you need a little pick-me-up.
- For a Picnic: Pack it up for a picnic! It travels well and is sure to impress your friends and family.
Whatever way you choose to serve your Cheesy Herb Pull Apart Bread, I guarantee it will be a hit. The joy of pulling apart those cheesy layers is an experience everyone will love. So, gather your loved ones, and enjoy this delightful creation together!
Tips for Making Cheesy Herb Pull Apart Bread
As I’ve baked my fair share of Cheesy Herb Pull Apart Bread, I’ve picked up a few handy tips that can elevate your baking experience. These little nuggets of wisdom can make all the difference in achieving that perfect loaf!
- Use Fresh Ingredients: Fresh herbs and quality cheese can transform your bread. I always recommend using the freshest ingredients you can find for the best flavor.
- Don’t Skip the Kneading: Kneading the dough helps develop gluten, giving your bread that lovely chewy texture. I find it therapeutic to knead for about 5-7 minutes until the dough is smooth and elastic.
- Experiment with Cheese: While mozzarella and Parmesan are classic choices, don’t hesitate to mix in your favorites. I’ve had great success with gouda and feta, adding a unique twist to the flavor profile.
- Let It Rise: Be patient during the rising times. A good rise is key to fluffy bread. I often find that the longer I let it rise, the better the texture!
- Serve Warm: This bread is best enjoyed warm. If you can, serve it straight from the oven. The gooey cheese and warm bread create a delightful experience that’s hard to resist!
With these tips in your back pocket, you’re all set to create a delicious loaf of Cheesy Herb Pull Apart Bread. Happy baking, and may your kitchen be filled with the wonderful aroma of freshly baked bread!
Breakdown of Time for Cheesy Herb Pull Apart Bread
Now that we’ve covered the ingredients and the preparation steps, let’s talk about the time it takes to create this delightful Cheesy Herb Pull Apart Bread. I find that knowing the time commitment helps me plan my baking adventures better. Here’s a quick breakdown:
- Prep Time: Approximately 20 minutes. This includes gathering your ingredients, mixing the dough, and preparing the cheesy filling. It’s a fun and engaging process that flies by!
- Rising Time: About 1 hour and 30 minutes total. This includes the first rise of 1 hour and a second rise of 30 minutes. Patience is key here, but the wait is so worth it!
- Cooking Time: 30-35 minutes. This is when your kitchen will fill with that irresistible aroma of baking bread. Keep an eye on it as it turns golden brown!
- Total Time: Roughly 2 hours and 25 minutes. This includes all the prep, rising, and baking time. It may seem like a while, but trust me, the end result is a warm, cheesy masterpiece that will have everyone coming back for more!
With this time breakdown, you can easily fit the making of Cheesy Herb Pull Apart Bread into your day. Whether it’s a weekend project or a special occasion, I promise it will be a rewarding experience that fills your home with warmth and joy!
Nutritional Information for Cheesy Herb Pull Apart Bread
As a passionate home cook, I always find it helpful to know the nutritional content of the dishes I prepare. While Cheesy Herb Pull Apart Bread is a delightful treat, it’s good to enjoy it in moderation. Here’s a general breakdown of the nutritional information per serving (based on a loaf divided into 12 pieces):
- Calories: Approximately 180 calories
- Protein: 6 grams
- Carbohydrates: 25 grams
- Fat: 7 grams
- Saturated Fat: 4 grams
- Cholesterol: 20 mg
- Sodium: 250 mg
- Fiber: 1 gram
Keep in mind that these values can vary based on the specific ingredients you use, especially if you opt for different cheeses or add-ons. I always encourage balancing indulgent treats like this bread with plenty of fresh fruits and vegetables in your diet. Enjoying Cheesy Herb Pull Apart Bread as part of a well-rounded meal can make it even more satisfying!
Frequently Asked Questions about Cheesy Herb Pull Apart Bread
As I’ve shared my love for Cheesy Herb Pull Apart Bread, I often get questions from fellow home cooks eager to try their hand at this delightful recipe. Here are some of the most common questions I’ve encountered, along with my answers to help you on your baking journey!
Can I use whole wheat flour instead of all-purpose flour?
Absolutely! Whole wheat flour can add a nutty flavor and extra fiber to your bread. However, it may result in a denser texture. I recommend using a mix of whole wheat and all-purpose flour for the best results.
How do I store leftover bread?
If you have any leftovers (which is rare in my house!), store them in an airtight container at room temperature for up to two days. You can also freeze the bread for up to a month. Just reheat it in the oven for that fresh-baked taste!
Can I make the dough ahead of time?
Yes! You can prepare the dough and let it rise, then punch it down and refrigerate it for up to 24 hours. When you’re ready to bake, let it come to room temperature and rise again before shaping and baking.
What can I substitute for fresh herbs?
If you don’t have fresh herbs on hand, dried herbs can work too! Just remember that dried herbs are more concentrated, so use about one-third of the amount. For example, if a recipe calls for 1 tablespoon of fresh herbs, use 1 teaspoon of dried herbs instead.
Can I add other fillings to the bread?
Definitely! The beauty of Cheesy Herb Pull Apart Bread is its versatility. Feel free to add ingredients like cooked bacon, sautéed onions, or even spinach for a delicious twist. Just be mindful not to overstuff the dough, as it may affect the baking process.
These FAQs are just a glimpse into the wonderful world of Cheesy Herb Pull Apart Bread. I hope they inspire you to get creative and enjoy the process of baking this delightful treat. If you have more questions, don’t hesitate to reach out or experiment in your kitchen!
Conclusion on Cheesy Herb Pull Apart Bread
As I wrap up this delightful journey into the world of Cheesy Herb Pull Apart Bread, I can’t help but feel a sense of warmth and joy. This recipe is more than just a collection of ingredients; it’s a celebration of flavors, a canvas for creativity, and a way to bring loved ones together. The gooey cheese, fragrant herbs, and soft, pillowy bread create a symphony of taste that is simply irresistible.
What I love most about this bread is its versatility. Whether you’re hosting a gathering, enjoying a cozy night in, or simply craving a snack, Cheesy Herb Pull Apart Bread fits the bill perfectly. Plus, it’s easy to customize with your favorite ingredients, making it a unique reflection of your culinary style.
So, I encourage you to roll up your sleeves, gather your ingredients, and embark on this baking adventure. The process is not only therapeutic but also incredibly rewarding. With each pull apart, you’ll experience the joy of homemade goodness that fills your home with love and laughter. Happy baking, and may your kitchen always be filled with the delightful aroma of freshly baked bread!


