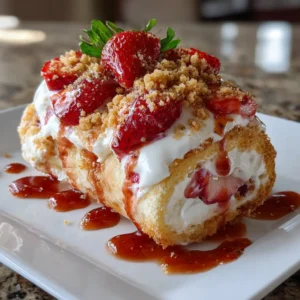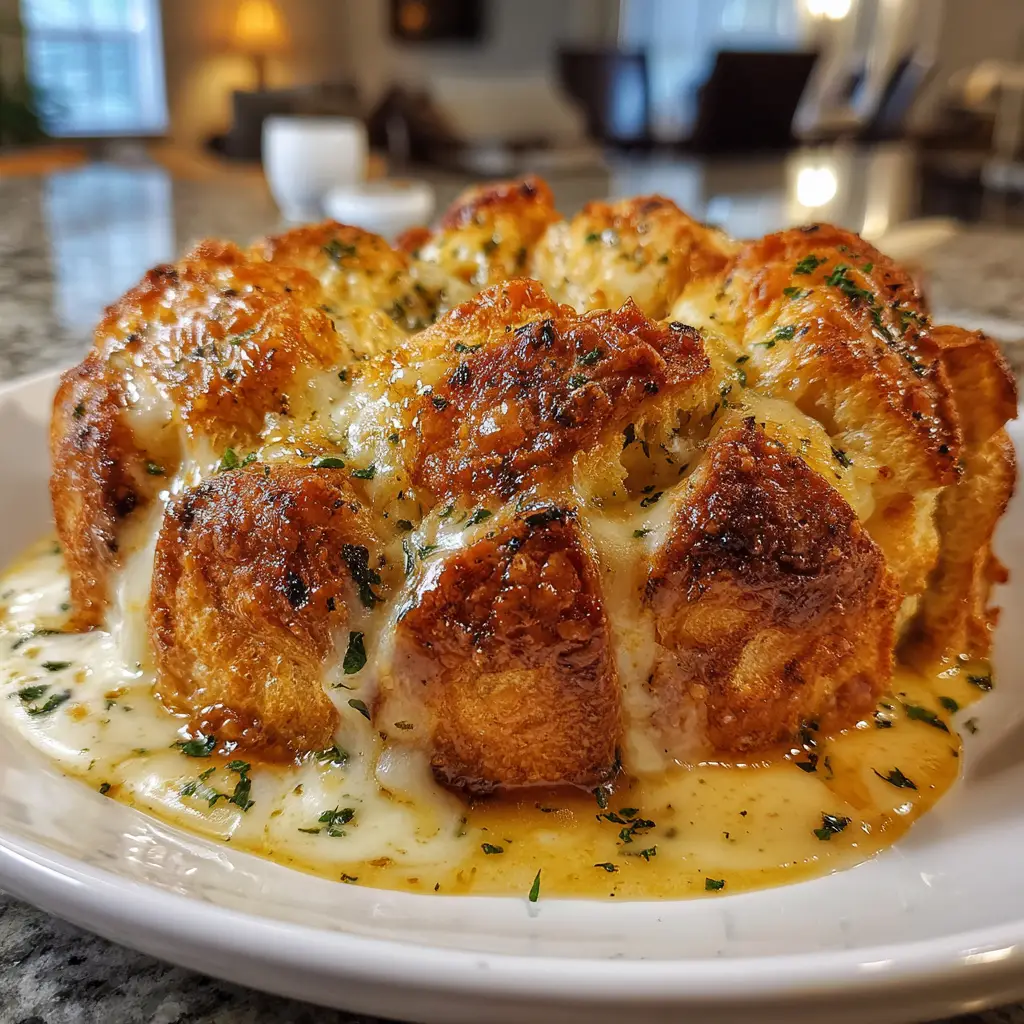
Introduction to Cheesy Garlic Cruffin
As a busy mom, I know how precious time can be, especially when it comes to meal prep. That’s why I absolutely adore these Cheesy Garlic Cruffins! They’re the perfect blend of cheesy goodness and garlicky delight, all wrapped in a flaky pastry. Whether you need a quick snack for the kids or a tasty treat to impress your friends, these cruffins are a game-changer. They come together in no time and are sure to bring smiles to your family’s faces. Trust me, once you try them, you’ll be hooked!
Why You’ll Love This Cheesy Garlic Cruffin
These Cheesy Garlic Cruffins are a lifesaver for busy days! They’re quick to whip up, taking just 40 minutes from start to finish. The delightful combination of cheese and garlic creates a flavor explosion that’s hard to resist. Plus, they’re versatile enough to serve as a snack, appetizer, or even a side dish. You’ll love how they make your kitchen smell heavenly while satisfying everyone’s cravings!
Ingredients for Cheesy Garlic Cruffin
Gathering the right ingredients is the first step to creating these delightful Cheesy Garlic Cruffins. Here’s what you’ll need:
- All-purpose flour: This is the base of your dough, giving it that lovely flaky texture.
- Grated cheese: Cheddar or mozzarella works wonders here. Choose your favorite for a cheesy kick!
- Unsalted butter: Melted butter adds richness and helps create that irresistible flaky layer.
- Garlic: Freshly minced garlic brings a robust flavor that pairs perfectly with cheese.
- Milk: This helps bind the dough together, making it soft and easy to work with.
- Salt and pepper: Essential for seasoning, these enhance the overall flavor of your cruffins.
- Fresh parsley: Chopped parsley adds a pop of color and a fresh taste that brightens the dish.
Feel free to get creative! You can add more garlic for an extra punch or experiment with different cheeses like feta or gouda. If you’re in a pinch, pre-shredded cheese works just fine. For exact measurements, check the bottom of the article where you can find everything listed for easy printing.
How to Make Cheesy Garlic Cruffin
Making Cheesy Garlic Cruffins is a delightful adventure! Follow these simple steps, and you’ll have a batch of warm, cheesy goodness in no time. Let’s dive in!
Step 1: Preheat the Oven
First things first, preheat your oven to 375°F (190°C). Preheating is crucial because it ensures your cruffins bake evenly. A hot oven helps achieve that golden-brown crust we all love. So, don’t skip this step!
Step 2: Prepare the Dough
In a mixing bowl, combine the all-purpose flour, salt, and pepper. Stir them together until well mixed. Then, pour in the melted butter and milk. Mix until a soft dough forms. It should be slightly sticky but manageable. If it feels too dry, add a splash more milk!
Step 3: Roll Out the Dough
Now, lightly flour your countertop to prevent sticking. Roll out the dough into a rectangle, about ¼ inch thick. Aim for an even thickness to ensure uniform baking. If the dough resists, let it rest for a few minutes. This will make it easier to roll out!
Step 4: Add the Filling
Sprinkle the grated cheese, minced garlic, and chopped parsley evenly over the rolled-out dough. Make sure to cover the surface well, as this is where the flavor magic happens! Feel free to add extra cheese if you’re feeling indulgent.
Step 5: Shape the Cruffins
Starting from one edge, roll the dough tightly into a log. Once rolled, cut the log into pieces, about 1 inch thick. Place these pieces upright in a greased muffin tin. This will help them rise beautifully while baking!
Step 6: Bake the Cruffins
Pop the muffin tin into your preheated oven and bake for 20-25 minutes. Keep an eye on them! You’ll know they’re done when they’re golden brown and your kitchen smells heavenly. A toothpick inserted in the center should come out clean.
Step 7: Cool and Serve
Once baked, remove the cruffins from the oven and let them cool in the tin for about 5 minutes. This helps them set and makes them easier to remove. Serve them warm for the best cheesy experience!
Tips for Success
- Use room temperature ingredients for a smoother dough.
- Don’t rush the rolling process; take your time for even thickness.
- Experiment with different cheeses for unique flavors.
- For extra crunch, brush the tops with melted butter before baking.
- Store leftovers in an airtight container to keep them fresh.
Equipment Needed
- Muffin tin: Essential for shaping your cruffins. A silicone mold works great too!
- Mixing bowl: Any large bowl will do for combining ingredients.
- Rolling pin: If you don’t have one, a wine bottle can work in a pinch!
- Measuring cups and spoons: For accurate ingredient measurements, but eyeballing can be fun too!
Variations
- Herb-Infused: Add dried herbs like oregano or thyme to the dough for an aromatic twist.
- Spicy Kick: Mix in some red pepper flakes or jalapeños for a spicy version that packs a punch.
- Cheese Lovers: Try a blend of cheeses like feta, gouda, or pepper jack for a unique flavor profile.
- Gluten-Free: Substitute all-purpose flour with a gluten-free blend to accommodate dietary needs.
- Veggie Delight: Add finely chopped spinach or sun-dried tomatoes to the filling for extra nutrition and flavor.
Serving Suggestions
- Pair your Cheesy Garlic Cruffins with a fresh garden salad for a light meal.
- Serve them alongside a warm bowl of tomato soup for a comforting combo.
- For drinks, a chilled glass of white wine or sparkling water complements the flavors beautifully.
- Garnish with extra parsley for a pop of color and freshness.
FAQs about Cheesy Garlic Cruffin
Can I make Cheesy Garlic Cruffins ahead of time?
Absolutely! You can prepare the dough and filling in advance. Just roll and shape the cruffins, then store them in the fridge. When you’re ready to bake, pop them in the oven straight from the fridge. They’ll still turn out delicious!
What can I serve with Cheesy Garlic Cruffins?
These cruffins pair wonderfully with a fresh salad or a warm bowl of soup. They also make a great appetizer for gatherings. Just imagine serving them at your next get-together; they’ll be a hit!
Can I freeze Cheesy Garlic Cruffins?
Yes, you can! Once they’re baked and cooled, place them in an airtight container or freezer bag. They’ll keep well for up to three months. Just reheat them in the oven for a quick snack later!
What type of cheese works best in Cheesy Garlic Cruffins?
Cheddar and mozzarella are fantastic choices, but feel free to experiment! Feta, gouda, or even pepper jack can add a unique twist. The key is to use cheese that melts well for that gooey texture.
How do I know when my Cheesy Garlic Cruffins are done baking?
Keep an eye on them! They should be golden brown on top, and a toothpick inserted in the center should come out clean. The aroma wafting through your kitchen will also be a good indicator that they’re ready!
Final Thoughts
Making Cheesy Garlic Cruffins is more than just a cooking task; it’s a joyful experience that brings warmth to your kitchen. The delightful aroma of garlic and cheese fills the air, creating a cozy atmosphere that invites everyone to gather around. These cruffins are not only easy to prepare but also a fantastic way to bring smiles to your loved ones’ faces. Whether you’re enjoying them as a snack or serving them at a gathering, they’re sure to be a hit. So, roll up your sleeves and dive into this cheesy adventure—you won’t regret it!
Print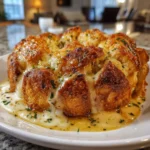
Cheesy Garlic Cruffin: The Ultimate Snack Delight!
- Total Time: 40 minutes
- Yield: 12 cruffins 1x
- Diet: Vegetarian
Description
A delicious blend of cheesy and garlicky flavors wrapped in a flaky pastry, perfect for snacking.
Ingredients
- 1 cup all-purpose flour
- 1/2 cup grated cheese (cheddar or mozzarella)
- 1/4 cup unsalted butter, melted
- 2 cloves garlic, minced
- 1/4 cup milk
- 1/4 teaspoon salt
- 1/4 teaspoon pepper
- 1 tablespoon fresh parsley, chopped
Instructions
- Preheat the oven to 375°F (190°C).
- In a bowl, mix the flour, salt, and pepper.
- Add the melted butter and milk, stirring until a dough forms.
- Roll out the dough and sprinkle with cheese, garlic, and parsley.
- Roll the dough into a log and cut into pieces.
- Place the pieces in a muffin tin and bake for 20-25 minutes until golden brown.
- Let cool slightly before serving.
Notes
- For extra flavor, add more garlic or different types of cheese.
- These can be made ahead of time and reheated.
- Serve warm for the best taste.
- Prep Time: 15 minutes
- Cook Time: 25 minutes
- Category: Snack
- Method: Baking
- Cuisine: American
Nutrition
- Serving Size: 1 cruffin
- Calories: 150
- Sugar: 1g
- Sodium: 200mg
- Fat: 8g
- Saturated Fat: 5g
- Unsaturated Fat: 2g
- Trans Fat: 0g
- Carbohydrates: 15g
- Fiber: 1g
- Protein: 4g
- Cholesterol: 20mg
Keywords: Cheesy Garlic Cruffin, Snack, Pastry, Baking