Introduction to Butterfinger Caramel Crunch Bars Recipe
As a passionate home cook, I find joy in creating sweet treats that bring smiles to faces. One of my all-time favorites is the Butterfinger Caramel Crunch Bars. These delightful bars are a perfect blend of crunchy, creamy, and sweet, making them an irresistible snack for any occasion. I remember the first time I made them; the kitchen was filled with the warm, inviting aroma of caramel melting, and I could hardly wait to take a bite!
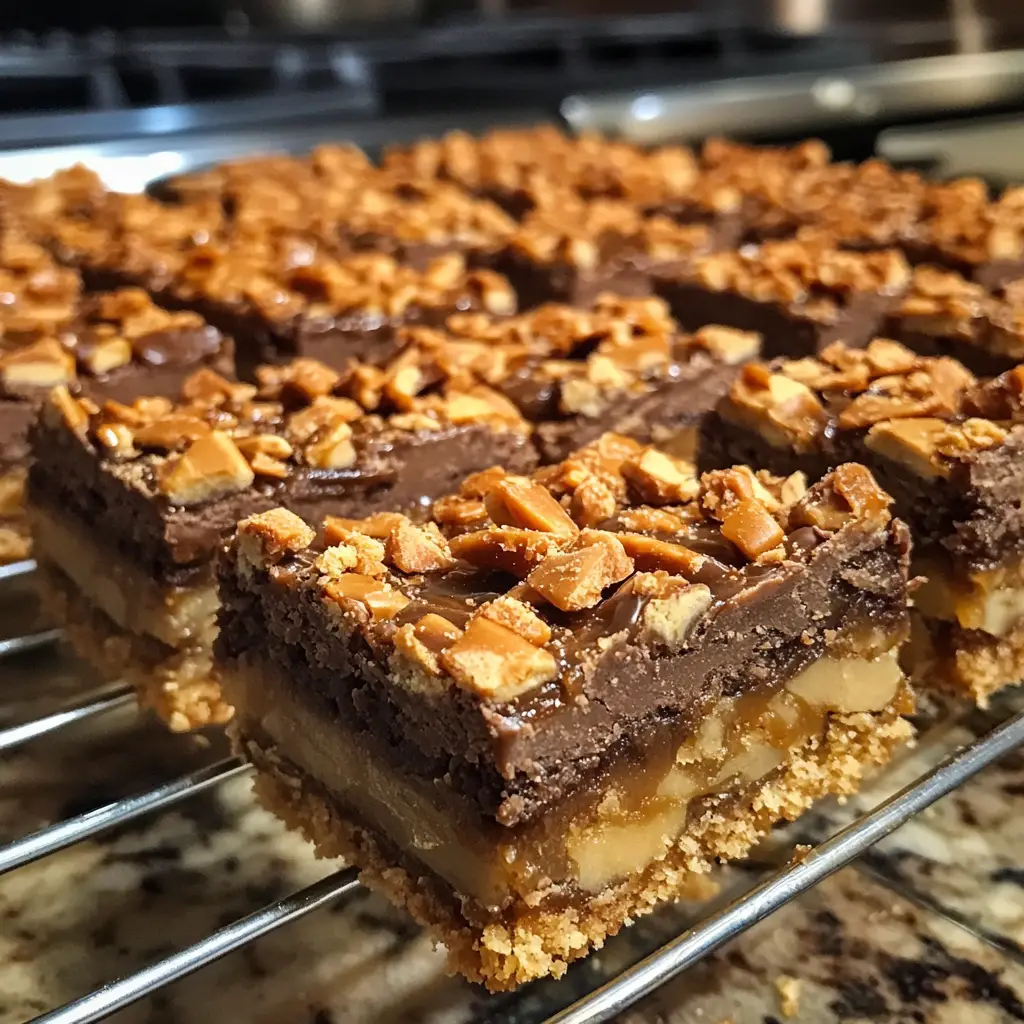
What I love most about this recipe is how it combines the nostalgic flavors of Butterfinger candy bars with a homemade twist. The layers of buttery crunch, gooey caramel, and the signature Butterfinger topping create a symphony of textures and tastes that dance on your palate. Whether you’re hosting a party, celebrating a birthday, or simply indulging in a sweet craving, these bars are sure to impress.
In this recipe, I’ll guide you through each step, sharing tips and tricks that I’ve learned along the way. From selecting the best ingredients to perfecting the caramel layer, I want to ensure your experience is as enjoyable as the final product. So, roll up your sleeves, and let’s embark on this delicious culinary adventure together!
Ingredients for Butterfinger Caramel Crunch Bars Recipe
Before we dive into the delightful process of making Butterfinger Caramel Crunch Bars, let’s gather our ingredients. Having everything ready makes the cooking experience smoother and more enjoyable. I always find that using high-quality ingredients elevates the final product, so I recommend sourcing the best you can find. Here’s what you’ll need:
Main Ingredients
- 1 cup of unsalted butter (melted)
- 1 cup of granulated sugar
- 1 cup of packed brown sugar
- 2 cups of all-purpose flour
- 1 cup of rolled oats
- 1 teaspoon of baking soda
- 1/2 teaspoon of salt
- 1 cup of sweetened condensed milk
- 1 cup of caramel sauce (store-bought or homemade)
- 1 cup of crushed Butterfinger candy bars (about 3-4 bars)
These ingredients come together to create a rich, layered treat that’s hard to resist. I always opt for unsalted butter to control the saltiness, and using fresh, high-quality Butterfinger bars makes a noticeable difference in flavor.
Optional Add-ons
- 1/2 cup of chopped nuts (like pecans or walnuts) for added crunch
- 1/2 teaspoon of vanilla extract to enhance the flavor
- Chocolate chips (for drizzling on top)
Feel free to get creative! Adding nuts gives a delightful crunch, while a drizzle of chocolate on top can make these bars even more decadent. I often experiment with different toppings, and each variation brings a new twist to this classic recipe.
How to Prepare Butterfinger Caramel Crunch Bars Recipe
Now that we have our ingredients ready, it’s time to roll up our sleeves and dive into the fun part—preparing the Butterfinger Caramel Crunch Bars! I love this part because it’s where the magic happens. Each step brings us closer to that delicious moment when we can finally take a bite. Let’s get started!
Step 1: Prepare the Base Layer
First, we need to create a sturdy base for our bars. This layer is the foundation that holds everything together, so it’s important to get it just right. In a large mixing bowl, combine the melted butter, granulated sugar, brown sugar, and vanilla extract (if using). Mix until it’s smooth and creamy. Then, add the flour, oats, baking soda, and salt. Stir until everything is well combined.
Tips for Step 1
- Make sure your butter is melted but not too hot; it should be warm to the touch. This helps the sugars blend nicely.
- Don’t overmix! Just stir until the dry ingredients are incorporated. Overmixing can lead to tough bars.
- Use a spatula to press the mixture evenly into the bottom of a greased baking pan. This ensures a nice, even base.
Step 2: Make the Caramel Layer
Next up is the gooey caramel layer! In a saucepan over medium heat, combine the sweetened condensed milk and caramel sauce. Stir continuously until the mixture is smooth and starts to bubble. This step is where the kitchen fills with that heavenly caramel aroma that makes my heart sing!
Tips for Step 2
- Keep an eye on the caramel; it can burn quickly if left unattended. Stirring constantly is key!
- If you want a richer flavor, consider adding a pinch of sea salt to the caramel mixture.
- Once it’s ready, pour the caramel over the base layer and spread it evenly. This creates a luscious layer that will melt in your mouth.
Step 3: Add the Butterfinger Topping
Now comes the fun part—adding the Butterfinger topping! Sprinkle the crushed Butterfinger bars evenly over the caramel layer. I love the sound of the crunchy bits hitting the gooey caramel; it’s like music to my ears! Press them down gently to ensure they stick.
Tips for Step 3
- For an extra touch, you can mix some of the Butterfinger crumbs into the caramel before pouring it over the base.
- Feel free to add more or less Butterfinger, depending on how much crunch you want in each bite!
- If you’re feeling adventurous, try adding a sprinkle of sea salt on top for a sweet and salty contrast.
Step 4: Assemble and Chill
Finally, it’s time to assemble everything and let it chill. Place the baking pan in the refrigerator for at least 2 hours, or until the bars are firm. This step is crucial because it allows all the layers to meld together beautifully.
Tips for Step 4
- Cover the pan with plastic wrap to prevent any odors from the fridge affecting the bars.
- Once chilled, use a sharp knife to cut the bars into squares or rectangles. Wipe the knife with a damp cloth between cuts for clean edges.
- Store any leftovers in an airtight container in the fridge. They’ll stay fresh for several days—if they last that long!
Equipment Needed for Butterfinger Caramel Crunch Bars Recipe
Before we dive into the kitchen, let’s gather the essential tools for making these delightful Butterfinger Caramel Crunch Bars. Having the right equipment on hand makes the process smoother and more enjoyable. Here’s what you’ll need:
- Mixing Bowls: A large mixing bowl for combining the base ingredients and a smaller one for the caramel layer.
- Measuring Cups and Spoons: Accurate measurements are key to achieving the perfect balance of flavors.
- Spatula: A sturdy spatula is perfect for mixing and spreading the layers evenly in the baking pan.
- 9×13-inch Baking Pan: This size is ideal for the bars, ensuring they cook evenly. If you don’t have one, a similar-sized pan will work just fine.
- Medium Saucepan: You’ll need this for melting the caramel and sweetened condensed milk together.
- Sharp Knife: A sharp knife is essential for cutting the bars into neat squares once they’ve chilled.
- Plastic Wrap: Use this to cover the baking pan while the bars chill in the fridge, keeping them fresh.
Don’t worry if you don’t have all the exact tools! Many of these items can be substituted with what you have at home. For example, a sturdy spoon can replace a spatula, and any baking dish can work in place of a 9×13-inch pan. The most important thing is to have fun and enjoy the process!
Variations of Butterfinger Caramel Crunch Bars Recipe
As a home cook, I love to experiment with recipes, and these Butterfinger Caramel Crunch Bars are no exception! There are so many fun variations you can try to make this treat your own. Here are a few ideas that I’ve enjoyed:
- Peanut Butter Twist: Add 1/2 cup of creamy peanut butter to the caramel layer for a rich, nutty flavor. The combination of peanut butter and Butterfinger is simply divine!
- Chocolate Lovers: Mix in chocolate chips into the base layer or drizzle melted chocolate over the top before serving. This adds an extra layer of indulgence that chocolate lovers will adore.
- Nutty Crunch: Swap out the Butterfinger for crushed nuts like almonds or pecans. This gives a delightful crunch and a different flavor profile that’s equally satisfying.
- Seasonal Flavors: During the holidays, consider adding spices like cinnamon or nutmeg to the base layer. It gives a warm, festive touch that’s perfect for gatherings.
These variations not only keep things exciting but also allow you to tailor the bars to your taste preferences. I often find that trying something new can lead to delightful surprises in the kitchen. So, don’t hesitate to get creative and make these bars your own!
Cooking Notes for Butterfinger Caramel Crunch Bars Recipe
As I’ve made these Butterfinger Caramel Crunch Bars time and time again, I’ve gathered a few cooking notes that can help you achieve the best results. These little tips can make a big difference in your baking adventure!
- Room Temperature Ingredients: For the best texture, ensure your butter and eggs (if using) are at room temperature. This helps them blend more smoothly into the mixture.
- Chilling Time: Don’t rush the chilling process! Allowing the bars to set properly in the fridge ensures they hold their shape when cut. Patience is key here!
- Storage: If you have leftovers (which is rare in my house!), store them in an airtight container in the fridge. They can last up to a week, but I doubt they’ll last that long!
- Cutting Tips: For clean cuts, use a sharp knife and wipe it with a damp cloth between cuts. This prevents the sticky caramel from gumming up your knife.
- Experiment with Layers: Feel free to adjust the thickness of each layer to your liking. If you love caramel, add a bit more! If you prefer a crunchier base, reduce the caramel slightly.
These cooking notes are like little nuggets of wisdom I’ve picked up along the way. They help ensure that every batch of Butterfinger Caramel Crunch Bars turns out delicious and satisfying. Happy baking!
Serving Suggestions for Butterfinger Caramel Crunch Bars Recipe
Once your Butterfinger Caramel Crunch Bars are chilled and ready to go, it’s time to think about how to serve them! I love to present these bars in a way that makes them even more tempting. Here are some of my favorite serving suggestions:
- On a Dessert Platter: Arrange the bars on a colorful dessert platter, garnished with fresh fruit like strawberries or raspberries. The vibrant colors make for a stunning presentation!
- With a Scoop of Ice Cream: Serve a warm bar alongside a scoop of vanilla or chocolate ice cream. The combination of warm and cold is simply heavenly!
- Drizzled with Chocolate: For an extra touch of indulgence, drizzle melted chocolate over the top of the bars just before serving. It adds a beautiful finish and enhances the chocolatey flavor.
- As Party Favors: Cut the bars into smaller squares and package them in cute boxes or bags. They make delightful party favors for birthdays or gatherings!
- With a Cup of Coffee: Enjoy these bars with a hot cup of coffee or tea. The rich flavors pair perfectly, making for a cozy afternoon treat.
These serving suggestions not only elevate the experience but also allow you to share the joy of these delicious bars with friends and family. I always find that the way we present our food can make it even more enjoyable. So, get creative and have fun with it!
Tips for Making Butterfinger Caramel Crunch Bars Recipe
As I’ve whipped up these Butterfinger Caramel Crunch Bars countless times, I’ve gathered a treasure trove of tips that can help you achieve the best results. These little nuggets of wisdom can make your baking adventure even more enjoyable and successful!
- Prep Ahead: If you’re short on time, consider prepping the base layer and caramel in advance. You can store them in the fridge for a day or two before assembling the bars.
- Use Parchment Paper: Lining your baking pan with parchment paper makes it easier to lift the bars out once they’re set. This way, you can cut them into perfect squares without any fuss!
- Chill Between Layers: If you want to ensure that each layer sets perfectly, chill the base layer for about 15 minutes before adding the caramel. This helps keep the layers distinct and prevents them from mixing.
- Customize Your Crunch: Don’t hesitate to mix different types of candy bars or nuts into the Butterfinger topping. Each addition can create a unique flavor profile that’s all your own!
- Be Patient: Allow the bars to chill completely before cutting. This patience pays off with clean, beautiful squares that are easy to serve and enjoy.
These tips are like little guiding stars in my kitchen, helping me navigate the sweet journey of making Butterfinger Caramel Crunch Bars. I hope they inspire you to create your own delicious batch with confidence and joy!
Breakdown of Time for Butterfinger Caramel Crunch Bars Recipe
When it comes to making Butterfinger Caramel Crunch Bars, timing is everything! I always find it helpful to have a clear idea of how long each step will take. This way, I can plan my baking adventure without feeling rushed. Here’s a quick breakdown of the time you’ll need:
- Prep Time: 20 minutes – This includes gathering your ingredients, mixing the base layer, and preparing the caramel.
- Cooking Time: 15 minutes – This is the time spent baking the base layer and melting the caramel.
- Chilling Time: 2 hours – Allowing the bars to chill is crucial for achieving the perfect texture. Patience is key here!
- Total Time: 2 hours and 35 minutes – This includes all the prep, cooking, and chilling time.
Knowing this timeline helps me stay organized and ensures that I can enjoy the process without any last-minute surprises. Plus, once you take that first bite of your delicious creation, you’ll realize that every minute spent was worth it!
Nutritional Information for Butterfinger Caramel Crunch Bars Recipe
As a passionate home cook, I always find it helpful to know the nutritional information of the treats I make. It allows me to enjoy them mindfully and share them with friends and family without any surprises. Here’s a general breakdown of the nutritional content for one Butterfinger Caramel Crunch Bar, assuming the recipe yields about 16 bars:
- Calories: Approximately 250 calories
- Fat: 12 grams (Saturated Fat: 7 grams)
- Carbohydrates: 35 grams (Sugars: 20 grams)
- Protein: 3 grams
- Fiber: 1 gram
- Sodium: 150 milligrams
Keep in mind that these values can vary based on the specific brands of ingredients you use and any optional add-ons you choose to include. If you’re looking to lighten things up, consider using less sugar or substituting some ingredients. Regardless, these bars are a delightful treat that’s perfect for special occasions or a sweet indulgence. Enjoy every bite!
Frequently Asked Questions about Butterfinger Caramel Crunch Bars Recipe
As I’ve shared my Butterfinger Caramel Crunch Bars with friends and family, I’ve noticed a few common questions pop up. I love answering these queries because it helps everyone enjoy the recipe to its fullest. Here are some of the most frequently asked questions:
- Can I use a different type of candy instead of Butterfinger? Absolutely! While Butterfinger adds a unique flavor, you can substitute it with other crushed candy bars like Snickers or Milky Way for a different twist.
- How do I store the bars? Store the bars in an airtight container in the fridge. They’ll stay fresh for up to a week, but I doubt they’ll last that long!
- Can I make these bars gluten-free? Yes! You can use gluten-free flour and oats to make this recipe gluten-free. Just ensure that all your ingredients are certified gluten-free.
- What if I don’t have caramel sauce? You can make your own caramel sauce at home using sugar, butter, and cream. There are plenty of easy recipes online if you want to try it!
- Can I freeze the bars? Yes! These bars freeze well. Just wrap them tightly in plastic wrap and place them in a freezer-safe container. They can last for up to three months in the freezer.
These questions often come up, and I love sharing my insights. If you have any other questions, feel free to reach out! I’m always here to help you on your baking journey.
Conclusion on Butterfinger Caramel Crunch Bars Recipe
As we wrap up this delightful journey of making Butterfinger Caramel Crunch Bars, I hope you feel inspired to dive into your kitchen and create your own batch. These bars are not just a treat; they are a celebration of flavors and textures that can bring joy to any gathering or simply satisfy a sweet craving.
What I love most about this recipe is its versatility. Whether you stick to the classic version or experiment with variations, each bite is a reminder of the joy that baking can bring. The combination of crunchy Butterfinger, gooey caramel, and a buttery base creates a symphony of taste that’s hard to resist.
So, gather your ingredients, follow the steps, and let the sweet aroma fill your kitchen. I can’t wait for you to experience the magic of these bars. Remember, the best part of cooking is sharing your creations with loved ones. Enjoy every moment, and happy baking!
Conclusion on Butterfinger Caramel Crunch Bars Recipe
As we come to the end of our delicious adventure with Butterfinger Caramel Crunch Bars, I hope you’re feeling inspired to whip up your own batch. These bars are more than just a sweet treat; they’re a delightful blend of flavors and textures that can brighten any day. The crunchy Butterfinger topping, the gooey caramel layer, and the buttery base create a symphony of taste that’s simply irresistible.
What truly makes this recipe special is its versatility. You can stick to the classic version or let your creativity shine by adding your favorite ingredients. Each variation brings a new twist, making it a fun experience every time you bake. Plus, these bars are perfect for sharing with friends and family, making them a wonderful addition to any gathering or celebration.
So, gather your ingredients, follow the steps, and let the sweet aroma fill your kitchen. I can’t wait for you to experience the joy of these Butterfinger Caramel Crunch Bars. Remember, the best part of cooking is sharing your creations with loved ones. Enjoy every moment, and happy baking!


