Introduction to Boston Cream Pie Cookies
As a busy mom, I know how precious time can be, especially when it comes to whipping up something sweet. That’s why I’m excited to share my Boston Cream Pie Cookies with you! These delightful treats capture the classic flavors of the beloved Boston cream pie, all in a cookie form. They’re perfect for a quick dessert after dinner or a special treat to impress your loved ones. With just a few simple steps, you can create a batch of cookies that will have everyone asking for seconds. Let’s dive into this delicious adventure together!
Why You’ll Love This Boston Cream Pie Cookies
These Boston Cream Pie Cookies are a game-changer for busy days! They’re quick to make, taking just over half an hour from start to finish. The rich chocolate glaze and creamy filling create a flavor explosion that will delight your taste buds. Plus, they’re a fun twist on a classic dessert, making them perfect for family gatherings or a cozy night in. Trust me, you’ll want to keep this recipe close!
Ingredients for Boston Cream Pie Cookies
Gathering the right ingredients is the first step to creating these scrumptious Boston Cream Pie Cookies. Here’s what you’ll need:
- All-purpose flour: This is the base of your cookies, providing structure and a soft texture.
- Unsweetened cocoa powder: It adds that rich chocolate flavor, making these cookies irresistible.
- Baking powder: This leavening agent helps the cookies rise, giving them a light and fluffy bite.
- Salt: Just a pinch enhances the flavors and balances the sweetness.
- Unsalted butter: Softened butter creates a creamy texture and rich taste. You can use margarine if you prefer.
- Granulated sugar: This sweetens the cookies and contributes to their delightful chewiness.
- Large egg: It binds the ingredients together and adds moisture.
- Vanilla extract: A splash of this adds warmth and depth to the flavor profile.
- Heavy cream: This is whipped to create the luscious filling that makes these cookies special.
- Powdered sugar: It sweetens the cream filling and helps achieve that perfect whipped texture.
- Semi-sweet chocolate chips: These are melted for drizzling on top, adding a decadent finish. Dark chocolate chips can be a great alternative for a richer taste.
For exact measurements, check the bottom of the article where you can find everything listed for easy printing. Happy baking!
How to Make Boston Cream Pie Cookies
Now that we have our ingredients ready, let’s dive into the fun part—making these Boston Cream Pie Cookies! Follow these simple steps, and you’ll have a batch of cookies that will make your kitchen smell heavenly.
Step 1: Preheat the Oven
First things first, preheat your oven to 350°F (175°C). This step is crucial because it ensures even baking. While the oven warms up, line a baking sheet with parchment paper. This will prevent the cookies from sticking and make cleanup a breeze!
Step 2: Mix Dry Ingredients
In a medium bowl, whisk together the all-purpose flour, unsweetened cocoa powder, baking powder, and salt. Make sure there are no lumps in the cocoa powder. This mixture is the foundation of your cookies, so take your time to get it right!
Step 3: Cream Butter and Sugar
In a large bowl, cream together the softened unsalted butter and granulated sugar. Use an electric mixer on medium speed until the mixture is light and fluffy. This usually takes about 2-3 minutes. The fluffiness is key to achieving that perfect cookie texture!
Step 4: Combine Wet Ingredients
Next, add the large egg and vanilla extract to the butter-sugar mixture. Mix well until everything is combined. The egg adds moisture, while the vanilla brings warmth to the flavor. You’ll love how it smells!
Step 5: Combine Wet and Dry Ingredients
Now, gradually add the dry ingredients to the wet mixture. Mix until just combined. Be careful not to overmix; we want our cookies to be tender and soft. A few flour streaks are okay!
Step 6: Shape the Cookies
Using a tablespoon, drop balls of dough onto the prepared baking sheet. Leave some space between each ball, as they will spread while baking. If you want uniform cookies, you can use a cookie scoop for even sizes!
Step 7: Bake the Cookies
Pop the baking sheet into the preheated oven and bake for 10-12 minutes. Keep an eye on them; you want the edges to be set but the centers slightly soft. Once done, let them cool on a wire rack for a few minutes before transferring them to cool completely.
Step 8: Prepare the Cream Filling
While the cookies cool, it’s time to whip up the cream filling. In a separate bowl, whip the heavy cream and powdered sugar together until stiff peaks form. This will create a light and fluffy filling that’s simply irresistible!
Step 9: Assemble the Cookies
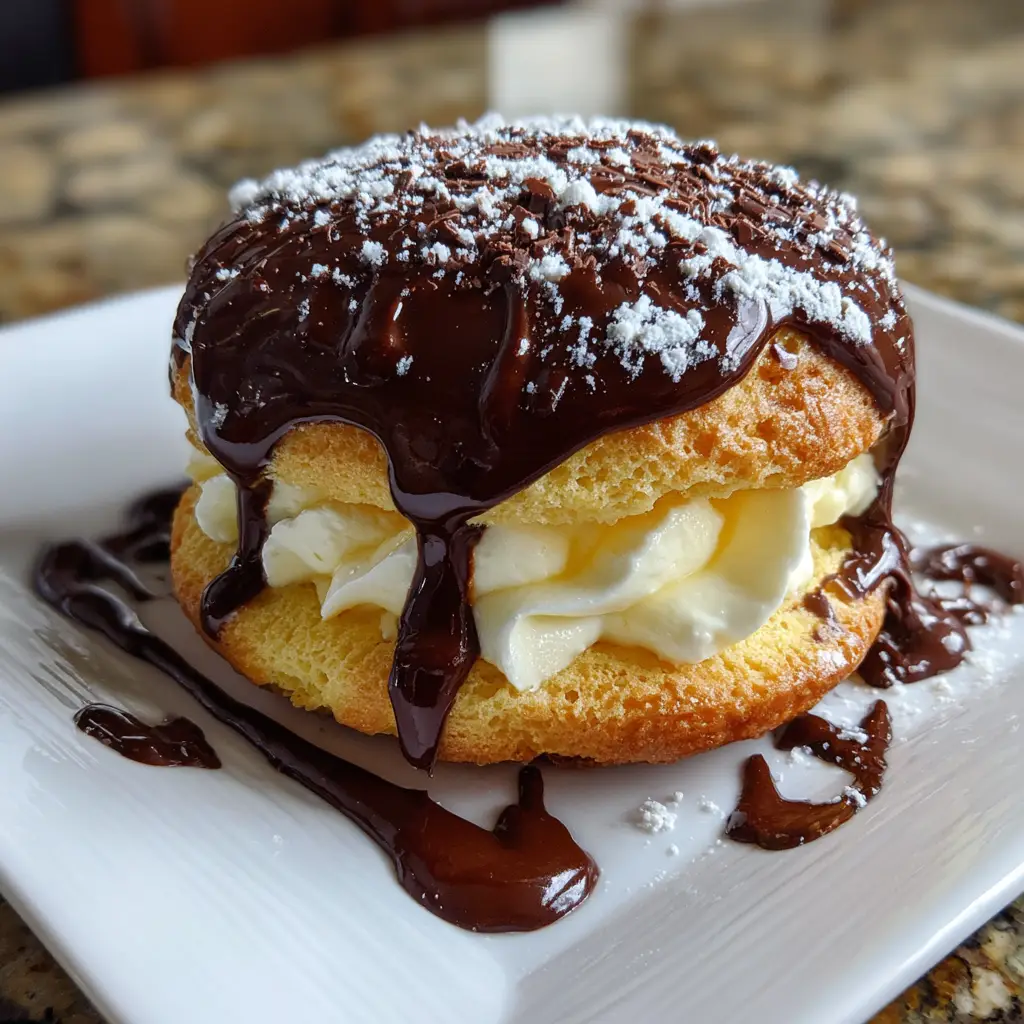
Once the cookies are cool, it’s assembly time! Pipe or spread the whipped cream filling onto half of the cookies. Top them with the remaining cookies to create delightful little sandwiches. You’ll want to take a moment to admire your handiwork!
Step 10: Drizzle with Chocolate
Finally, melt the semi-sweet chocolate chips in a microwave-safe bowl. Drizzle the melted chocolate over the assembled cookies. This adds a beautiful finish and a rich chocolatey flavor that ties everything together. Let the chocolate set before serving!
Tips for Success
- Make sure your butter is softened for easy creaming.
- Don’t skip the cooling step; it helps the cookies firm up.
- Use a cookie scoop for uniform sizes and even baking.
- Experiment with different chocolate types for unique flavors.
- Store cookies in an airtight container to keep them fresh.
Equipment Needed
- Baking sheet: A standard one works, but a silicone mat can help with non-stick.
- Parchment paper: Great for easy cleanup; aluminum foil is a good alternative.
- Mixing bowls: Use any size, but a large one is best for creaming.
- Electric mixer: A hand mixer is perfect, but a whisk will do in a pinch.
- Cookie scoop: This helps with uniform sizes; a tablespoon can work too.
Variations
- Gluten-Free: Substitute all-purpose flour with a gluten-free flour blend for a delicious gluten-free option.
- Vegan: Use vegan butter, a flax egg (1 tablespoon ground flaxseed mixed with 2.5 tablespoons water), and coconut cream for the filling.
- Nutty Twist: Add chopped nuts like walnuts or pecans to the cookie dough for added crunch and flavor.
- Mint Chocolate: Incorporate a few drops of peppermint extract into the cream filling for a refreshing minty flavor.
- Fruit-Filled: Add a layer of fresh berries or banana slices between the cookies for a fruity surprise!
Serving Suggestions
- Pair these Boston Cream Pie Cookies with a glass of cold milk for a classic treat.
- Serve alongside a scoop of vanilla ice cream for an indulgent dessert experience.
- For a festive touch, dust with powdered sugar before serving.
- Arrange on a decorative platter for a beautiful presentation at gatherings.
FAQs about Boston Cream Pie Cookies
As you embark on your baking journey with these Boston Cream Pie Cookies, you might have a few questions. Here are some common queries I’ve encountered, along with helpful answers to guide you along the way!
Can I make the cream filling ahead of time?
Absolutely! You can whip the cream filling a few hours in advance. Just store it in the refrigerator until you’re ready to assemble the cookies. This way, you can save time on busy days!
How should I store the cookies?
To keep your Boston Cream Pie Cookies fresh, store them in an airtight container at room temperature. They’ll stay delicious for up to three days. If you want to keep them longer, consider freezing them!
Can I use different types of chocolate?
Yes! Feel free to experiment with dark chocolate or even white chocolate for the drizzle. Each type will give your cookies a unique flavor twist, so have fun with it!
What if my cookies spread too much while baking?
If your cookies spread too much, it could be due to warm dough. Make sure to chill the dough for about 30 minutes before baking. This helps them hold their shape better!
Can I add other flavors to the cookies?
Definitely! You can mix in some orange zest or almond extract for a delightful flavor boost. Just a little can elevate your Boston Cream Pie Cookies to a whole new level!
Final Thoughts
Making Boston Cream Pie Cookies is more than just baking; it’s about creating sweet memories in the kitchen. The joy of watching your loved ones savor each bite is truly priceless. These cookies are a delightful blend of flavors that can brighten even the busiest of days. Whether you’re sharing them at a family gathering or enjoying them with a cup of coffee, they bring a sense of warmth and happiness. So, roll up your sleeves, gather your ingredients, and let the magic happen. Trust me, these cookies will become a cherished favorite in your home!
Print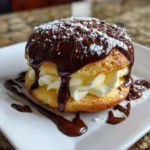
Boston Cream Pie Cookies: The Ultimate Treat to Try!
- Total Time: 32 minutes
- Yield: 12 cookies 1x
- Diet: Vegetarian
Description
Boston Cream Pie Cookies are a delightful dessert that combines the flavors of the classic Boston cream pie into a cookie form, featuring a rich chocolate glaze and creamy filling.
Ingredients
- 1 cup all-purpose flour
- 1/2 cup unsweetened cocoa powder
- 1/2 teaspoon baking powder
- 1/4 teaspoon salt
- 1/2 cup unsalted butter, softened
- 1 cup granulated sugar
- 1 large egg
- 1 teaspoon vanilla extract
- 1/2 cup heavy cream
- 1/2 cup powdered sugar
- 1 cup semi-sweet chocolate chips
Instructions
- Preheat the oven to 350°F (175°C) and line a baking sheet with parchment paper.
- In a bowl, whisk together flour, cocoa powder, baking powder, and salt.
- In another bowl, cream together the butter and granulated sugar until light and fluffy.
- Add the egg and vanilla extract to the butter mixture and mix well.
- Gradually add the dry ingredients to the wet ingredients, mixing until just combined.
- Drop tablespoon-sized balls of dough onto the prepared baking sheet.
- Bake for 10-12 minutes, then let cool on a wire rack.
- In a separate bowl, whip the heavy cream and powdered sugar until stiff peaks form.
- Once the cookies are cool, pipe or spread the whipped cream filling onto half of the cookies and top with the remaining cookies.
- Melt the chocolate chips and drizzle over the assembled cookies.
Notes
- For a richer flavor, use dark chocolate chips.
- Store cookies in an airtight container for up to 3 days.
- These cookies can be frozen for up to a month.
- Prep Time: 20 minutes
- Cook Time: 12 minutes
- Category: Dessert
- Method: Baking
- Cuisine: American
Nutrition
- Serving Size: 1 cookie
- Calories: 180
- Sugar: 12g
- Sodium: 50mg
- Fat: 8g
- Saturated Fat: 5g
- Unsaturated Fat: 2g
- Trans Fat: 0g
- Carbohydrates: 24g
- Fiber: 1g
- Protein: 2g
- Cholesterol: 20mg
Keywords: Boston Cream Pie Cookies, dessert, cookies, chocolate, cream filling


