Introduction to Berry Cheesecake Danish Pastry
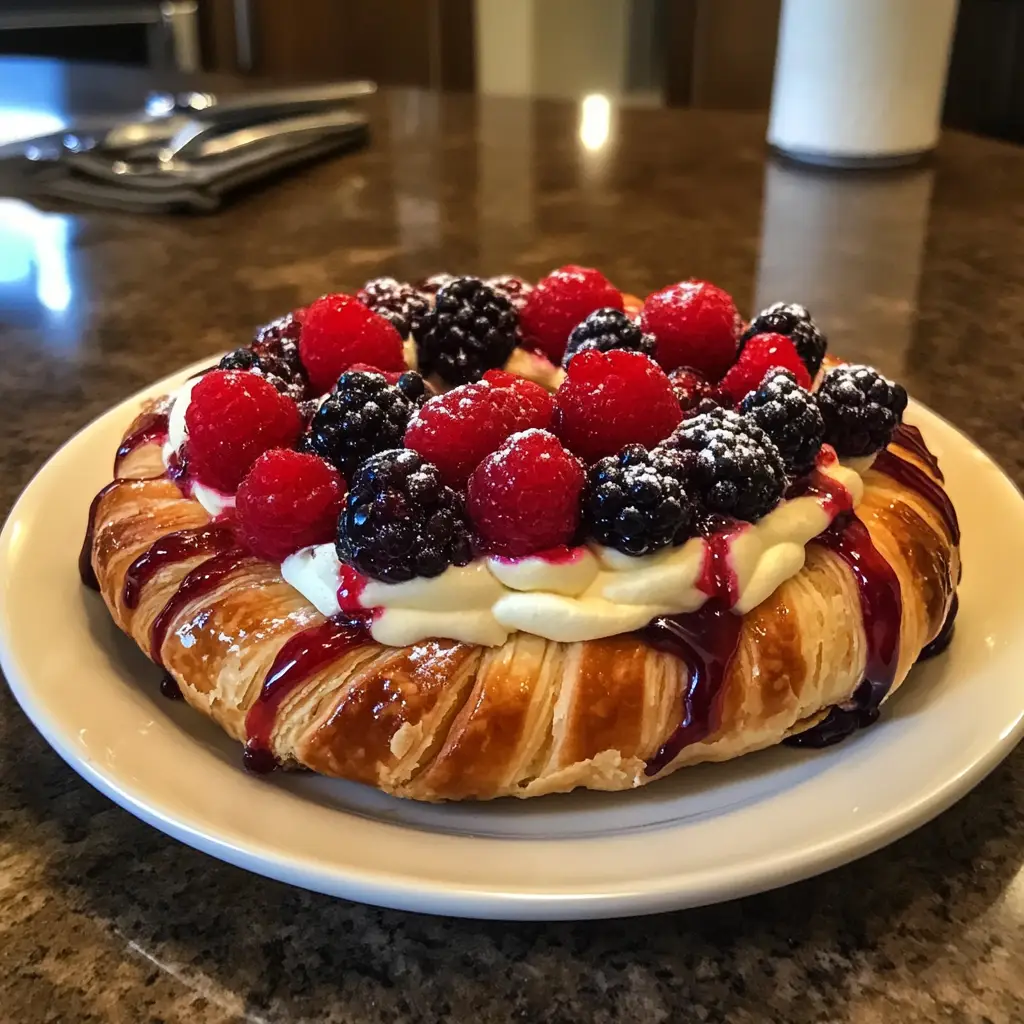
As a passionate home cook, I find joy in creating delightful treats that not only satisfy the taste buds but also warm the heart. One of my all-time favorites is the Berry Cheesecake Danish Pastry. This scrumptious pastry is like a hug in dessert form, combining the creamy richness of cheesecake with the vibrant burst of fresh berries, all wrapped in a flaky, golden pastry. It’s a symphony of flavors and textures that dances on your palate!
My love for this recipe began on a sunny Saturday morning. I had a craving for something sweet, yet light, and I stumbled upon a recipe that promised to deliver just that. The moment I took my first bite, I was transported to a quaint café in Europe, where the aroma of freshly baked pastries filled the air. I knew I had to recreate that experience in my own kitchen.
What I adore about the Berry Cheesecake Danish Pastry is its versatility. You can use any berries you have on hand—strawberries, blueberries, raspberries, or even a mix! Each bite is a delightful surprise, and the best part? It’s surprisingly easy to make. Whether you’re hosting a brunch, celebrating a special occasion, or simply treating yourself, this pastry is sure to impress.
In this article, I’ll guide you through the process of making your very own Berry Cheesecake Danish Pastry. From selecting the freshest ingredients to perfecting the baking technique, I’ll share my tips and tricks to ensure your pastry turns out as delicious as mine. So, roll up your sleeves, and let’s embark on this culinary adventure together!
Ingredients for Berry Cheesecake Danish Pastry
Before we dive into the delightful world of baking, let’s gather our ingredients. Having everything ready makes the process smoother and more enjoyable. I always say, the secret to a great pastry starts with quality ingredients. Here’s what you’ll need to create your Berry Cheesecake Danish Pastry.
Main Ingredients
- 1 sheet of puff pastry (thawed if frozen)
- 8 oz cream cheese, softened
- 1/4 cup granulated sugar
- 1/2 teaspoon vanilla extract
- 1 large egg (for the egg wash)
- 1 cup mixed berries (fresh or frozen, such as strawberries, blueberries, and raspberries)
- 1 tablespoon cornstarch (to thicken the berry mixture)
- 1 tablespoon lemon juice (to enhance the berry flavor)
- Powdered sugar (for dusting, optional)
When selecting your berries, I recommend going for the freshest ones you can find. If you’re using frozen berries, make sure they’re unsweetened to keep the balance of flavors just right. The cream cheese should be at room temperature for easy mixing, so don’t forget to take it out ahead of time!
Optional Add-ons
- 1 tablespoon of honey or maple syrup (for added sweetness in the filling)
- 1/2 teaspoon almond extract (for a nutty flavor twist)
- Chopped nuts (like almonds or walnuts, for a crunchy topping)
- Additional spices (like cinnamon or nutmeg, for a warm flavor profile)
Feel free to get creative! I often add a splash of almond extract to the cream cheese filling for a delightful surprise. And if you have some leftover nuts in your pantry, sprinkle them on top before baking for an extra crunch. The beauty of this recipe is that it can be tailored to your taste!
How to Prepare Berry Cheesecake Danish Pastry
Now that we have our ingredients ready, it’s time to roll up our sleeves and get baking! I find that the process of making the Berry Cheesecake Danish Pastry is just as enjoyable as eating it. Each step brings a new layer of excitement, and I can’t wait to share my tips with you. Let’s dive into the steps!
Step 1: Preparing the Dough
First things first, we need to prepare our puff pastry. If you’re using frozen pastry, make sure it’s completely thawed. I usually take it out of the freezer the night before and let it sit in the fridge. This way, it’s ready to go when I am!
Tips for Making the Dough
- Roll out the puff pastry on a lightly floured surface. This helps prevent sticking and gives you a nice, even thickness.
- Cut the pastry into squares or rectangles, depending on your preference. I like to make them about 4 inches wide for a perfect bite-sized treat.
- Keep the pastry cold until you’re ready to use it. If it gets too warm, it won’t puff up as beautifully in the oven.
Step 2: Making the Cheesecake Filling
Next up is the creamy cheesecake filling. This part is where the magic happens! In a mixing bowl, combine the softened cream cheese, granulated sugar, and vanilla extract. I love using a hand mixer for this—it makes the process so much easier!
Tips for the Cheesecake Filling
- Make sure your cream cheese is at room temperature. This ensures a smooth and creamy filling without any lumps.
- Don’t overmix the filling. Just mix until everything is combined; overmixing can make it too airy.
- If you’re adding honey or almond extract, mix it in at this stage for a delightful flavor boost!
Step 3: Preparing the Berry Topping
Now, let’s prepare the berry topping! In a small saucepan, combine your mixed berries, cornstarch, and lemon juice. This mixture will create a lovely, thick berry sauce that complements the cheesecake filling perfectly.
Tips for the Berry Topping
- Cook the berry mixture over medium heat until it starts to bubble. This usually takes about 5 minutes.
- Stir gently to avoid breaking the berries too much. We want some whole berries for that beautiful presentation!
- If you prefer a sweeter topping, feel free to add a bit of sugar or honey while cooking.
Step 4: Assembling the Danish Pastry
It’s time to bring everything together! Take your prepared puff pastry squares and place a generous spoonful of the cheesecake filling in the center of each. Then, top it with a spoonful of the berry mixture.
Tips for Assembly
- Be careful not to overfill the pastries. A little goes a long way, and we want to avoid any spills while baking!
- Fold the corners of the pastry over the filling to create a lovely pocket. You can pinch the edges to seal them, giving it a rustic look.
- Brush the tops with the beaten egg for a beautiful golden finish.
Step 5: Baking the Danish Pastry
Finally, it’s time to bake our creations! Preheat your oven to 375°F (190°C) and line a baking sheet with parchment paper. Place your assembled pastries on the sheet, leaving some space between them.
Tips for Baking
- Bake for about 20-25 minutes or until the pastries are golden brown and puffed up. The aroma will be heavenly!
- Let them cool for a few minutes before dusting with powdered sugar. This adds a lovely touch and makes them look extra special.
- Enjoy them warm or at room temperature. They’re delicious either way!
Equipment Needed for Berry Cheesecake Danish Pastry
Before we embark on our baking journey, let’s gather the essential tools that will help us create the perfect Berry Cheesecake Danish Pastry. Having the right equipment makes the process smoother and more enjoyable. Here’s what you’ll need:
- Baking Sheet: A standard baking sheet is perfect for placing your pastries. If you don’t have one, a large oven-safe dish will work too.
- Parchment Paper: This is a must-have for easy cleanup and to prevent sticking. If you’re out of parchment paper, you can lightly grease the baking sheet instead.
- Mixing Bowls: You’ll need a couple of mixing bowls—one for the cheesecake filling and another for the berry topping. Any size will do, but I prefer medium-sized bowls for easy mixing.
- Hand Mixer or Whisk: A hand mixer makes blending the cream cheese a breeze, but a whisk works just as well if you’re up for a little workout!
- Measuring Cups and Spoons: Accurate measurements are key to a successful pastry. If you don’t have measuring cups, you can use a regular cup, but keep in mind that it may not be as precise.
- Rolling Pin: This is helpful for rolling out the puff pastry. If you don’t have one, a clean wine bottle can serve as a great alternative!
- Pastry Brush: For brushing the egg wash on top of the pastries. If you don’t have a pastry brush, you can use a clean paper towel or your fingers to apply the egg wash.
With these tools in hand, you’re all set to create your Berry Cheesecake Danish Pastry! Remember, the joy of baking comes not just from the end result, but from the process itself. So, let’s get started!
Variations of Berry Cheesecake Danish Pastry
One of the things I love most about the Berry Cheesecake Danish Pastry is its adaptability. You can easily switch things up to suit your taste or the season. Here are a few delightful variations that I’ve tried and absolutely adored:
- Chocolate Berry Delight: Add a drizzle of melted chocolate over the top before serving. The rich chocolate pairs beautifully with the tangy berries and creamy cheesecake.
- Citrus Twist: Incorporate some orange or lemon zest into the cheesecake filling for a refreshing citrus flavor. It brightens up the pastry and adds a lovely zing!
- Nutty Crunch: Mix in some finely chopped nuts, like pecans or hazelnuts, into the berry topping. This adds a delightful crunch and a nutty flavor that complements the sweetness.
- Seasonal Fruits: Don’t limit yourself to just berries! Try using peaches, apples, or even figs when they’re in season. Each fruit brings its own unique flavor and charm to the pastry.
- Spiced Autumn Version: Add a pinch of cinnamon or nutmeg to the cheesecake filling for a warm, cozy flavor that’s perfect for fall.
These variations not only keep things exciting but also allow you to experiment with flavors and textures. I encourage you to get creative and make this recipe your own. After all, the kitchen is a playground for culinary adventures!
Cooking Notes for Berry Cheesecake Danish Pastry
As I’ve journeyed through the delightful process of making Berry Cheesecake Danish Pastry, I’ve gathered a few cooking notes that can help elevate your baking experience. These little nuggets of wisdom can make a big difference in the final outcome!
- Chill Your Ingredients: Keeping your cream cheese and puff pastry cold is crucial. Cold ingredients help create that flaky texture we all love. If your dough gets too warm, pop it back in the fridge for a few minutes.
- Don’t Skip the Egg Wash: Brushing the pastries with an egg wash not only gives them a beautiful golden color but also adds a lovely sheen. It’s the finishing touch that makes your pastries look bakery-fresh!
- Watch the Baking Time: Every oven is different, so keep an eye on your pastries as they bake. If they’re not golden brown after 25 minutes, give them a few more minutes, but check frequently to avoid overbaking.
- Let Them Cool: After baking, allow your pastries to cool on a wire rack. This prevents them from getting soggy on the bottom and helps maintain that delightful crispiness.
- Store Properly: If you have leftovers (which is rare in my house!), store them in an airtight container at room temperature for up to two days. For longer storage, you can freeze them, but I recommend enjoying them fresh for the best taste!
These cooking notes are like little secrets I’ve learned along the way. They help ensure that each batch of Berry Cheesecake Danish Pastry turns out as delicious as the last. Happy baking!
Serving Suggestions for Berry Cheesecake Danish Pastry
Now that we’ve baked our Berry Cheesecake Danish Pastry to golden perfection, it’s time to think about how to serve this delightful treat! Presentation can elevate the experience, and I love to get a little creative when it comes to serving. Here are some of my favorite serving suggestions:
- With a Dusting of Powdered Sugar: A light sprinkle of powdered sugar on top adds a touch of elegance. It’s like a little snow on your pastry, making it look extra special!
- Pair with Fresh Berries: Serve your Danish with a side of fresh berries. Not only does this enhance the berry flavor, but it also adds a pop of color to your plate.
- Accompany with Whipped Cream: A dollop of freshly whipped cream on the side is a delightful addition. The creaminess complements the pastry beautifully and adds a luxurious touch.
- Serve with Coffee or Tea: Enjoy your pastry with a warm cup of coffee or tea. The rich flavors of the pastry pair wonderfully with a hot beverage, making it a perfect treat for brunch or afternoon tea.
- Make it a Dessert Platter: If you’re hosting a gathering, consider serving the Danish alongside other desserts. A platter with assorted pastries, fruits, and chocolates creates a beautiful spread that will impress your guests!
These serving suggestions not only enhance the visual appeal but also elevate the overall experience of enjoying your Berry Cheesecake Danish Pastry. Whether it’s a cozy family breakfast or a festive gathering, these little touches make all the difference. Enjoy every bite!
Tips for Perfecting Berry Cheesecake Danish Pastry
As I’ve baked my fair share of Berry Cheesecake Danish Pastries, I’ve gathered a treasure trove of tips that can help you achieve pastry perfection. These little gems of wisdom can make all the difference in your baking journey. Let’s dive into my top tips!
- Use Quality Ingredients: The better the ingredients, the better the pastry. Opt for high-quality cream cheese and fresh berries. Trust me, it makes a world of difference in flavor!
- Keep Everything Cold: Remember to keep your puff pastry and cream cheese chilled until you’re ready to use them. Cold ingredients create that flaky texture we all love.
- Don’t Rush the Dough: Allow your puff pastry to thaw completely before rolling it out. Rushing this step can lead to a tough pastry that won’t puff up nicely.
- Experiment with Flavors: Don’t be afraid to play around with different berries or add spices to the filling. Each variation can bring a new twist to this classic treat!
- Practice Patience: Let your pastries cool for a few minutes after baking. This helps them set and makes for easier handling. Plus, the flavors meld beautifully as they rest!
With these tips in your back pocket, you’re well on your way to creating a Berry Cheesecake Danish Pastry that will impress everyone. Happy baking, and may your kitchen be filled with the sweet aroma of success!
Breakdown of Time for Berry Cheesecake Danish Pastry
As a home cook, I know that time management is key in the kitchen. When I’m whipping up my Berry Cheesecake Danish Pastry, I like to keep track of how long each step takes. This way, I can plan my baking session efficiently and enjoy the process without feeling rushed. Here’s a quick breakdown of the time you can expect to spend:
- Prep Time: Approximately 30 minutes. This includes gathering your ingredients, preparing the dough, making the cheesecake filling, and preparing the berry topping.
- Cooking Time: About 20-25 minutes. This is the time it takes for your pastries to bake to golden perfection in the oven.
- Total Time: Roughly 50-55 minutes. From start to finish, you can have these delightful pastries ready to enjoy in under an hour!
Knowing this time breakdown helps me plan my baking adventures better. Whether I’m making them for a special occasion or just a cozy weekend treat, I can easily fit this recipe into my schedule. Plus, the anticipation of that delicious aroma filling my kitchen makes every minute worth it!
Nutritional Information for Berry Cheesecake Danish Pastry
As a passionate home cook, I believe it’s important to enjoy our treats while also being mindful of what we’re eating. The Berry Cheesecake Danish Pastry is a delightful indulgence, and knowing its nutritional information can help you savor it even more. Here’s a general breakdown of the nutritional content per serving, assuming the recipe yields about 8 pastries:
- Calories: Approximately 250-300 calories
- Protein: 4-5 grams
- Carbohydrates: 30-35 grams
- Fat: 15-20 grams
- Sugar: 8-10 grams
- Fiber: 1-2 grams
Keep in mind that these values can vary based on the specific ingredients you use and any optional add-ons you choose to include. For instance, using low-fat cream cheese or reducing the sugar can help lighten the pastry a bit. I often remind myself that balance is key. Enjoying a Berry Cheesecake Danish Pastry as an occasional treat can be part of a healthy lifestyle. So, go ahead and indulge in this sweet delight without guilt!
Frequently Asked Questions about Berry Cheesecake Danish Pastry
As I’ve shared my love for the Berry Cheesecake Danish Pastry, I’ve often received questions from fellow home cooks eager to try their hand at this delightful treat. I love answering these questions because it shows just how much excitement there is around baking! Here are some of the most frequently asked questions, along with my personal insights:
Can I use store-bought pastry dough?
Absolutely! Using store-bought puff pastry is a fantastic time-saver. It’s convenient and still yields delicious results. Just make sure to follow the package instructions for thawing and handling. I often keep a sheet in my freezer for those spontaneous baking moments!
What if I don’t have fresh berries?
No worries! Frozen berries work just as well. Just remember to thaw and drain them before using to avoid excess moisture in your filling. I’ve made this pastry with frozen berries many times, and it’s always a hit!
Can I make the filling ahead of time?
Yes, you can! I often prepare the cheesecake filling a day in advance and store it in the fridge. Just give it a good stir before using it. This way, you can save time on baking day and still enjoy that fresh flavor!
How do I store leftovers?
If you have any pastries left (which is rare in my house!), store them in an airtight container at room temperature for up to two days. For longer storage, you can freeze them. Just make sure to wrap them well to prevent freezer burn. When you’re ready to enjoy, simply reheat them in the oven for a few minutes!
Can I use different types of cheese for the filling?
While cream cheese is the classic choice for this recipe, you can experiment with mascarpone or ricotta for a different flavor and texture. Just keep in mind that the consistency may vary, so adjust the sugar accordingly. I love trying new combinations!
Is this recipe suitable for special diets?
This recipe can be adapted for various dietary needs. For a gluten-free version, use gluten-free puff pastry. You can also substitute low-fat cream cheese or a dairy-free alternative if you’re looking for a lighter or vegan option. The beauty of this recipe is its flexibility!
These questions reflect the curiosity and creativity that come with baking. I hope my answers inspire you to dive into making your own Berry Cheesecake Danish Pastry. Remember, every kitchen adventure is a chance to learn and grow, so don’t hesitate to ask questions and experiment along the way!
Conclusion on Berry Cheesecake Danish Pastry
As I wrap up this delightful journey into the world of Berry Cheesecake Danish Pastry, I can’t help but feel a sense of joy and accomplishment. This recipe is more than just a treat; it’s a celebration of flavors, creativity, and the simple pleasure of baking. The combination of creamy cheesecake and vibrant berries, all enveloped in a flaky pastry, creates a dessert that is both comforting and elegant.
What I love most about this pastry is its versatility. Whether you’re whipping it up for a special occasion or just indulging in a sweet moment at home, it never fails to impress. Plus, the process of making it is filled with fun and excitement, allowing you to connect with your inner chef. With each bite, you’re not just tasting a dessert; you’re savoring a piece of your culinary adventure.
So, I encourage you to gather your ingredients, roll up your sleeves, and dive into making your own Berry Cheesecake Danish Pastry. Share it with loved ones, enjoy it with a cup of coffee, or simply relish it on your own. No matter how you choose to enjoy it, this pastry is sure to bring a smile to your face and warmth to your heart. Happy baking!


