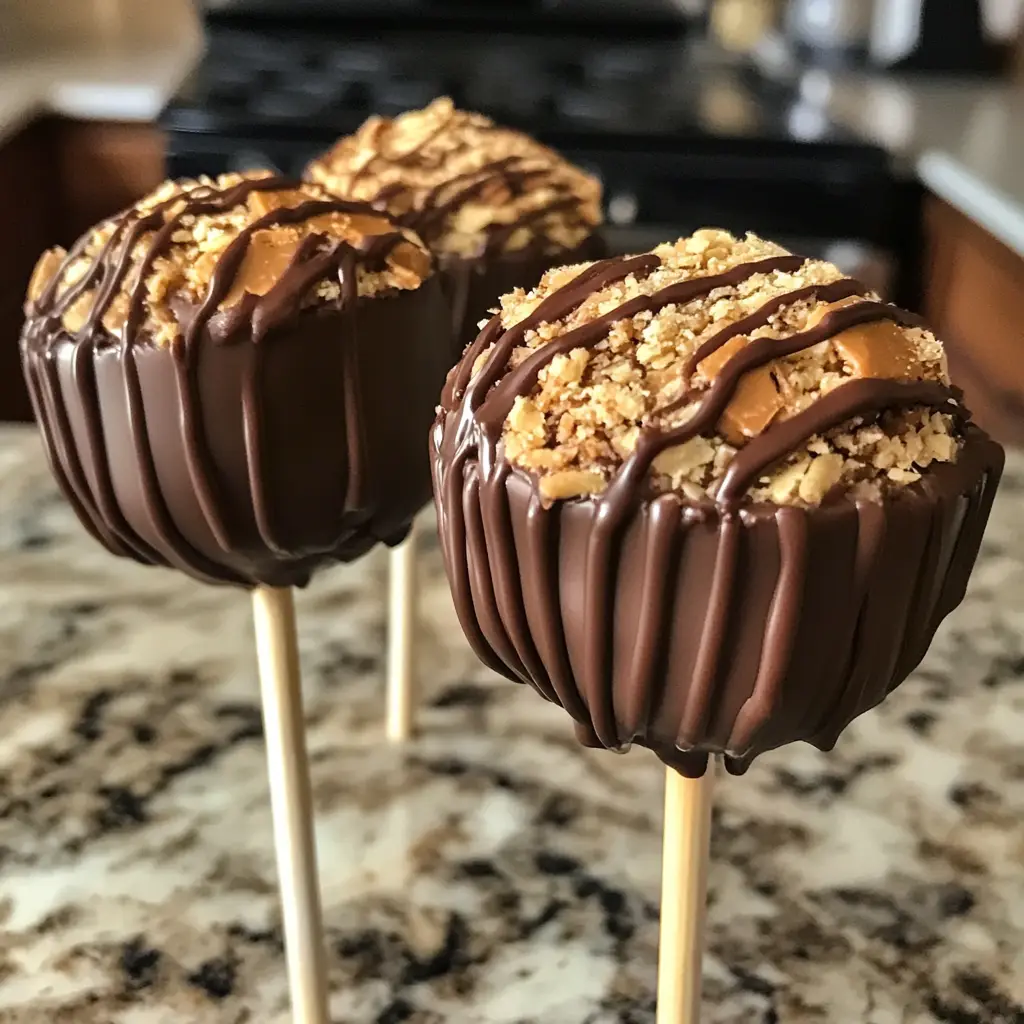
Introduction to Peanut Butter Cup Pie Pops
As a passionate home cook, I often find myself daydreaming about desserts that bring joy and nostalgia. One such treat that has captured my heart is the delightful Peanut Butter Cup Pie Pops. Imagine biting into a sweet, flaky crust that cradles a creamy, rich peanut butter filling, all while holding it like a lollipop! It’s a whimsical twist on classic flavors that never fails to make me smile.
My love for peanut butter began in childhood, when I would sneak spoonfuls straight from the jar. I remember the first time I combined it with chocolate; it was like fireworks in my mouth! That magical moment inspired me to create these pie pops, which are perfect for sharing at parties or enjoying as a sweet snack at home.
What I adore about Peanut Butter Cup Pie Pops is their versatility. They can be dressed up for special occasions or enjoyed casually on a cozy afternoon. Plus, they’re a fun project to make with kids, who love to help roll out the dough and fill the pops. The joy of creating something delicious together is a memory I cherish.
In this recipe, I’ll guide you through each step, sharing tips and tricks that I’ve learned along the way. Whether you’re a seasoned baker or a novice in the kitchen, I promise you’ll find this adventure both enjoyable and rewarding. So, let’s dive into the world of Peanut Butter Cup Pie Pops and create something truly special!
Ingredients for Peanut Butter Cup Pie Pops
Before we embark on our culinary adventure, let’s gather all the ingredients we’ll need to create these delightful Peanut Butter Cup Pie Pops. I always believe that quality ingredients make a world of difference in the final product. So, let’s make sure we’re using the best!
Main Ingredients
- 1 ½ cups all-purpose flour
- ½ cup unsalted butter, chilled and cubed
- ¼ cup granulated sugar
- 1 large egg
- 1 cup creamy peanut butter (I prefer natural peanut butter for a richer flavor)
- ½ cup powdered sugar
- 1 teaspoon vanilla extract
- 1 cup mini chocolate chips (for that extra chocolatey goodness)
When choosing your peanut butter, I recommend going for a brand that uses minimal ingredients—just peanuts and salt. This way, you’ll get that pure, nutty flavor that pairs perfectly with the sweetness of the chocolate.
Optional Add-ons
- 1 tablespoon cocoa powder (for a deeper chocolate flavor)
- Sprinkles or crushed nuts (for decoration)
- Sea salt (a sprinkle on top enhances the flavors)
Feel free to get creative with these optional add-ons! I love adding a sprinkle of sea salt on top of the pie pops before baking. It adds a delightful contrast to the sweetness and makes each bite even more enjoyable.
Now that we have our ingredients ready, we can move on to the fun part—preparing our Peanut Butter Cup Pie Pops!
How to Prepare Peanut Butter Cup Pie Pops
Now that we have our ingredients ready, it’s time to roll up our sleeves and dive into the preparation of these delightful Peanut Butter Cup Pie Pops! I find that breaking the process down into simple steps makes it feel less daunting and more fun. Let’s get started!
Step 1: Prepare the Pie Crust
First things first, we need to whip up a flaky pie crust that will cradle our delicious filling. In a large bowl, combine the all-purpose flour and granulated sugar. Then, add the chilled, cubed butter. Using a pastry cutter or your fingers, mix until the mixture resembles coarse crumbs. It’s like creating a sandy beach, but with flour!
Tips for Making the Perfect Pie Crust
- Keep your butter cold! This helps create that flaky texture we all love.
- Don’t overwork the dough. Mix just until combined; it’s okay if there are a few lumps.
- Chill the dough for at least 30 minutes before rolling it out. This helps it hold its shape while baking.
Step 2: Make the Peanut Butter Filling
While the dough is chilling, let’s move on to the star of the show—the peanut butter filling! In a mixing bowl, combine the creamy peanut butter, powdered sugar, and vanilla extract. Mix until smooth and creamy. It should feel like a warm hug, rich and inviting!
Tips for Achieving the Right Consistency
- If the mixture feels too thick, you can add a splash of milk to loosen it up.
- For a fun twist, consider adding cocoa powder for a chocolatey kick!
- Make sure to taste the filling! Adjust the sweetness to your liking.
Step 3: Assemble the Pie Pops
Now comes the fun part—assembling our pie pops! Roll out the chilled dough on a floured surface until it’s about 1/8 inch thick. Using a round cookie cutter, cut out circles of dough. Place half of the circles on a baking sheet lined with parchment paper. Spoon a dollop of the peanut butter filling onto each circle, leaving a little space around the edges.
Tips for Properly Sealing the Pops
- Moisten the edges of the dough with a little water before placing the top circle on. This helps seal the pops.
- Press down gently around the edges to ensure a tight seal. You can also use a fork to crimp the edges for a decorative touch!
- Don’t forget to poke a small hole in the top of each pie pop to allow steam to escape while baking.
Step 4: Bake the Pie Pops
It’s time to bake our creations! Preheat your oven to 350°F (175°C). Place the assembled pie pops in the oven and bake for about 15-20 minutes, or until they are golden brown. The aroma wafting through your kitchen will be heavenly!
Tips for Even Baking
- Rotate the baking sheet halfway through to ensure even baking.
- Keep an eye on them during the last few minutes; they can go from golden to burnt quickly!
- Let them cool for a few minutes before enjoying. Trust me, the filling will be hot!
And there you have it! With these steps, you’ll create Peanut Butter Cup Pie Pops that are not only delicious but also a joy to make. I can’t wait for you to experience the delight of biting into these sweet treats!
Equipment Needed for Peanut Butter Cup Pie Pops
Before we dive into the kitchen, let’s gather the essential tools that will help us create these delightful Peanut Butter Cup Pie Pops. Having the right equipment makes the process smoother and more enjoyable. Here’s what you’ll need:
- Mixing Bowls: A couple of medium-sized mixing bowls will do the trick for combining your ingredients.
- Pastry Cutter or Fork: This is perfect for cutting the butter into the flour for that flaky pie crust. If you don’t have a pastry cutter, a fork works just as well!
- Rolling Pin: Essential for rolling out the dough. If you don’t have one, a clean wine bottle can serve as a great alternative.
- Cookie Cutters: A round cookie cutter is ideal for shaping the pie pops. If you don’t have one, you can use a glass or any round object with a similar diameter.
- Baking Sheet: A standard baking sheet lined with parchment paper will help prevent sticking and make cleanup a breeze.
- Pastry Brush (optional): If you want to brush the tops of your pie pops with an egg wash for a golden finish, a pastry brush is handy.
With these tools in hand, you’re all set to embark on your Peanut Butter Cup Pie Pops adventure! Remember, the kitchen is a place for creativity, so feel free to improvise with what you have. Let’s get cooking!
Variations of Peanut Butter Cup Pie Pops
As I’ve experimented with my Peanut Butter Cup Pie Pops, I’ve discovered that there are endless ways to put a unique spin on this delightful treat. Each variation brings its own charm and flavor, making it even more fun to create and share. Here are a few of my favorite twists:
- Chocolate Lovers: For those who can’t get enough chocolate, try adding a layer of chocolate ganache inside the pie pops. Just melt some chocolate and mix it with a bit of cream before spooning it in with the peanut butter filling. It’s like a chocolate explosion!
- Nutty Delight: If you love a bit of crunch, consider mixing in some chopped nuts, like almonds or pecans, into the peanut butter filling. It adds a delightful texture that complements the creaminess.
- Fruit Fusion: For a fruity twist, add a layer of raspberry or strawberry jam alongside the peanut butter filling. The tartness of the fruit pairs beautifully with the rich peanut butter, creating a flavor harmony that’s simply irresistible.
- Spiced Up: Want to add a little warmth? Sprinkle in some cinnamon or nutmeg into the peanut butter filling. It gives the pie pops a cozy, comforting flavor that’s perfect for chilly days.
These variations not only keep things exciting but also allow you to cater to different tastes and preferences. I love how a simple change can transform the entire experience of enjoying these pie pops. So, don’t hesitate to get creative and make them your own!
Cooking Notes for Peanut Butter Cup Pie Pops
As I’ve journeyed through the delightful world of Peanut Butter Cup Pie Pops, I’ve gathered a few cooking notes that can help elevate your baking experience. These little nuggets of wisdom can make a big difference in the outcome of your treats!
- Room Temperature Ingredients: For the best results, make sure your butter and egg are at room temperature. This helps them blend more easily into the dough and filling, creating a smoother texture.
- Chill Time is Key: Don’t skip the chilling step for the dough! It not only helps with rolling but also ensures that your pie pops maintain their shape while baking.
- Watch the Oven: Every oven is different, so keep an eye on your pie pops as they bake. If they start to brown too quickly, you can cover them loosely with aluminum foil to prevent burning.
- Storage Tips: If you have leftovers (which is rare in my house!), store them in an airtight container at room temperature for up to two days. For longer storage, you can freeze them. Just make sure to wrap them well!
These cooking notes are like little secrets I’ve learned along the way. They help ensure that each batch of Peanut Butter Cup Pie Pops turns out just as delicious as the last. Happy baking!
Serving Suggestions for Peanut Butter Cup Pie Pops
When it comes to serving my Peanut Butter Cup Pie Pops, I love to get a little creative! These delightful treats are not only delicious but also visually appealing, making them perfect for any occasion. Here are some of my favorite serving suggestions that add a special touch:
- On a Dessert Platter: Arrange the pie pops on a colorful platter, mixing in some fresh fruit like strawberries or banana slices. The vibrant colors make for a stunning presentation that’s sure to impress your guests!
- With Dipping Sauces: Serve the pie pops with a side of melted chocolate or caramel sauce for dipping. It adds an extra layer of indulgence that everyone will love. Just imagine the gooey goodness!
- As Party Favors: Wrap each pie pop in a clear cellophane bag tied with a ribbon. They make adorable party favors for birthdays or celebrations, allowing guests to take a sweet treat home.
- With Ice Cream: Pair the pie pops with a scoop of vanilla or chocolate ice cream. The combination of warm pie pops and cold ice cream is a match made in dessert heaven!
These serving suggestions not only enhance the experience of enjoying Peanut Butter Cup Pie Pops but also make them a delightful centerpiece for any gathering. I can’t wait for you to try these ideas and see how they elevate your pie pop game!
Tips for Perfect Peanut Butter Cup Pie Pops
As I’ve crafted my Peanut Butter Cup Pie Pops over the years, I’ve picked up a few tips that can help you achieve perfection in every bite. These little nuggets of wisdom can make a world of difference, ensuring your pie pops are not only delicious but also visually stunning!
- Use a Food Processor: If you have one, a food processor can make quick work of mixing the pie crust ingredients. Just pulse until you reach that sandy texture, and you’ll save time!
- Experiment with Flavors: Don’t be afraid to play with flavors! Try adding a splash of almond extract or a hint of orange zest to the peanut butter filling for a unique twist.
- Chill Between Steps: If you find the dough getting too warm while you work, pop it back in the fridge for a few minutes. This will help maintain that flaky texture we all love.
- Decorate with Drizzle: After baking, drizzle melted chocolate or peanut butter over the tops of the pie pops for an eye-catching finish. It adds a touch of elegance and extra flavor!
- Share the Love: Baking is always more fun when shared! Invite friends or family to join you in the kitchen. It’s a great way to bond and create lasting memories.
With these tips in your back pocket, you’re well on your way to creating Peanut Butter Cup Pie Pops that will impress everyone. Happy baking, and enjoy the sweet journey!
Breakdown of Time for Peanut Butter Cup Pie Pops
As a home cook, I know that time management is key in the kitchen. When I’m whipping up my Peanut Butter Cup Pie Pops, I like to keep track of how long each step takes. This way, I can plan my baking adventure without feeling rushed. Here’s a quick breakdown of the time you’ll need:
- Prep Time: Approximately 30 minutes. This includes gathering your ingredients, making the pie crust, and preparing the peanut butter filling. It’s a great time to enjoy some music or a podcast while you work!
- Cooking Time: About 15-20 minutes. This is the time it takes for your pie pops to bake to golden perfection. The aroma wafting through your kitchen will be worth every second!
- Total Time: Roughly 50-60 minutes. From start to finish, you can have these delightful treats ready to enjoy in just under an hour. Perfect for a quick dessert fix!
With this time breakdown, you can easily fit these Peanut Butter Cup Pie Pops into your day. Whether you’re making them for a special occasion or just because, you’ll find that the time spent is well worth the delicious reward at the end. Happy baking!
Nutritional Information for Peanut Butter Cup Pie Pops
As a passionate home cook, I always find it helpful to know the nutritional content of the treats I create. While Peanut Butter Cup Pie Pops are undeniably a sweet indulgence, they can also be enjoyed in moderation as part of a balanced diet. Here’s a general breakdown of the nutritional information for one pie pop, based on the ingredients listed:
- Calories: Approximately 200 calories
- Protein: 4 grams
- Fat: 10 grams (with about 4 grams being saturated fat)
- Carbohydrates: 25 grams
- Fiber: 1 gram
- Sugar: 8 grams
Keep in mind that these values can vary based on the specific brands of ingredients you use and any optional add-ons you choose to include. For instance, using natural peanut butter can slightly alter the fat content, while adding chocolate chips will increase the sugar and calorie count.
While these pie pops are a delightful treat, I always encourage enjoying them as part of a varied diet. Pairing them with fresh fruit or a scoop of yogurt can create a more balanced snack. Remember, it’s all about savoring the experience and sharing the joy of baking with loved ones!
Frequently Asked Questions about Peanut Butter Cup Pie Pops
As I’ve shared my love for Peanut Butter Cup Pie Pops, I’ve often received questions from fellow home cooks eager to try their hand at this delightful treat. I love answering these queries because it shows just how much excitement there is around baking! Here are some of the most frequently asked questions, along with my personal insights:
Can I make the pie pops ahead of time?
Absolutely! You can prepare the pie pops ahead of time and store them in the refrigerator for up to a day before baking. Just make sure to cover them well with plastic wrap to keep them fresh. If you want to make them even earlier, you can freeze the assembled pops. Just pop them in the oven straight from the freezer, adding a few extra minutes to the baking time.
What can I use instead of peanut butter?
If you or someone you’re serving has a peanut allergy, you can easily substitute peanut butter with almond butter, sunflower seed butter, or cashew butter. Each alternative brings its own unique flavor, so feel free to experiment and find your favorite!
How do I store leftover pie pops?
Leftover pie pops can be stored in an airtight container at room temperature for up to two days. If you want to keep them longer, you can freeze them. Just wrap each pie pop individually in plastic wrap and place them in a freezer-safe bag. They’ll stay fresh for up to three months!
Can I use store-bought pie crust?
Of course! If you’re short on time or just want to simplify the process, using a store-bought pie crust is a great option. Just roll it out according to the package instructions, and you’ll be ready to fill and bake your pie pops in no time!
What’s the best way to serve these pie pops?
Serving Peanut Butter Cup Pie Pops can be as fun as making them! I love to arrange them on a colorful platter with fresh fruit or serve them with a side of melted chocolate for dipping. They also make adorable party favors when wrapped in cellophane. The possibilities are endless!
These questions reflect the curiosity and creativity that come with baking. I hope my answers inspire you to dive into the world of Peanut Butter Cup Pie Pops and enjoy every moment of the process. Happy baking, and may your kitchen be filled with sweet aromas and laughter!
Conclusion on Peanut Butter Cup Pie Pops
As I wrap up this delightful journey into the world of Peanut Butter Cup Pie Pops, I can’t help but reflect on the joy they bring. These sweet treats are more than just a dessert; they’re a celebration of flavors, creativity, and shared moments in the kitchen. The combination of a flaky crust and creamy peanut butter filling, all in a fun, portable form, makes them a hit for any occasion.
What I love most about these pie pops is their versatility. Whether you’re hosting a party, looking for a fun activity with kids, or simply craving a sweet snack, they fit the bill perfectly. Plus, with endless variations and serving suggestions, you can customize them to suit any taste or theme.
So, gather your ingredients, invite a friend or family member to join you, and embark on this sweet adventure. I promise that the smiles and laughter shared while making and enjoying these Peanut Butter Cup Pie Pops will be the sweetest part of all. Happy baking!


