Introduction to Crispy Chicken Caesar Wraps
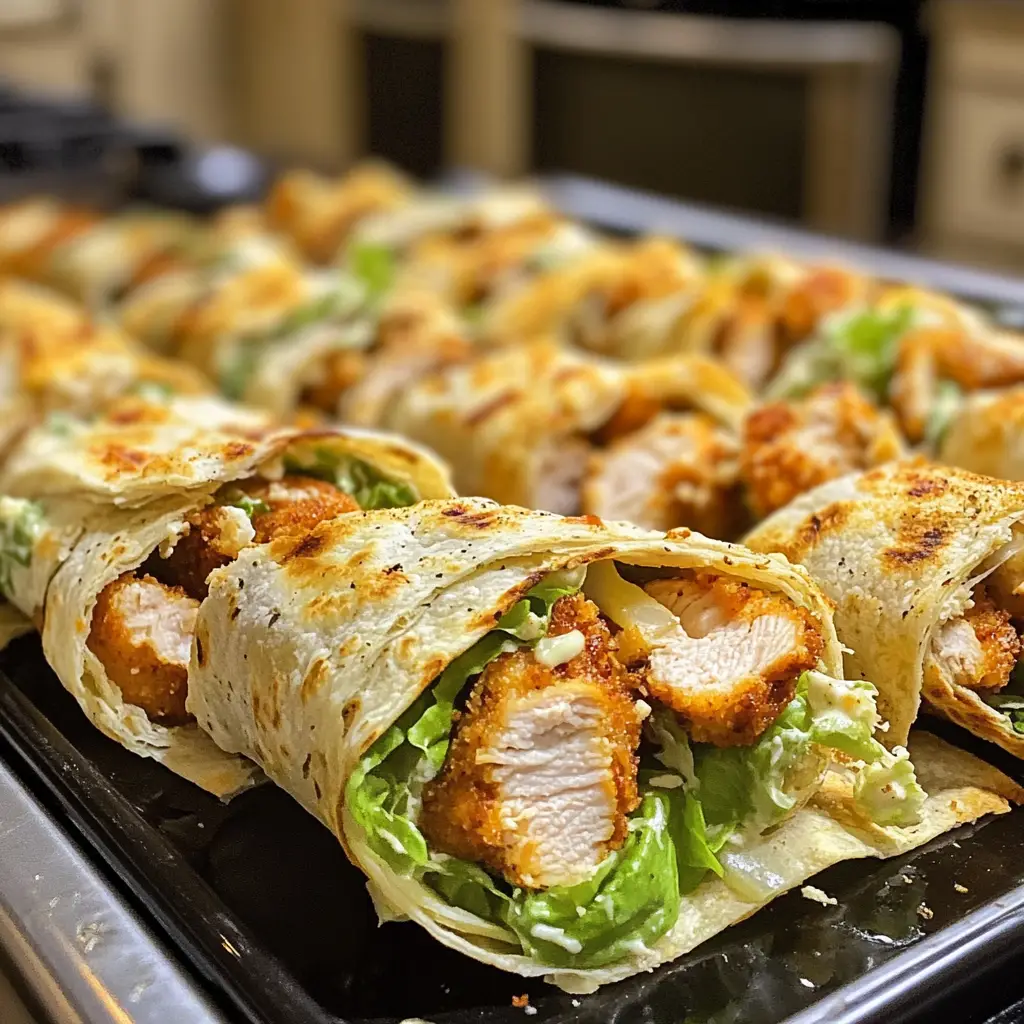
As a passionate home cook, I find joy in creating meals that not only satisfy my taste buds but also bring a smile to my family’s faces. One of my all-time favorite dishes is the Crispy Chicken Caesar Wrap. It’s a delightful blend of flavors and textures that never fails to impress. Picture this: tender, juicy chicken, perfectly seasoned and crisped to golden perfection, all wrapped up in a soft tortilla with fresh romaine lettuce and a creamy Caesar dressing. It’s like a party in your mouth!
What I love most about these wraps is their versatility. They’re perfect for a quick lunch, a picnic in the park, or even a casual dinner. I remember the first time I made them for my friends. We were having a movie night, and I wanted to whip up something easy yet delicious. As soon as I served these wraps, they were gone in minutes! The combination of crispy chicken and zesty dressing had everyone raving.
Not only are Crispy Chicken Caesar Wraps a hit at gatherings, but they also allow me to get creative in the kitchen. I often experiment with different add-ons, like avocado or sun-dried tomatoes, to give them a unique twist. Plus, they’re a fantastic way to sneak in some greens, making them a bit healthier without sacrificing flavor.
So, if you’re looking for a recipe that’s simple, scrumptious, and sure to please, you’ve come to the right place. Let’s dive into the world of Crispy Chicken Caesar Wraps and discover how to make this delightful dish together!
Ingredients for Crispy Chicken Caesar Wraps
Before we embark on our culinary adventure, let’s gather all the ingredients we need to create these mouthwatering Crispy Chicken Caesar Wraps. I always believe that the quality of ingredients can make or break a dish, so I recommend sourcing fresh, high-quality items whenever possible. Here’s what you’ll need:
Main Ingredients
- 2 large chicken breasts (about 1 pound), boneless and skinless
- 1 cup buttermilk (for marinating)
- 1 cup all-purpose flour
- 1 teaspoon garlic powder
- 1 teaspoon onion powder
- 1 teaspoon paprika
- Salt and pepper, to taste
- 2 tablespoons olive oil (for cooking)
- 4 large flour tortillas (or whole wheat, if you prefer)
- 2 cups romaine lettuce, chopped
- ½ cup grated Parmesan cheese
- ½ cup Caesar dressing (store-bought or homemade)
Optional Add-ons
Now, let’s talk about some fun optional add-ons that can elevate your wraps to the next level. I love to mix things up, and these ingredients can add a delightful twist:
- 1 ripe avocado, sliced
- ½ cup sun-dried tomatoes, chopped
- ¼ cup crispy bacon bits
- Fresh herbs like basil or parsley for garnish
- Hot sauce for a spicy kick
Feel free to get creative! Sometimes, I toss in whatever I have on hand, and it always turns out delicious. The beauty of these wraps is that they can be customized to suit your taste. So, gather your ingredients, and let’s get ready to make some magic in the kitchen!
How to Prepare Crispy Chicken Caesar Wraps
Now that we have all our ingredients ready, it’s time to roll up our sleeves and dive into the cooking process! Making Crispy Chicken Caesar Wraps is a fun and rewarding experience. I promise, once you get the hang of it, you’ll be whipping these up in no time. Let’s get started!
Step 1: Prepare the Chicken
The first step is to marinate the chicken. This is where the magic begins! Marinating not only adds flavor but also helps keep the chicken juicy.
Tips for Marinating Chicken
- In a bowl, combine the buttermilk, garlic powder, onion powder, paprika, salt, and pepper. This mixture is like a flavor bath for the chicken!
- Add the chicken breasts to the bowl, ensuring they are fully submerged. Cover and refrigerate for at least 30 minutes, or up to overnight for maximum flavor.
- Don’t skip this step! The longer you marinate, the more tender and flavorful your chicken will be.
Step 2: Cook the Chicken
Once the chicken has marinated, it’s time to cook it to crispy perfection. This step is crucial for achieving that delightful crunch!
Tips for Achieving Crispiness
- Remove the chicken from the marinade and let any excess drip off. Then, dredge each piece in flour, coating it evenly. This flour layer is what gives the chicken its crispy exterior.
- In a large skillet, heat the olive oil over medium-high heat. You want the oil hot enough that it sizzles when the chicken hits the pan.
- Cook the chicken for about 5-7 minutes on each side, or until golden brown and cooked through. Use a meat thermometer to ensure the internal temperature reaches 165°F.
- Once cooked, let the chicken rest for a few minutes before slicing. This helps keep the juices locked in!
Step 3: Prepare the Caesar Dressing
While the chicken is cooking, let’s whip up the Caesar dressing. If you’re using store-bought, feel free to skip this step, but I highly recommend making your own for that fresh taste!
Tips for a Creamy Dressing
- In a bowl, combine the Caesar dressing ingredients: mayonnaise, lemon juice, Worcestershire sauce, minced garlic, and grated Parmesan cheese. Whisk until smooth and creamy.
- Adjust the seasoning with salt and pepper to taste. If you like a tangier dressing, add a bit more lemon juice.
- For an extra kick, consider adding a dash of hot sauce or a sprinkle of anchovy paste!
Step 4: Assemble the Wraps
Now comes the fun part—assembling our wraps! This is where you can get creative and make them your own.
Tips for Wrapping
- Start by laying a tortilla flat on a clean surface. Spread a generous amount of Caesar dressing in the center.
- Add a handful of chopped romaine lettuce, followed by sliced chicken and a sprinkle of Parmesan cheese.
- If you’re using any optional add-ons, now’s the time to toss them in!
- To wrap, fold in the sides of the tortilla and then roll it up tightly from the bottom. This helps keep all the delicious fillings inside.
- For a neat finish, you can slice the wrap in half diagonally. It makes for a beautiful presentation!
And there you have it! Your Crispy Chicken Caesar Wraps are ready to be devoured. I can already smell the deliciousness wafting through the kitchen!
Equipment Needed for Crispy Chicken Caesar Wraps
Before we dive into the cooking process, let’s make sure we have all the right tools at our fingertips. Having the right equipment can make a world of difference in the kitchen. Here’s what you’ll need to whip up those delightful Crispy Chicken Caesar Wraps:
- Large Mixing Bowl: This is essential for marinating the chicken and mixing the dressing. If you don’t have a large bowl, a smaller one will work in batches.
- Skillet or Frying Pan: A non-stick skillet is perfect for cooking the chicken. If you don’t have one, any heavy-bottomed pan will do. Just make sure to adjust the heat to prevent sticking.
- Meat Thermometer: This handy tool ensures your chicken is cooked to perfection. If you don’t have one, you can cut into the chicken to check that it’s no longer pink inside.
- Whisk: A whisk is great for mixing the Caesar dressing. If you don’t have one, a fork can do the trick!
- Cutting Board and Knife: You’ll need these for slicing the cooked chicken and assembling your wraps. A sharp knife makes the job easier and safer.
- Serving Platter: Once your wraps are assembled, a nice platter will make them look even more inviting when serving.
And there you have it! With these simple tools, you’ll be well on your way to creating Crispy Chicken Caesar Wraps that are not only delicious but also visually appealing. If you find yourself missing any of these items, don’t fret! Many kitchen tools can be substituted, so get creative and make it work!
Variations of Crispy Chicken Caesar Wraps
One of the things I adore about Crispy Chicken Caesar Wraps is their flexibility. You can easily switch things up to keep your taste buds excited! Here are a few variations that I’ve tried and loved:
- Spicy Chicken Caesar Wrap: Add some heat by seasoning the chicken with cayenne pepper or using a spicy Caesar dressing. A sprinkle of crushed red pepper flakes can also do the trick!
- Vegetarian Caesar Wrap: Swap the chicken for crispy chickpeas or grilled vegetables like zucchini and bell peppers. It’s a fantastic way to enjoy the flavors without the meat.
- Buffalo Chicken Caesar Wrap: Toss the cooked chicken in buffalo sauce before assembling the wrap. The tangy heat pairs beautifully with the creamy dressing!
- Greek Caesar Wrap: Incorporate feta cheese, kalamata olives, and a drizzle of olive oil for a Mediterranean twist. You can even use pita bread instead of tortillas!
These variations not only keep the recipe fresh but also allow you to cater to different dietary preferences. I love experimenting with new flavors, and I encourage you to do the same! The possibilities are endless, and each wrap can tell a different delicious story.
Cooking Notes for Crispy Chicken Caesar Wraps
As I’ve journeyed through the delightful world of Crispy Chicken Caesar Wraps, I’ve picked up a few cooking notes that can help elevate your experience. These little tips can make a big difference in the final result!
- Marination Time: If you can, marinate the chicken overnight. This allows the flavors to penetrate deeply, making the chicken even more flavorful and tender.
- Oil Temperature: When cooking the chicken, ensure the oil is hot enough. A good test is to drop a small piece of flour into the oil; if it sizzles, you’re ready to go!
- Resting the Chicken: After cooking, let the chicken rest for a few minutes before slicing. This helps retain the juices, ensuring each bite is moist and delicious.
- Wrap Storage: If you have leftovers, store the components separately. This keeps the wraps from getting soggy. Assemble them fresh when you’re ready to enjoy!
- Experiment with Dressings: While Caesar dressing is classic, don’t hesitate to try other dressings like ranch or a zesty vinaigrette for a different flavor profile.
These cooking notes are like little nuggets of wisdom I’ve gathered over time. They help me create wraps that are not only tasty but also visually appealing. So, keep these tips in mind as you embark on your own culinary adventure with Crispy Chicken Caesar Wraps!
Serving Suggestions for Crispy Chicken Caesar Wraps
Now that we’ve crafted these delicious Crispy Chicken Caesar Wraps, it’s time to think about how to serve them! Presentation can elevate a meal from ordinary to extraordinary, and I love to make my dishes look as good as they taste. Here are some serving suggestions that I’ve found to be delightful:
- Accompany with Fresh Sides: Serve your wraps with a side of crispy sweet potato fries or a light garden salad. The contrast of textures adds a fun element to the meal!
- Garnish with Fresh Herbs: A sprinkle of fresh parsley or basil on top of the wraps not only adds a pop of color but also enhances the flavor. It’s like a little green confetti!
- Offer Dipping Sauces: Set out small bowls of extra Caesar dressing or a tangy ranch dip for a fun twist. Dipping adds an interactive element that everyone enjoys.
- Wrap It Up for Picnics: If you’re heading out for a picnic, wrap the Crispy Chicken Caesar Wraps in parchment paper or foil. It keeps them fresh and makes for easy eating outdoors!
- Pair with a Refreshing Drink: A chilled lemonade or iced tea complements the flavors beautifully. The refreshing drink balances the richness of the wraps perfectly.
These serving suggestions not only enhance the dining experience but also make your meal feel special. I love to get creative with how I present my food, and I encourage you to do the same! Enjoy your Crispy Chicken Caesar Wraps with these delightful accompaniments, and watch as they become a favorite at your table.
Tips for Making the Best Crispy Chicken Caesar Wraps
As I’ve crafted my Crispy Chicken Caesar Wraps over the years, I’ve gathered a treasure trove of tips that can help you achieve wrap perfection. These little nuggets of wisdom can elevate your wraps from good to absolutely fantastic!
- Choose the Right Chicken: Opt for chicken breasts that are plump and fresh. If you can, buy organic or free-range chicken for the best flavor and texture.
- Don’t Rush the Marination: Allow the chicken to marinate for at least 30 minutes, but if you can, aim for a few hours or overnight. This step is crucial for flavor and tenderness.
- Use a Meat Thermometer: To ensure your chicken is perfectly cooked, use a meat thermometer. It takes the guesswork out of cooking and guarantees juicy results.
- Experiment with Tortillas: While flour tortillas are classic, try using spinach or sun-dried tomato tortillas for a colorful twist. It adds visual appeal and a hint of extra flavor!
- Layer Wisely: When assembling, layer your ingredients thoughtfully. Start with dressing, then lettuce, followed by chicken, and finish with cheese. This helps distribute flavors evenly.
- Wrap Tightly: When rolling your wraps, make sure to tuck in the sides as you go. A tight wrap keeps everything together and makes for easier eating.
These tips are like little secrets I’ve learned along the way. They help me create Crispy Chicken Caesar Wraps that are not only delicious but also visually stunning. So, keep these in mind as you embark on your own culinary journey, and watch your wraps become the star of the show!
Breakdown of Time for Crispy Chicken Caesar Wraps
Now that we’ve explored the delicious world of Crispy Chicken Caesar Wraps, let’s take a moment to break down the time it takes to create this delightful dish. Knowing the time commitment can help you plan your cooking adventure better. Here’s how it all adds up:
- Prep Time: 15 minutes. This includes gathering your ingredients, marinating the chicken, and preparing the Caesar dressing. If you’re feeling extra organized, you can even prep some ingredients ahead of time!
- Cooking Time: 20 minutes. This is the time it takes to cook the chicken to crispy perfection and assemble your wraps. It’s a quick process, especially once you get the hang of it!
- Total Time: 35 minutes. In just over half an hour, you can have a delicious meal ready to serve. Perfect for a busy weeknight or a fun weekend gathering!
With this time breakdown, you can easily fit Crispy Chicken Caesar Wraps into your schedule. I love how quick and satisfying they are to make, and I’m sure you will too! So, roll up your sleeves and get ready to enjoy a scrumptious meal in no time!
Nutritional Information for Crispy Chicken Caesar Wraps
As a home cook, I always keep an eye on the nutritional value of the meals I prepare. It’s important to enjoy delicious food while also being mindful of what we’re putting into our bodies. Here’s a general breakdown of the nutritional information for one serving of Crispy Chicken Caesar Wraps, assuming you use the main ingredients listed:
- Calories: Approximately 550 calories
- Protein: 35 grams
- Carbohydrates: 45 grams
- Fat: 25 grams
- Saturated Fat: 5 grams
- Fiber: 3 grams
- Sodium: 800 milligrams
Keep in mind that these values can vary based on the specific ingredients you choose and any optional add-ons you include. For instance, adding avocado or bacon will increase the healthy fats and calories, while using whole wheat tortillas can boost the fiber content. I love to balance indulgence with nutrition, and these wraps allow me to do just that!
So, whether you’re enjoying them for lunch or dinner, you can feel good about savoring these Crispy Chicken Caesar Wraps. They’re not just tasty; they also pack a punch of protein and flavor!
Frequently Asked Questions about Crispy Chicken Caesar Wraps
As I’ve shared my love for Crispy Chicken Caesar Wraps, I often get questions from fellow home cooks eager to try this delightful dish. I love answering these queries because it shows just how much excitement surrounds this recipe! Here are some of the most frequently asked questions, along with my personal insights:
Can I make the wraps ahead of time?
Absolutely! You can prepare the chicken and dressing in advance. Just store them separately in the fridge. When you’re ready to eat, simply assemble the wraps. This makes for a quick meal on busy days!
What can I use instead of buttermilk?
If you don’t have buttermilk on hand, no worries! You can make a quick substitute by mixing one cup of milk with one tablespoon of vinegar or lemon juice. Let it sit for about 5 minutes, and you’ll have a perfect buttermilk replacement!
How do I store leftovers?
To keep your wraps fresh, store the components separately. Place the chicken, dressing, and veggies in airtight containers in the fridge. When you’re ready to enjoy them again, just assemble your wrap fresh to avoid sogginess.
Can I use grilled chicken instead of fried?
Definitely! Grilled chicken adds a lovely smoky flavor and is a healthier option. Just season it well and grill until cooked through. It’s a fantastic way to enjoy the same great taste with a lighter twist!
What other vegetables can I add?
The sky’s the limit! You can add sliced cucumbers, bell peppers, or even shredded carrots for extra crunch. I love to toss in whatever I have in the fridge, and it always turns out delicious!
Is this recipe kid-friendly?
Yes! Kids love the crispy chicken and creamy dressing. You can even let them help assemble their own wraps, making it a fun family activity. Plus, they can customize their wraps with their favorite add-ons!
These questions reflect the curiosity and creativity that come with cooking. I hope my answers inspire you to dive into making your own Crispy Chicken Caesar Wraps. Remember, cooking is all about experimenting and having fun, so don’t hesitate to make this recipe your own!
Conclusion on Crispy Chicken Caesar Wraps
In conclusion, Crispy Chicken Caesar Wraps are more than just a meal; they’re a delightful experience that brings joy to the table. With their perfect balance of crispy chicken, fresh greens, and creamy dressing, these wraps are sure to please everyone, from kids to adults. I love how easy they are to prepare, making them a go-to option for busy weeknights or casual gatherings with friends.
What truly makes these wraps special is their versatility. You can customize them with your favorite ingredients, whether it’s adding a spicy kick or swapping in fresh veggies. Each bite is a burst of flavor, and the satisfaction of creating something delicious from scratch is unmatched. Plus, they’re a fantastic way to sneak in some greens while still indulging in a tasty treat!
So, whether you’re enjoying them for lunch, dinner, or a picnic, I encourage you to give these Crispy Chicken Caesar Wraps a try. They’re not just a recipe; they’re a celebration of flavors that can bring family and friends together. Happy cooking!


