Introduction to Tex-Mex Layered Bean Dip Recipe
As a passionate home cook, I find joy in creating dishes that bring people together. One of my all-time favorites is the Tex-Mex Layered Bean Dip. This delightful dip is not just a recipe; it’s a celebration of flavors and textures that can turn any gathering into a fiesta! I remember the first time I made it for a game night with friends. The moment I set it on the table, the room filled with excitement, and the dip disappeared faster than I could say “nachos!”
What I love most about this layered bean dip is its versatility. You can customize it to suit your taste buds or dietary preferences. Whether you’re a fan of spicy jalapeños or prefer a milder flavor, this recipe has got you covered. Plus, it’s a fantastic way to use up leftover ingredients from your fridge. I often find myself adding a sprinkle of this or a dollop of that, and it always turns out delicious!
In this article, I’ll guide you through the process of making this scrumptious Tex-Mex Layered Bean Dip. From the creamy layers to the crunchy toppings, each bite is a burst of flavor that will leave your guests asking for more. So, grab your apron, and let’s dive into this culinary adventure together!
Ingredients for Tex-Mex Layered Bean Dip Recipe
Before we embark on our culinary journey, let’s gather all the ingredients needed for this mouthwatering Tex-Mex Layered Bean Dip. I always believe that the quality of ingredients can make or break a dish, so I recommend using fresh, high-quality items whenever possible. Here’s what you’ll need:
Main Ingredients
- 1 can (15 oz) refried beans
- 1 cup sour cream
- 1 cup guacamole (store-bought or homemade)
- 1 cup shredded cheddar cheese
- 1 cup diced tomatoes (fresh or canned, drained)
- 1/2 cup sliced black olives
- 1/4 cup chopped green onions
- 1 teaspoon taco seasoning (optional, for added flavor)
When I make this dip, I often opt for organic refried beans. They have a richer flavor and fewer additives. If you’re feeling adventurous, you can even make your own refried beans from scratch! It’s a bit more work, but the taste is unbeatable.
Optional Add-ons
- 1/2 cup diced jalapeños (for a spicy kick)
- 1/2 cup corn (canned or frozen, thawed)
- 1/4 cup fresh cilantro (for garnish)
- 1/2 cup diced bell peppers (for extra crunch)
These optional add-ons can elevate your dip to new heights. I love adding jalapeños for that extra zing, but if you’re serving kids or those who prefer milder flavors, feel free to skip them. The beauty of this recipe is that you can mix and match based on what you have on hand or what you love!
Now that we have our ingredients ready, let’s move on to the fun part—preparing this delicious Tex-Mex Layered Bean Dip!
How to Prepare Tex-Mex Layered Bean Dip Recipe
Now that we have all our ingredients lined up like eager little soldiers, it’s time to get our hands dirty and create this Tex-Mex Layered Bean Dip! I promise, the process is as fun as the final product is delicious. Let’s dive into the steps!
Step 1: Prepare the Base Layer
First things first, we need a solid base. Grab a medium-sized dish—something like a glass pie plate or a shallow baking dish works perfectly. Spread the refried beans evenly across the bottom. I like to use the back of a spoon to smooth it out, creating a nice, even layer. This will be the foundation of our dip!
Tips for Step 1
- For a creamier texture, warm the refried beans slightly in the microwave before spreading. This makes them easier to work with.
- Don’t worry about making it perfect; a rustic look adds charm!
Step 2: Add the Bean Layer
Next up, it’s time to add the sour cream layer. Gently dollop the sour cream on top of the beans. Using a spatula, spread it out evenly, just like frosting a cake. This creamy layer adds a delightful tang that balances the flavors beautifully.
Tips for Step 2
- For a zesty twist, mix in a teaspoon of lime juice or a pinch of garlic powder into the sour cream before spreading.
- Make sure to leave a little space at the edges for the toppings later on!
Step 3: Create the Sour Cream Layer
Now, let’s bring in the star of the show—guacamole! Spoon the guacamole over the sour cream layer. I like to use a generous amount because who doesn’t love guacamole? Spread it out gently, ensuring it covers the entire surface.
Tips for Step 3
- If you’re using store-bought guacamole, check for freshness. Homemade is always a winner if you have the time!
- For an extra kick, mix in some diced tomatoes or a splash of hot sauce into the guacamole.
Step 4: Layer the Guacamole
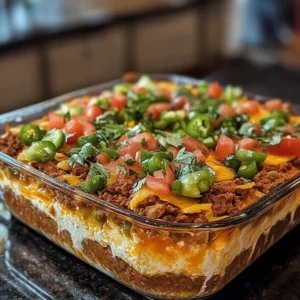
We’re almost there! Now it’s time to sprinkle the shredded cheddar cheese on top of the guacamole. I love a good cheesy layer, so don’t be shy! After that, add the diced tomatoes, black olives, and green onions. This colorful topping not only looks beautiful but also adds a burst of flavor with every bite.
Tips for Step 4
- Feel free to mix and match your toppings! Chopped bell peppers or even a sprinkle of taco seasoning can add a fun twist.
- For a more gourmet touch, try using a blend of cheeses like pepper jack or Monterey Jack.
Step 5: Top with Cheese and Vegetables
Finally, it’s time to let your creativity shine! Add any additional toppings you desire, like jalapeños or corn. Once you’re satisfied with your masterpiece, cover it with plastic wrap and let it chill in the fridge for about 30 minutes. This allows the flavors to meld together beautifully.
Tips for Step 5
- Chilling the dip not only enhances the flavors but also makes it easier to serve.
- Serve with tortilla chips, fresh veggies, or even pita bread for dipping!
And there you have it! Your Tex-Mex Layered Bean Dip is ready to impress. I can already picture the smiles on everyone’s faces as they dig in. Let’s move on to the equipment you’ll need to whip up this delightful dish!
Equipment Needed for Tex-Mex Layered Bean Dip Recipe
Before we dive into the deliciousness of our Tex-Mex Layered Bean Dip, let’s make sure we have the right tools at our disposal. Having the right equipment can make the cooking process smoother and more enjoyable. Here’s what you’ll need:
- Medium-sized dish: A glass pie plate or shallow baking dish works wonders for showcasing those beautiful layers.
- Mixing bowls: You’ll need a couple of bowls for mixing ingredients like guacamole and sour cream.
- Spatula: A spatula is essential for spreading the layers evenly. It’s like your trusty sidekick in the kitchen!
- Spoon: A regular spoon will help you scoop and dollop ingredients with ease.
- Plastic wrap: This is perfect for covering your dip while it chills in the fridge, keeping it fresh and flavorful.
If you don’t have a glass dish, don’t fret! Any shallow dish will do. The key is to have enough space to create those lovely layers. I’ve even used a large, flat plate in a pinch, and it turned out just fine. Now that we’re all set with our equipment, let’s get ready to create some magic in the kitchen!
Variations of Tex-Mex Layered Bean Dip Recipe
One of the things I adore about the Tex-Mex Layered Bean Dip is its flexibility. You can easily switch things up to suit your mood or the occasion. Here are a few variations that I’ve tried and loved:
- Meat Lover’s Delight: Add a layer of seasoned ground beef or shredded chicken between the beans and sour cream. It adds a hearty touch that meat lovers will appreciate!
- Vegetarian Fiesta: Swap the refried beans for black beans or pinto beans for a different flavor profile. You can also add diced bell peppers and corn for extra crunch.
- Spicy Kick: If you’re a fan of heat, mix diced jalapeños into the guacamole or sprinkle some crushed red pepper flakes on top. It’s a surefire way to wake up your taste buds!
- Southwestern Twist: Incorporate roasted corn and diced avocado into the layers. This adds a smoky flavor that pairs beautifully with the other ingredients.
- Cheesy Overload: Experiment with different cheese blends, like pepper jack or queso fresco, for a unique twist. The more cheese, the merrier, right?
These variations not only keep things exciting but also allow you to cater to different dietary preferences. I love how each version brings its own flair to the table, making every gathering a little more special. So, don’t hesitate to get creative and make this dip your own!
Cooking Notes for Tex-Mex Layered Bean Dip Recipe
As I’ve learned through my culinary adventures, a few cooking notes can make all the difference in achieving the perfect Tex-Mex Layered Bean Dip. Here are some tips that I always keep in mind when preparing this delightful dish:
- Layering Technique: The order of layers matters! Start with the beans, then the sour cream, followed by guacamole, and finish with cheese and toppings. This ensures that each bite is a harmonious blend of flavors.
- Chill Time: Don’t skip the chilling step! Allowing the dip to sit in the fridge for at least 30 minutes helps the flavors meld together beautifully. It’s like letting a fine wine breathe!
- Make Ahead: This dip is perfect for prepping in advance. You can assemble it a day ahead and store it in the fridge. Just add fresh toppings right before serving to keep everything looking vibrant.
- Fresh Ingredients: Whenever possible, opt for fresh ingredients. Fresh tomatoes, homemade guacamole, and organic beans can elevate the taste and make your dip truly shine.
- Serving Size: This dip is a crowd-pleaser, but be mindful of portion sizes. It’s easy to get carried away with those tortilla chips! I often set out small bowls for dipping to help control portions.
By keeping these cooking notes in mind, you’ll be well on your way to creating a Tex-Mex Layered Bean Dip that not only looks stunning but tastes incredible too. Trust me, your friends and family will be raving about it long after the last bite!
Serving Suggestions for Tex-Mex Layered Bean Dip Recipe
Now that our Tex-Mex Layered Bean Dip is ready to shine, let’s talk about how to serve it up! Presentation is key, and I love to make my dips look as inviting as they taste. Here are some of my favorite serving suggestions that will have everyone diving in:
- Tortilla Chips: The classic choice! Serve with a big bowl of crispy tortilla chips for that perfect crunch. I often choose a mix of regular and flavored chips for variety.
- Fresh Veggies: For a healthier option, cut up some colorful veggies like bell peppers, cucumbers, and carrots. They add a refreshing crunch and are perfect for dipping.
- Pita Bread: Warm, soft pita bread is another fantastic option. Cut it into triangles for easy dipping. It adds a unique twist to the traditional Tex-Mex experience!
- Mini Tacos: For a fun twist, serve the dip alongside mini taco shells. Guests can scoop the dip into the shells for a delightful bite-sized treat.
- Garnish with Fresh Herbs: A sprinkle of fresh cilantro or parsley on top not only adds a pop of color but also enhances the flavor. It’s like the cherry on top of your dip!
When I serve this dip, I like to arrange everything on a large platter, creating a colorful spread that invites everyone to dig in. The joy of sharing this Tex-Mex Layered Bean Dip with friends and family is what makes it truly special. So, gather your loved ones, set the table, and get ready for a flavor-packed fiesta!
Tips for Making Tex-Mex Layered Bean Dip Recipe
As I’ve whipped up my fair share of Tex-Mex Layered Bean Dips, I’ve gathered a treasure trove of tips that can elevate your dip from good to absolutely unforgettable. Here are some of my favorite nuggets of wisdom to keep in mind:
- Balance the Flavors: Aim for a balance of creamy, crunchy, and zesty elements. Each layer should complement the others, creating a symphony of flavors in every bite.
- Customize to Your Taste: Don’t hesitate to adjust the ingredients based on your preferences. If you love spicy, add more jalapeños. If you’re a cheese lover, go wild with the cheese layer!
- Use Fresh Ingredients: Fresh ingredients make a world of difference. Opt for ripe avocados for your guacamole and juicy tomatoes for that burst of flavor.
- Layer with Love: Take your time when layering. A little care in spreading each layer evenly will not only make your dip look stunning but also ensure a delightful experience with every scoop.
- Experiment with Textures: Mix in some crunchy toppings like crushed tortilla chips or toasted nuts for an unexpected twist. It adds a delightful crunch that contrasts beautifully with the creamy layers.
With these tips in your back pocket, you’re all set to create a Tex-Mex Layered Bean Dip that will have everyone coming back for seconds. Remember, cooking is all about having fun and expressing yourself, so let your creativity shine through!
Breakdown of Time for Tex-Mex Layered Bean Dip Recipe
Now that we’ve covered the ingredients, preparation, and all the delicious details, let’s talk about the time it takes to whip up this Tex-Mex Layered Bean Dip. I always find it helpful to know how long each step will take, especially when planning for a gathering. Here’s a quick breakdown:
- Prep Time: 20 minutes
- Chill Time: 30 minutes
- Total Time: 50 minutes
During the prep time, you’ll be busy gathering your ingredients, layering them with love, and getting everything ready for the fridge. The chill time is essential, as it allows the flavors to meld together beautifully. Trust me, the wait is worth it! In just under an hour, you’ll have a stunning Tex-Mex Layered Bean Dip that’s ready to impress your guests. So, let’s get cooking and make some magic happen in the kitchen!
Nutritional Information for Tex-Mex Layered Bean Dip Recipe
As a home cook, I always keep an eye on the nutritional value of the dishes I prepare. This Tex-Mex Layered Bean Dip is not only delicious but can also be a nutritious addition to your table. Here’s a quick overview of the nutritional information per serving, assuming the dip is divided into 8 servings:
- Calories: Approximately 180
- Protein: 6g
- Fat: 12g
- Carbohydrates: 15g
- Fiber: 4g
- Sugar: 2g
- Sodium: 300mg
These values can vary based on the specific brands and ingredients you choose. For instance, using low-fat sour cream or cheese can help reduce the calorie and fat content. I often opt for organic beans and fresh veggies, which not only enhance the flavor but also pack in more nutrients. Remember, moderation is key, especially when serving with chips or other dippables. Enjoying this dip as part of a balanced meal can make it a delightful treat without the guilt!
Frequently Asked Questions about Tex-Mex Layered Bean Dip Recipe
As I’ve shared my beloved Tex-Mex Layered Bean Dip with friends and family, I’ve encountered a few common questions that pop up time and again. I love addressing these queries because it helps everyone feel more confident in their cooking adventures. Here are some of the most frequently asked questions about this delicious dip:
Can I make this dip ahead of time?
Absolutely! In fact, I often prepare it a day in advance. Just assemble the layers, cover it with plastic wrap, and store it in the fridge. This allows the flavors to meld beautifully. Just remember to add any fresh toppings right before serving to keep everything looking vibrant!
What can I use instead of refried beans?
If you’re looking for alternatives, you can use black beans or pinto beans. Just mash them up a bit for a similar texture. I’ve even used hummus in a pinch, and it adds a unique twist that’s surprisingly delicious!
How can I make this dip spicier?
If you’re a fan of heat, there are plenty of ways to spice things up! You can mix diced jalapeños into the guacamole or sprinkle some crushed red pepper flakes on top. Adding a dash of hot sauce to the sour cream layer is another great option!
Can I freeze the Tex-Mex Layered Bean Dip?
While I wouldn’t recommend freezing the entire dip, you can freeze individual layers. For example, you can freeze the refried beans or guacamole separately. Just keep in mind that the texture may change once thawed, especially for the sour cream and guacamole layers.
What should I serve with the dip?
The classic choice is tortilla chips, but I love to mix it up! Fresh veggies like bell peppers, cucumbers, and carrots are great for a healthier option. You can also serve it with pita bread or even mini taco shells for a fun twist!
These FAQs should help clear up any uncertainties you might have about making this Tex-Mex Layered Bean Dip. Remember, cooking is all about experimenting and having fun, so don’t hesitate to make this recipe your own! Now, let’s wrap things up with a final note on this delightful dish.
Conclusion on Tex-Mex Layered Bean Dip Recipe
As I reflect on my culinary journey with the Tex-Mex Layered Bean Dip, I can’t help but smile at the joy it brings to gatherings. This dip is more than just a tasty treat; it’s a canvas for creativity and a way to connect with loved ones. Each layer tells a story, from the creamy refried beans to the vibrant toppings that burst with flavor.
What I love most is its versatility. Whether you’re hosting a game night, a casual get-together, or simply craving a snack, this dip fits the bill perfectly. You can customize it to suit any palate, making it a crowd-pleaser for everyone. Plus, it’s a fantastic way to use up ingredients you have on hand, turning leftovers into something extraordinary.
So, the next time you’re looking to impress your friends or family, remember this Tex-Mex Layered Bean Dip recipe. It’s easy to make, packed with flavor, and guaranteed to be a hit. Grab your ingredients, gather your loved ones, and let the fiesta begin! Happy cooking!